ANATOMY OF AN OBERIH

How to translate the word oberih.  The internet tells me amulet, talisman, charm, guardian.  I like the word amulet.

Embroidered amulets (pleural oberehy) have gained a lot of attention in Ukraine in the last three-and-a-half years and for obvious reasons.  They are believed to offer protection and can be present in the main design on an embroidered shirt, or sewn as a separate symbol nearby a seam or on a collar.  They can be embroidered as a whole motif onto a cloth worn somewhere on one’s person, like a mini-scarf in a pocket.  I’ve also been told that the boys, the defenders, are asking that they be backed with Velcro, which would make them like a chevron, worn as a patch on the uniform/camouflage.  For me, this concept epitomizes one of the ways in which the traditional is being brought into the hyper-contemporary in this current moment (all three-and-a-half years of it) in Ukrainian history and society.

I’ve referenced it in a previous post, but if you didn’t pick it up, visit #сорочкадлязахисника (shirt for a defender) in Facebook or on Instagram.  This is a grassroots project in which women around Ukraine and abroad are embroidering bespoke shirts for defenders, using khaki fabric to go with military kit and designs imbued with the powers of protection, adding embroidered patches of brigades or the Ukrainian flag onto sleeves.  It’s a wonder of a movement, breath-taking to behold, even from this distance.  To me, it symbolizes Ukrainians’ connection to heritage, this utter conviction that embroidery is OUR CODE, the significance of the embroidered Ukrainian shirt and the way in which people throughout Ukrainian society understand that they all have something to contribute.  Behold and be inspired.

I certainly have been. I saw a call to embroider oberehy for our defenders on the front lines and from the resources being shared, I took this design, which hails from the Hadiats’k region of the Poltava Oblast’, north eastern Ukraine.

There are several motifs that are believed to offer protection.  In this design, you see three of them.  I’m translating a bit literally when I call them the direct cross (horizontal and vertical components) – прямий хрест – and the diagonal cross – косий хрест.  The eight-point star is also a protective motif.  Whilst embroidery varies incredibly vastly throughout different regions, direct and diagonal crosses and eight-point stars are ubiquitous.

You may or may not have seen Ukrainian embroidery in black and red.  Did you know that before the development in Europe of alanine dyes, which were used to produce black threads, these designs were in fact blue and red?  The blue was indigo blue and came to Ukraine from India!

And in the same way that motifs carry meaning in Ukrainian embroidery, so do colours.  In Ukrainian worn embroidery (тілесна вишивка), red is literally used as protection against foreign influences onto the body of a person and against curses and witchcraft.  Blue and red in combination are harmonizing.

These oberehy were the mini-scarf (хусточка) in a pocket kind.  Let me show you their key characteristics as amulets.

And what is with the edges?

Embroidered amulets are deliberately left with an unhemmed, raw fringed edge.  This allows all the power of these small pieces to flow from them and into the bodies of those who carry them, who wear them on their person.

Of course, I took the opportunity of making these to have myself some colour play.  And not only with the shades of blue and red, but I also named them in ways that I hoped would bring some smiles and warmth to Ukrainians, after quintessential symbols from Ukrainian life or culture.

On a more serious note: I finished these oberehy over a year ago and sent them to Ukraine, to someone who could send them on to the frontline.  May they be continuing to do their work, protecting the defenders who received them.  

~oOo~

Fundraising with Embroidery ~ Пожертвувати вишивкою

Please scroll down for English.

Привіт друзі!

Слава Україні!

Пишу ‘звіт’ – як відбулися перші майстеркласи української вишивки в Мельборні, колаборація цієї ентузіастки і дорогої Наталі від Create for Ukraine Project createforukraine.wordpress.com.

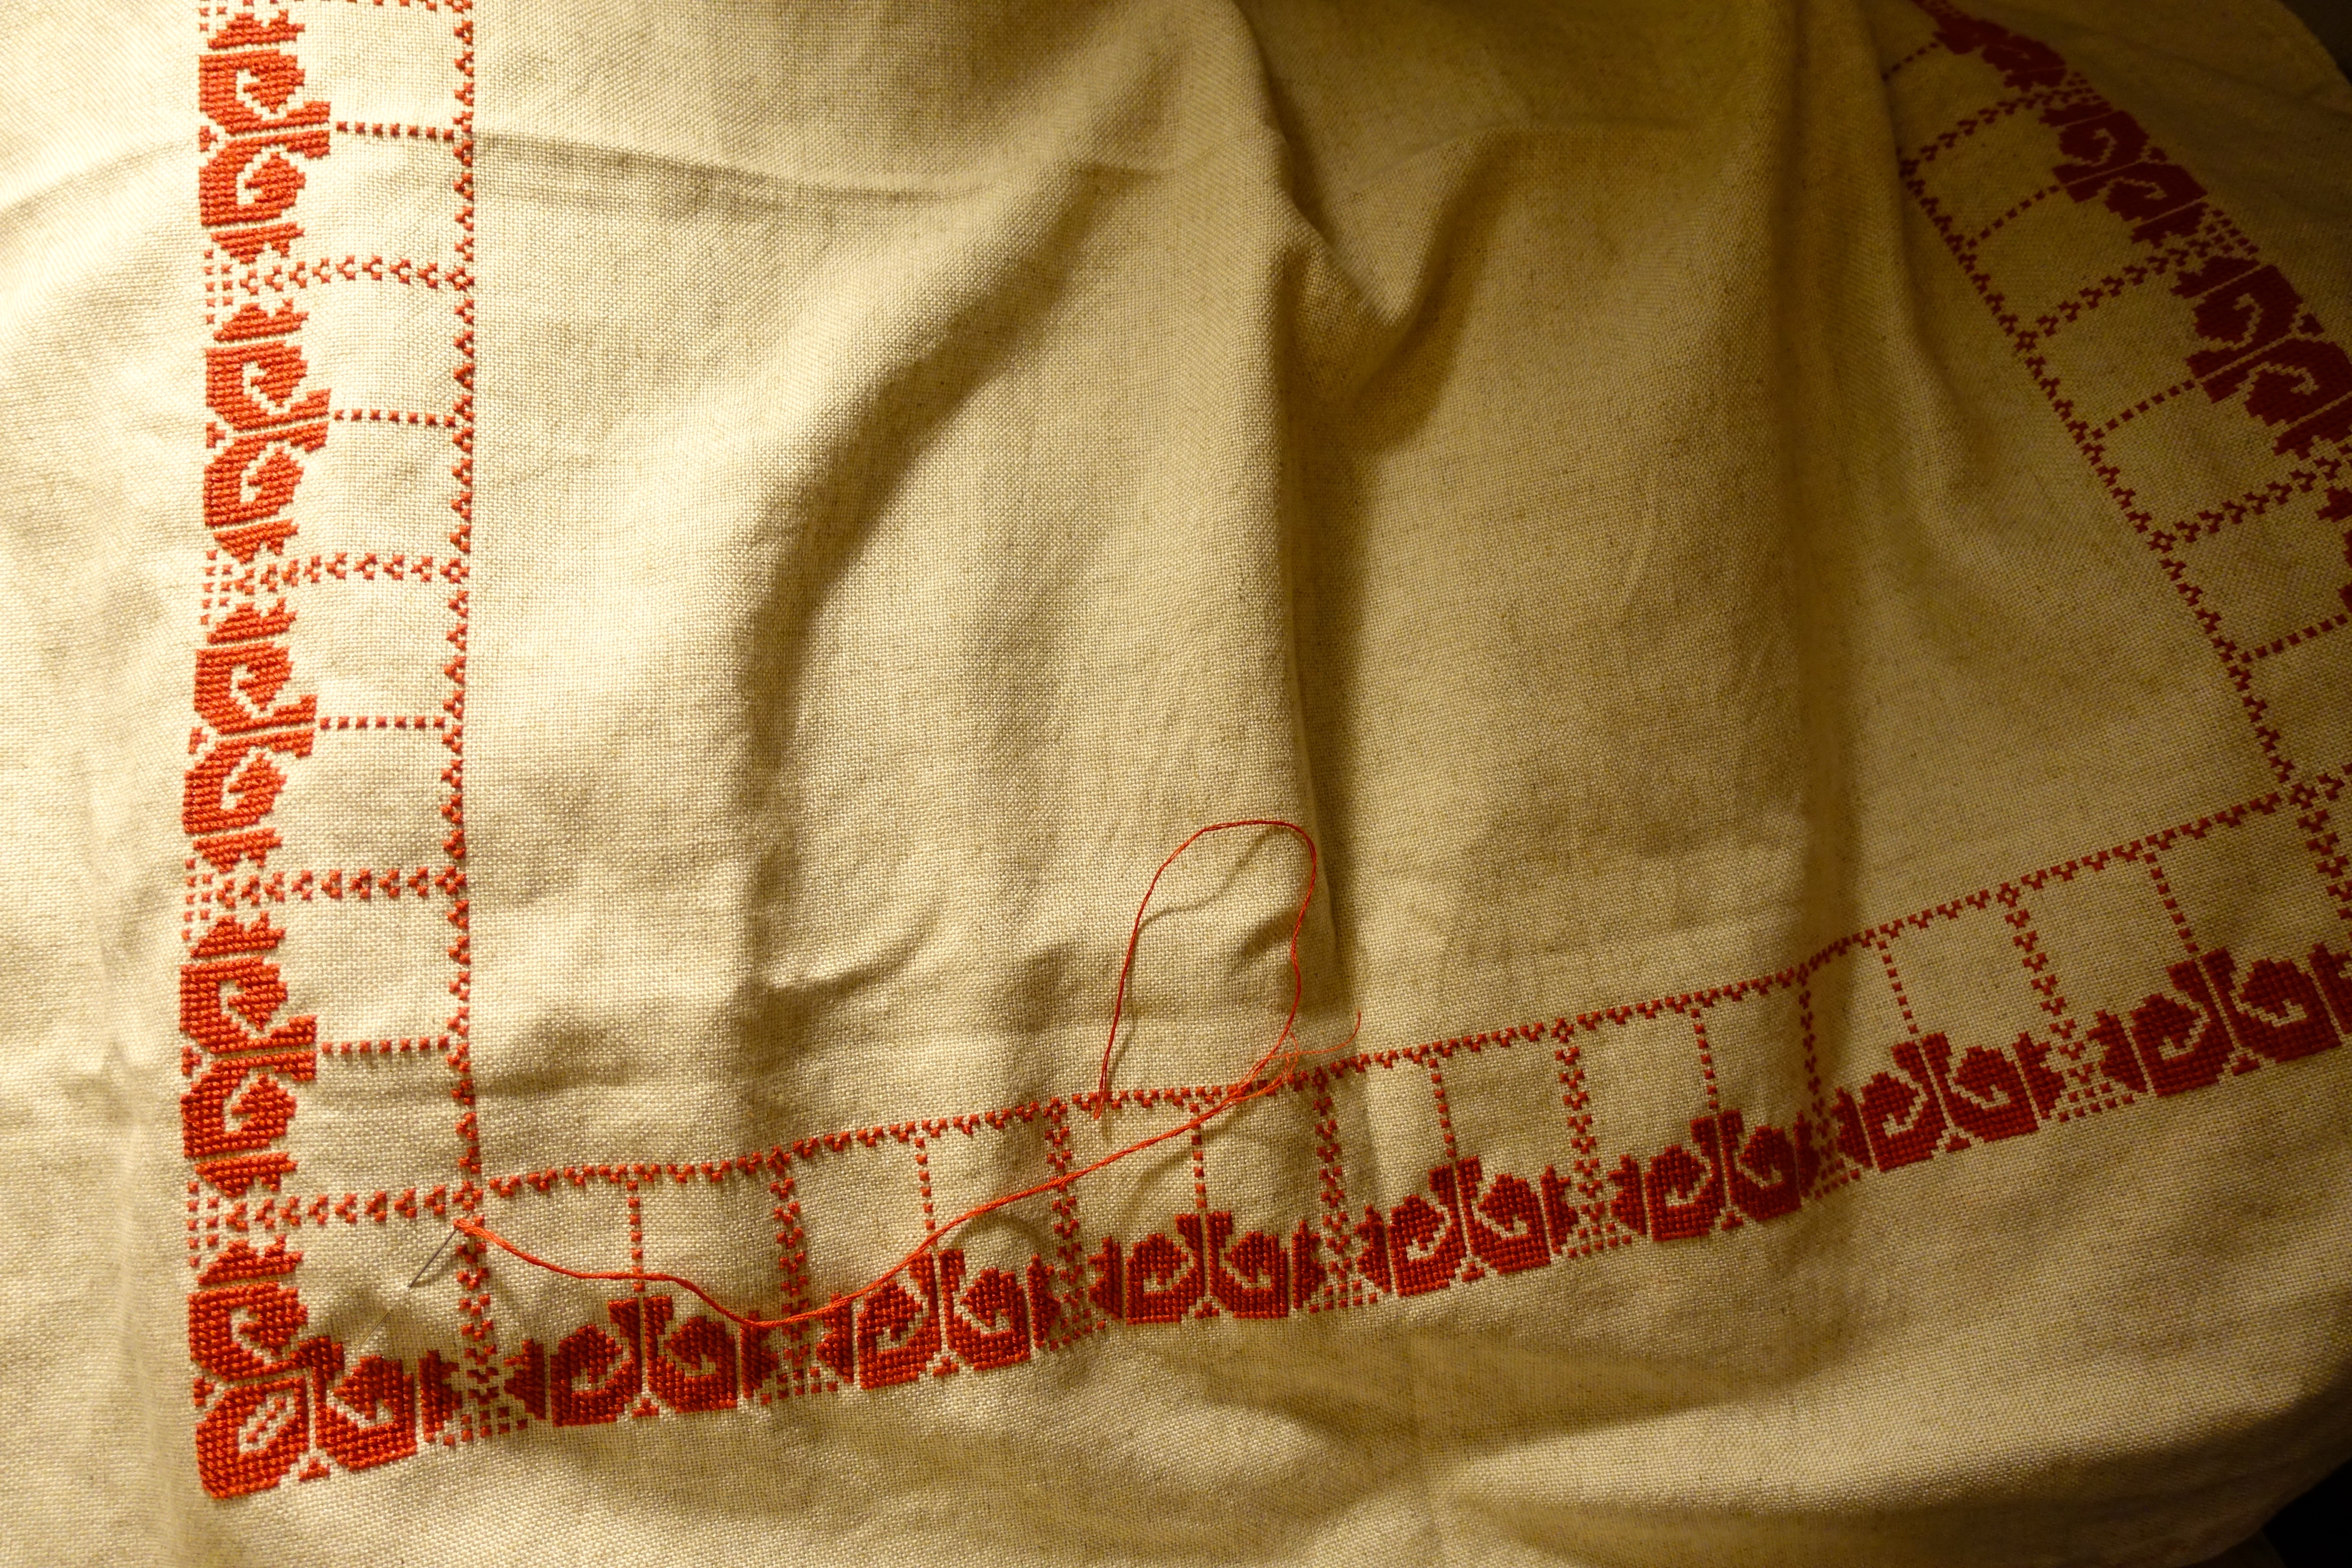
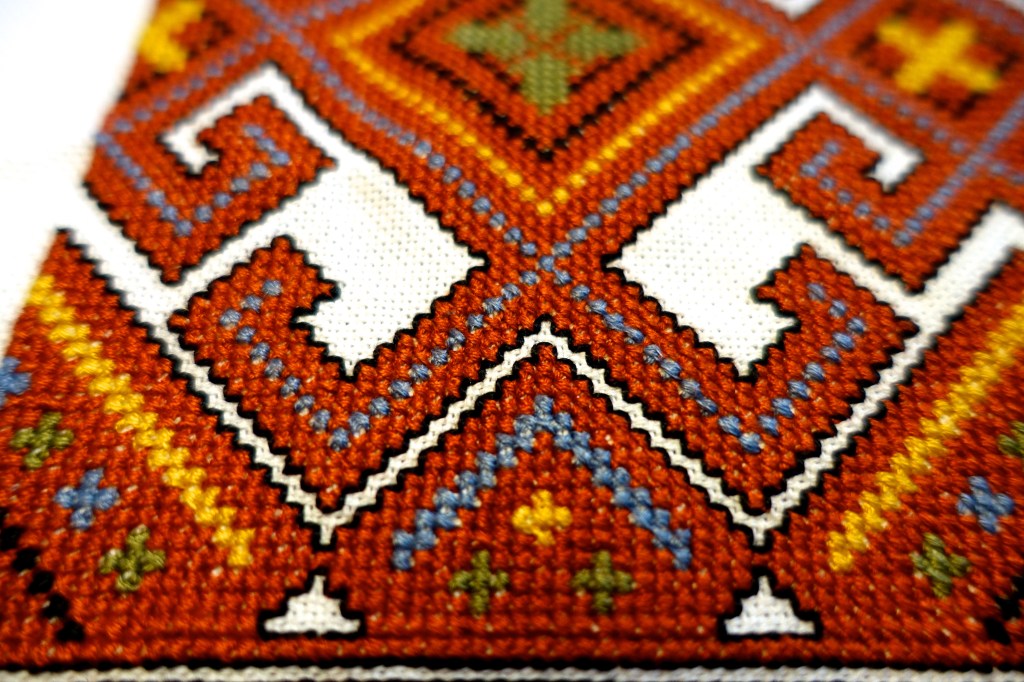
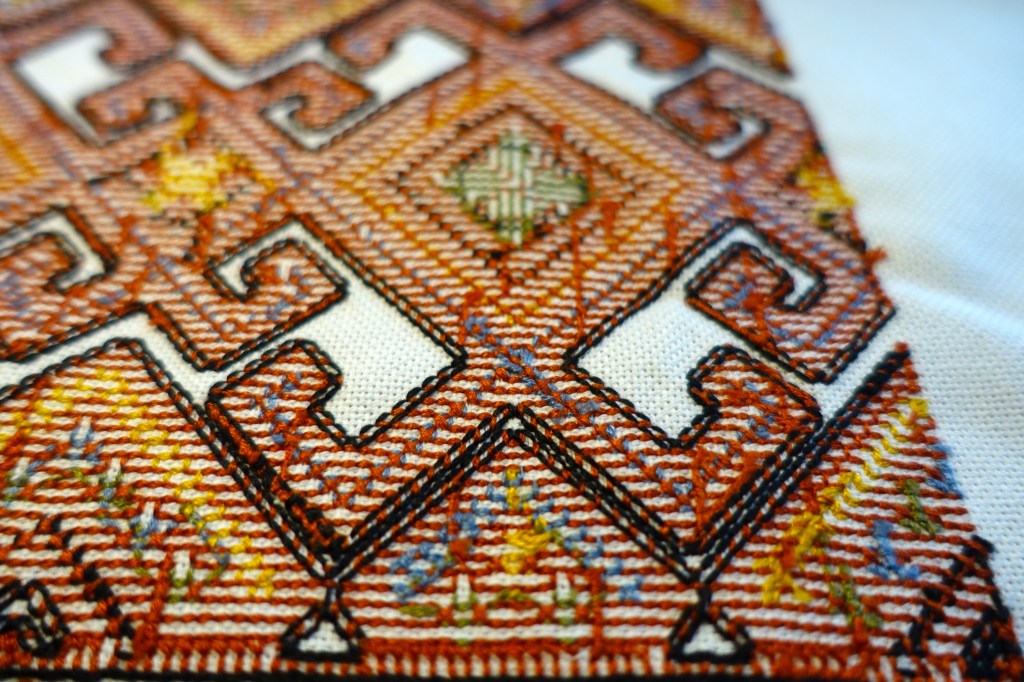
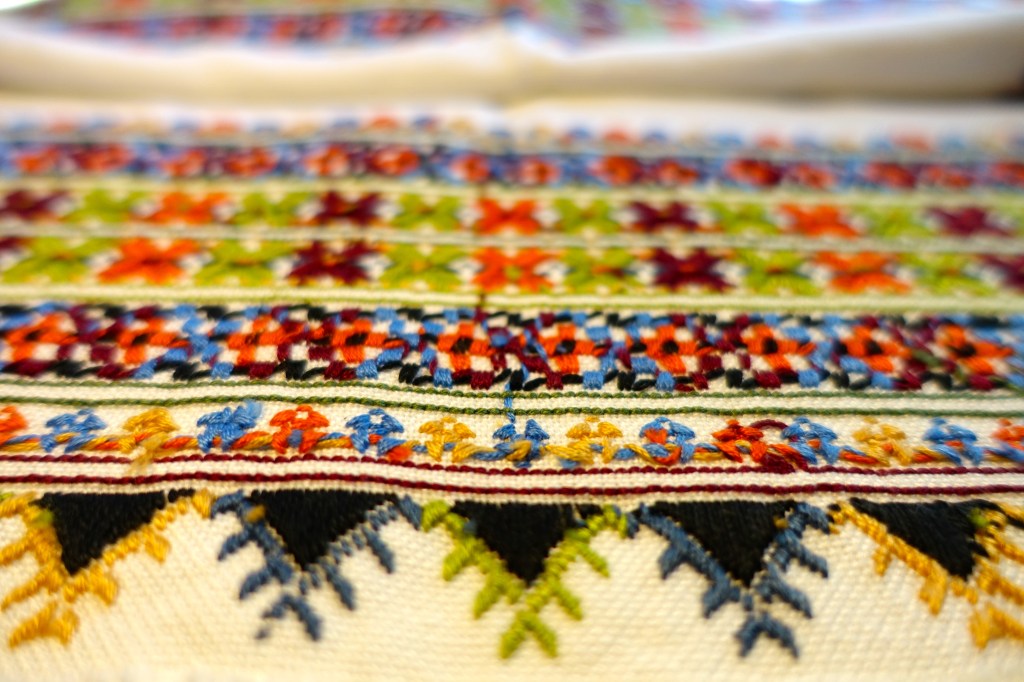
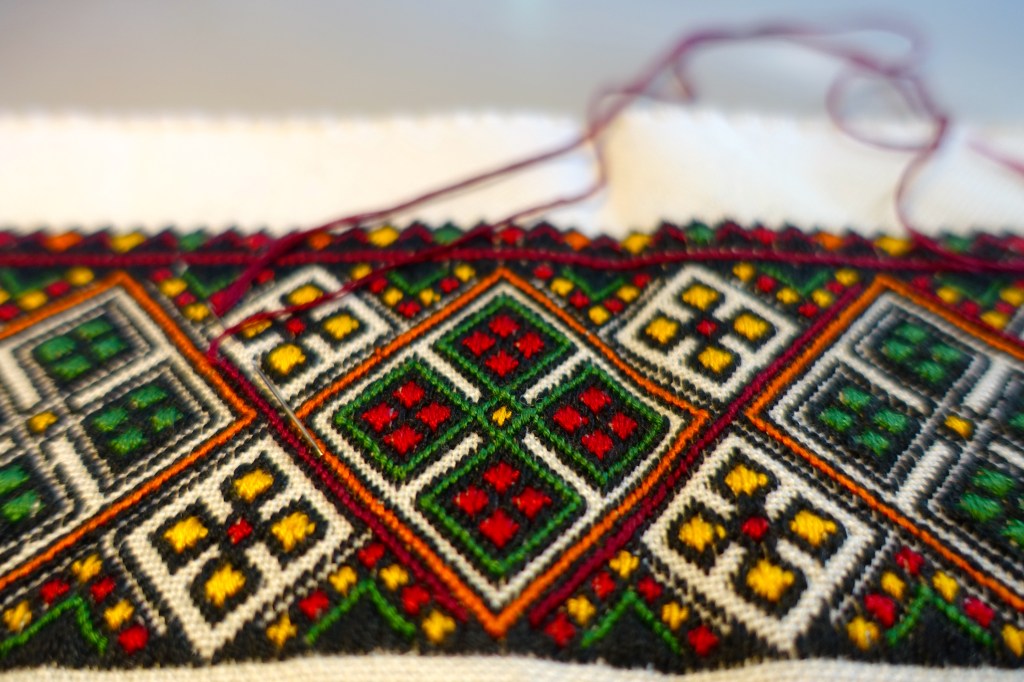
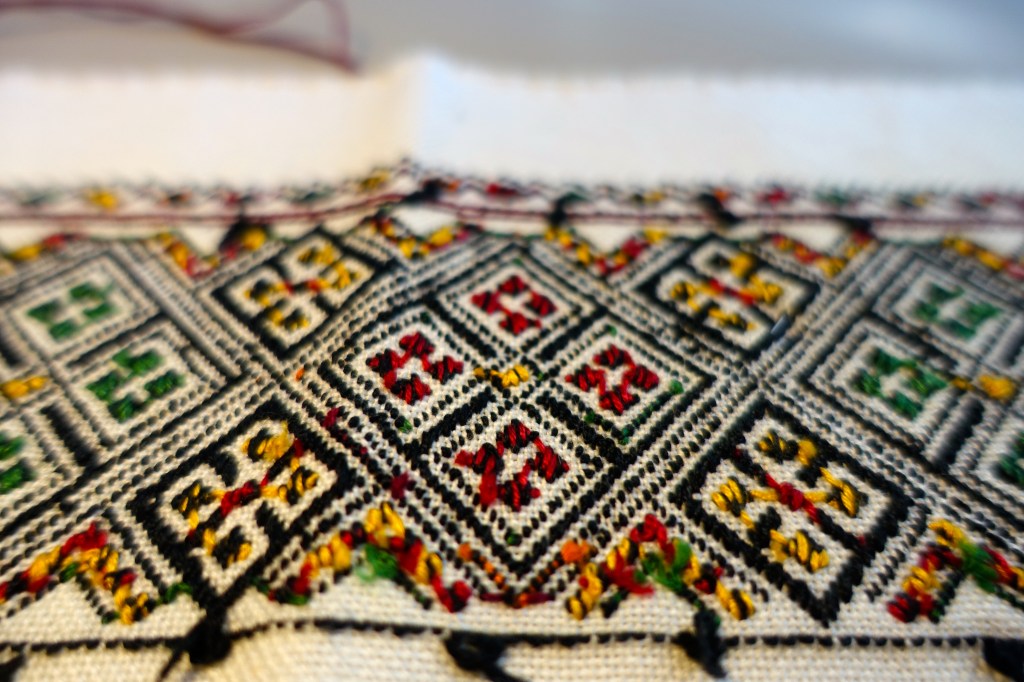
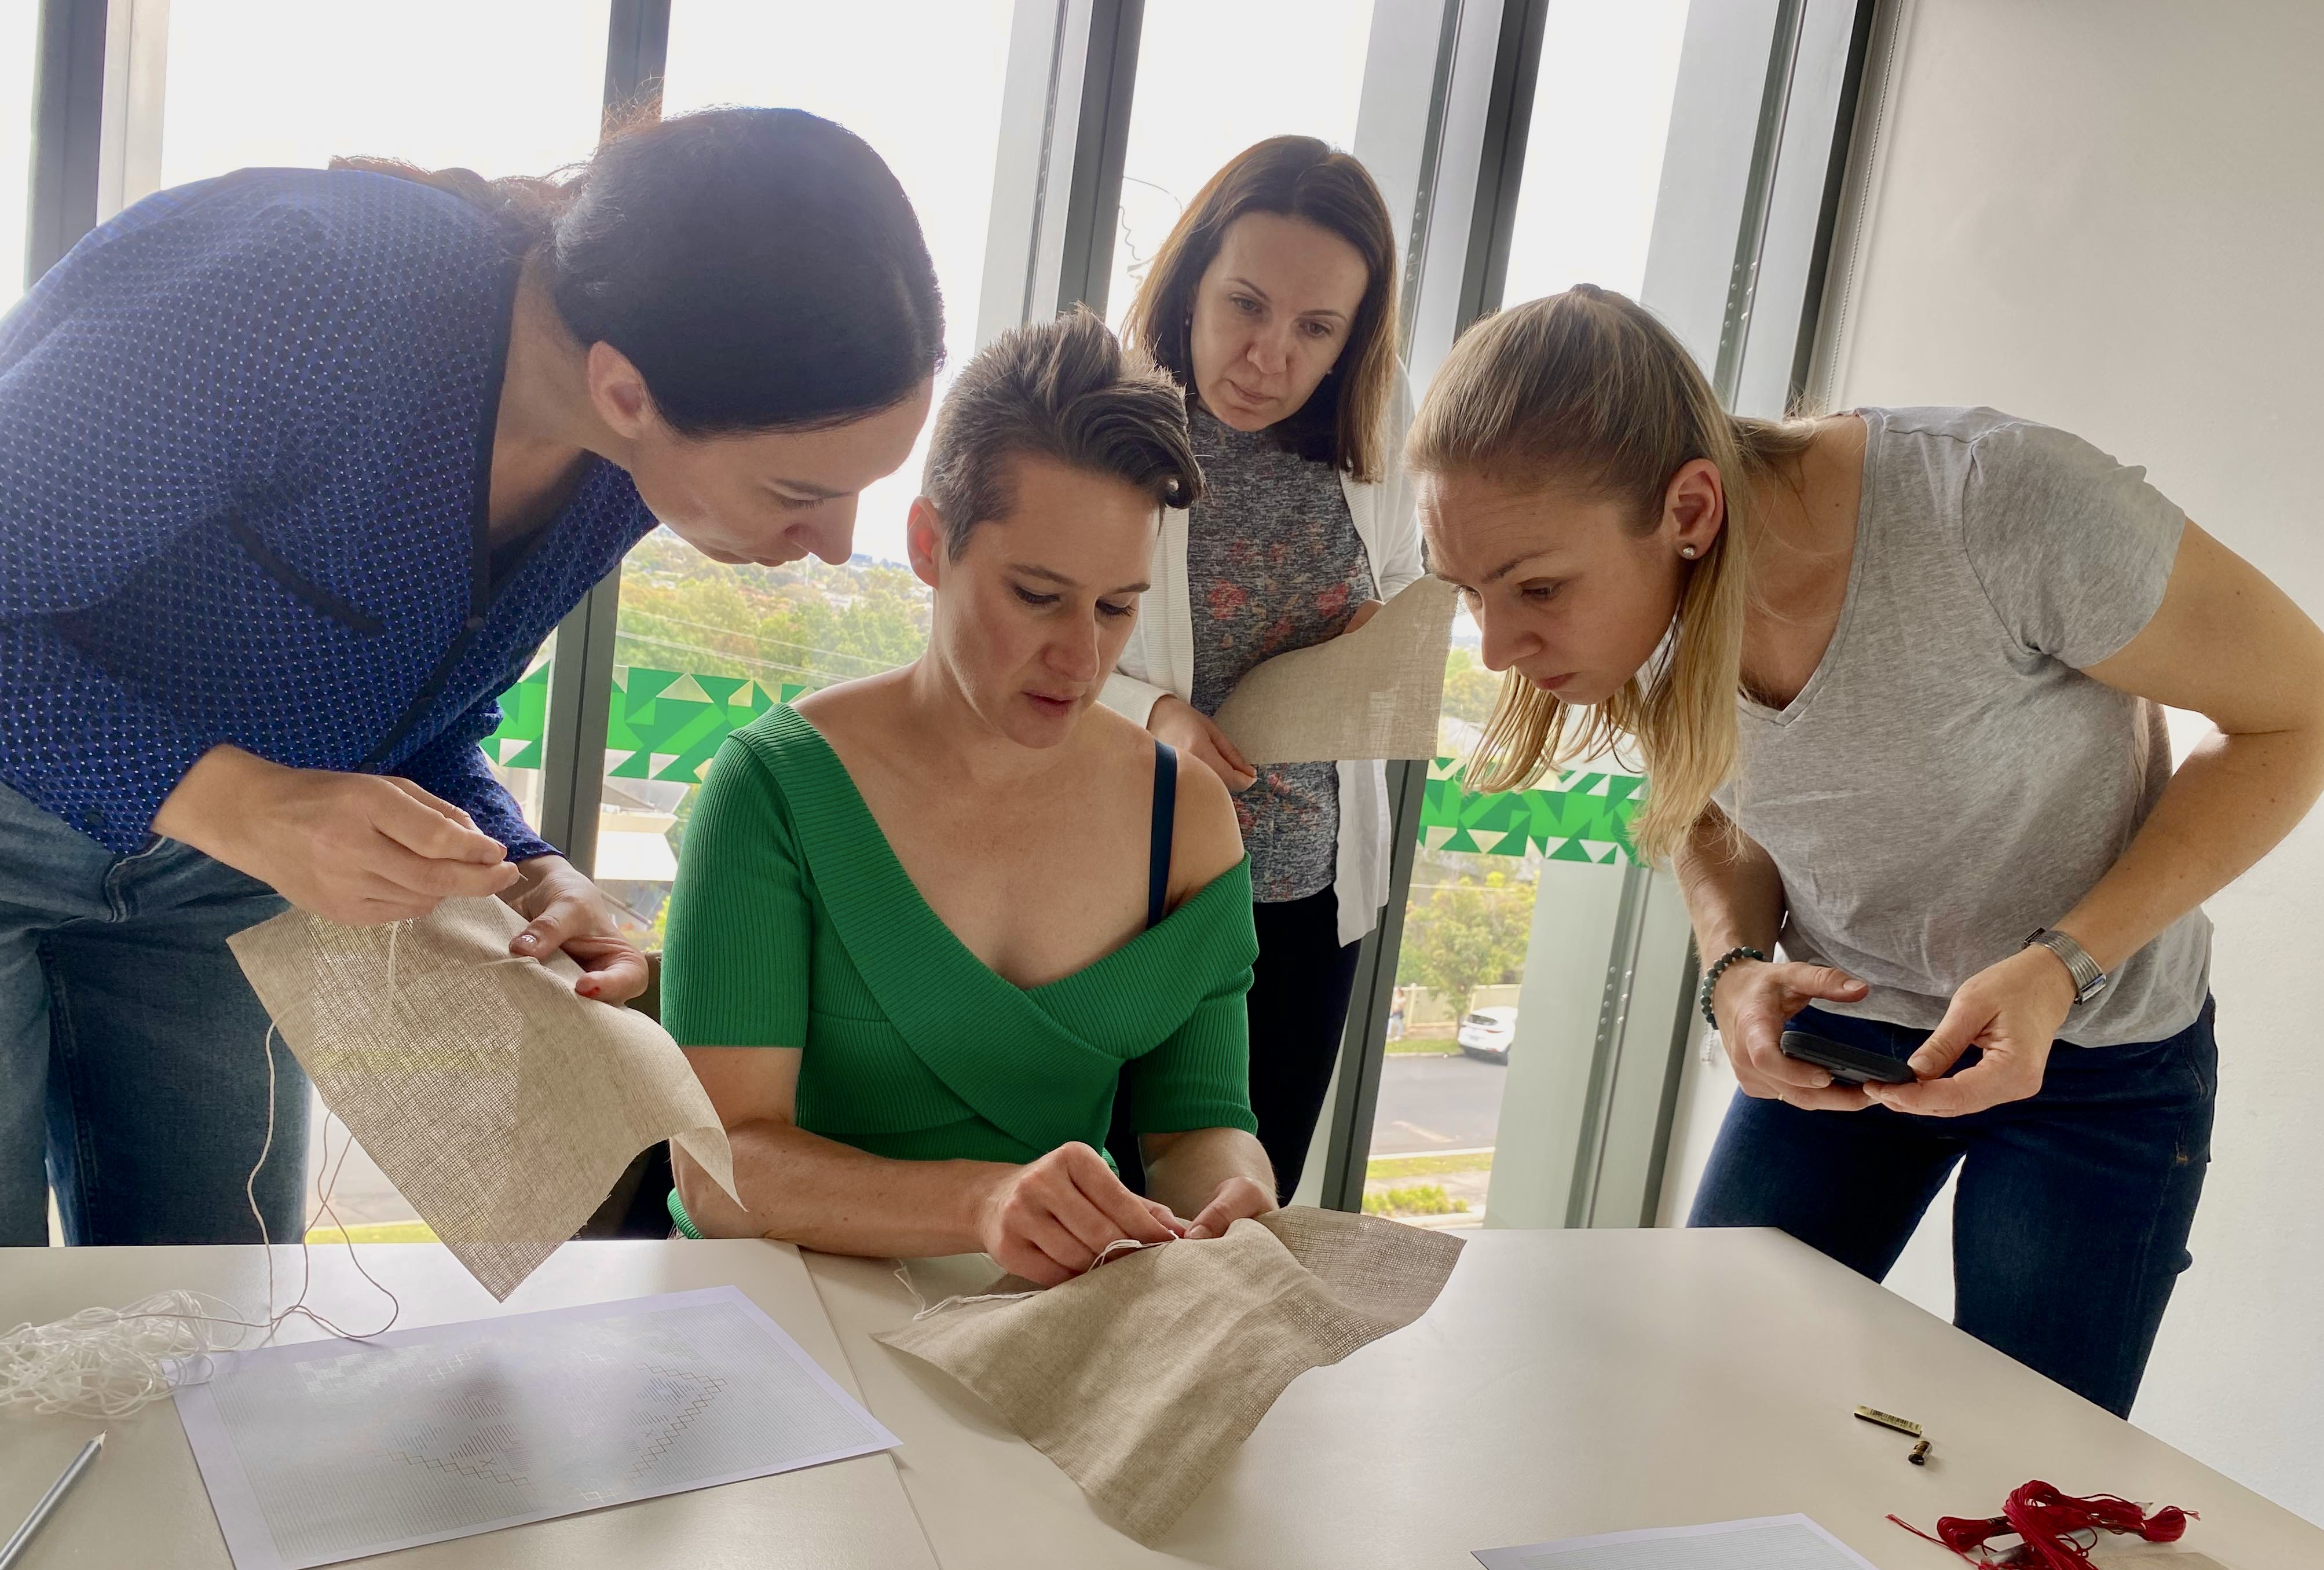
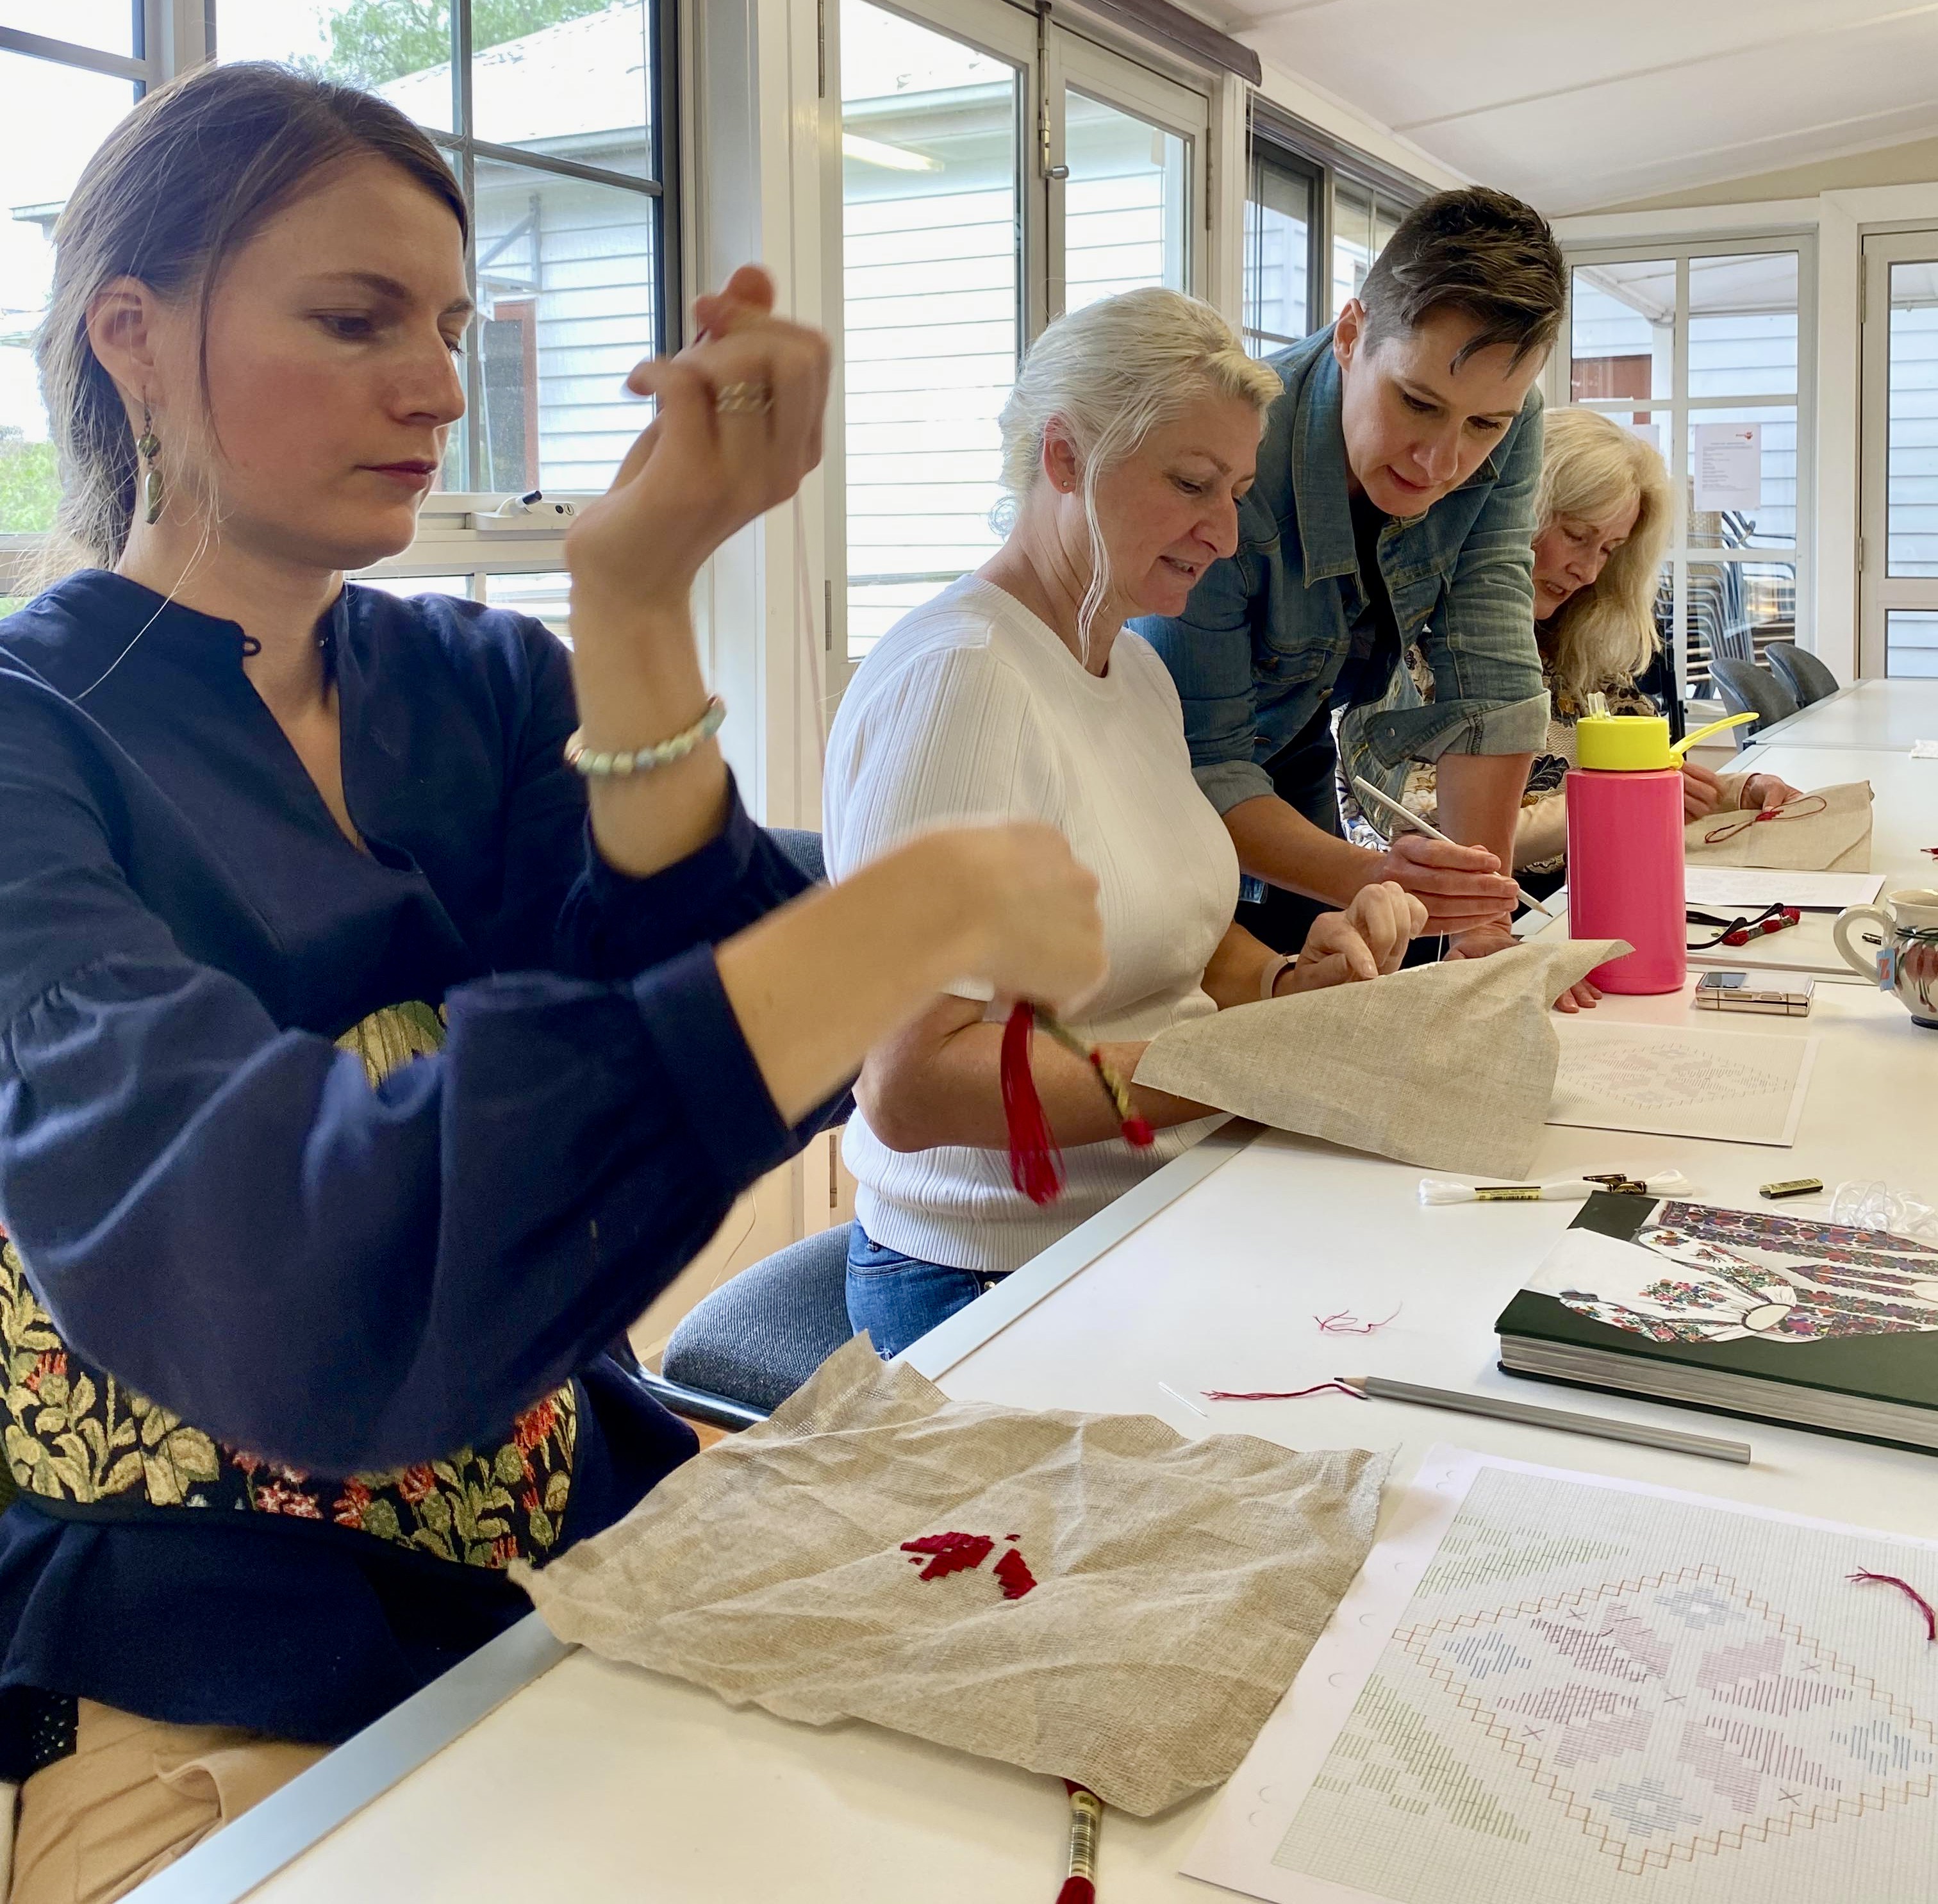
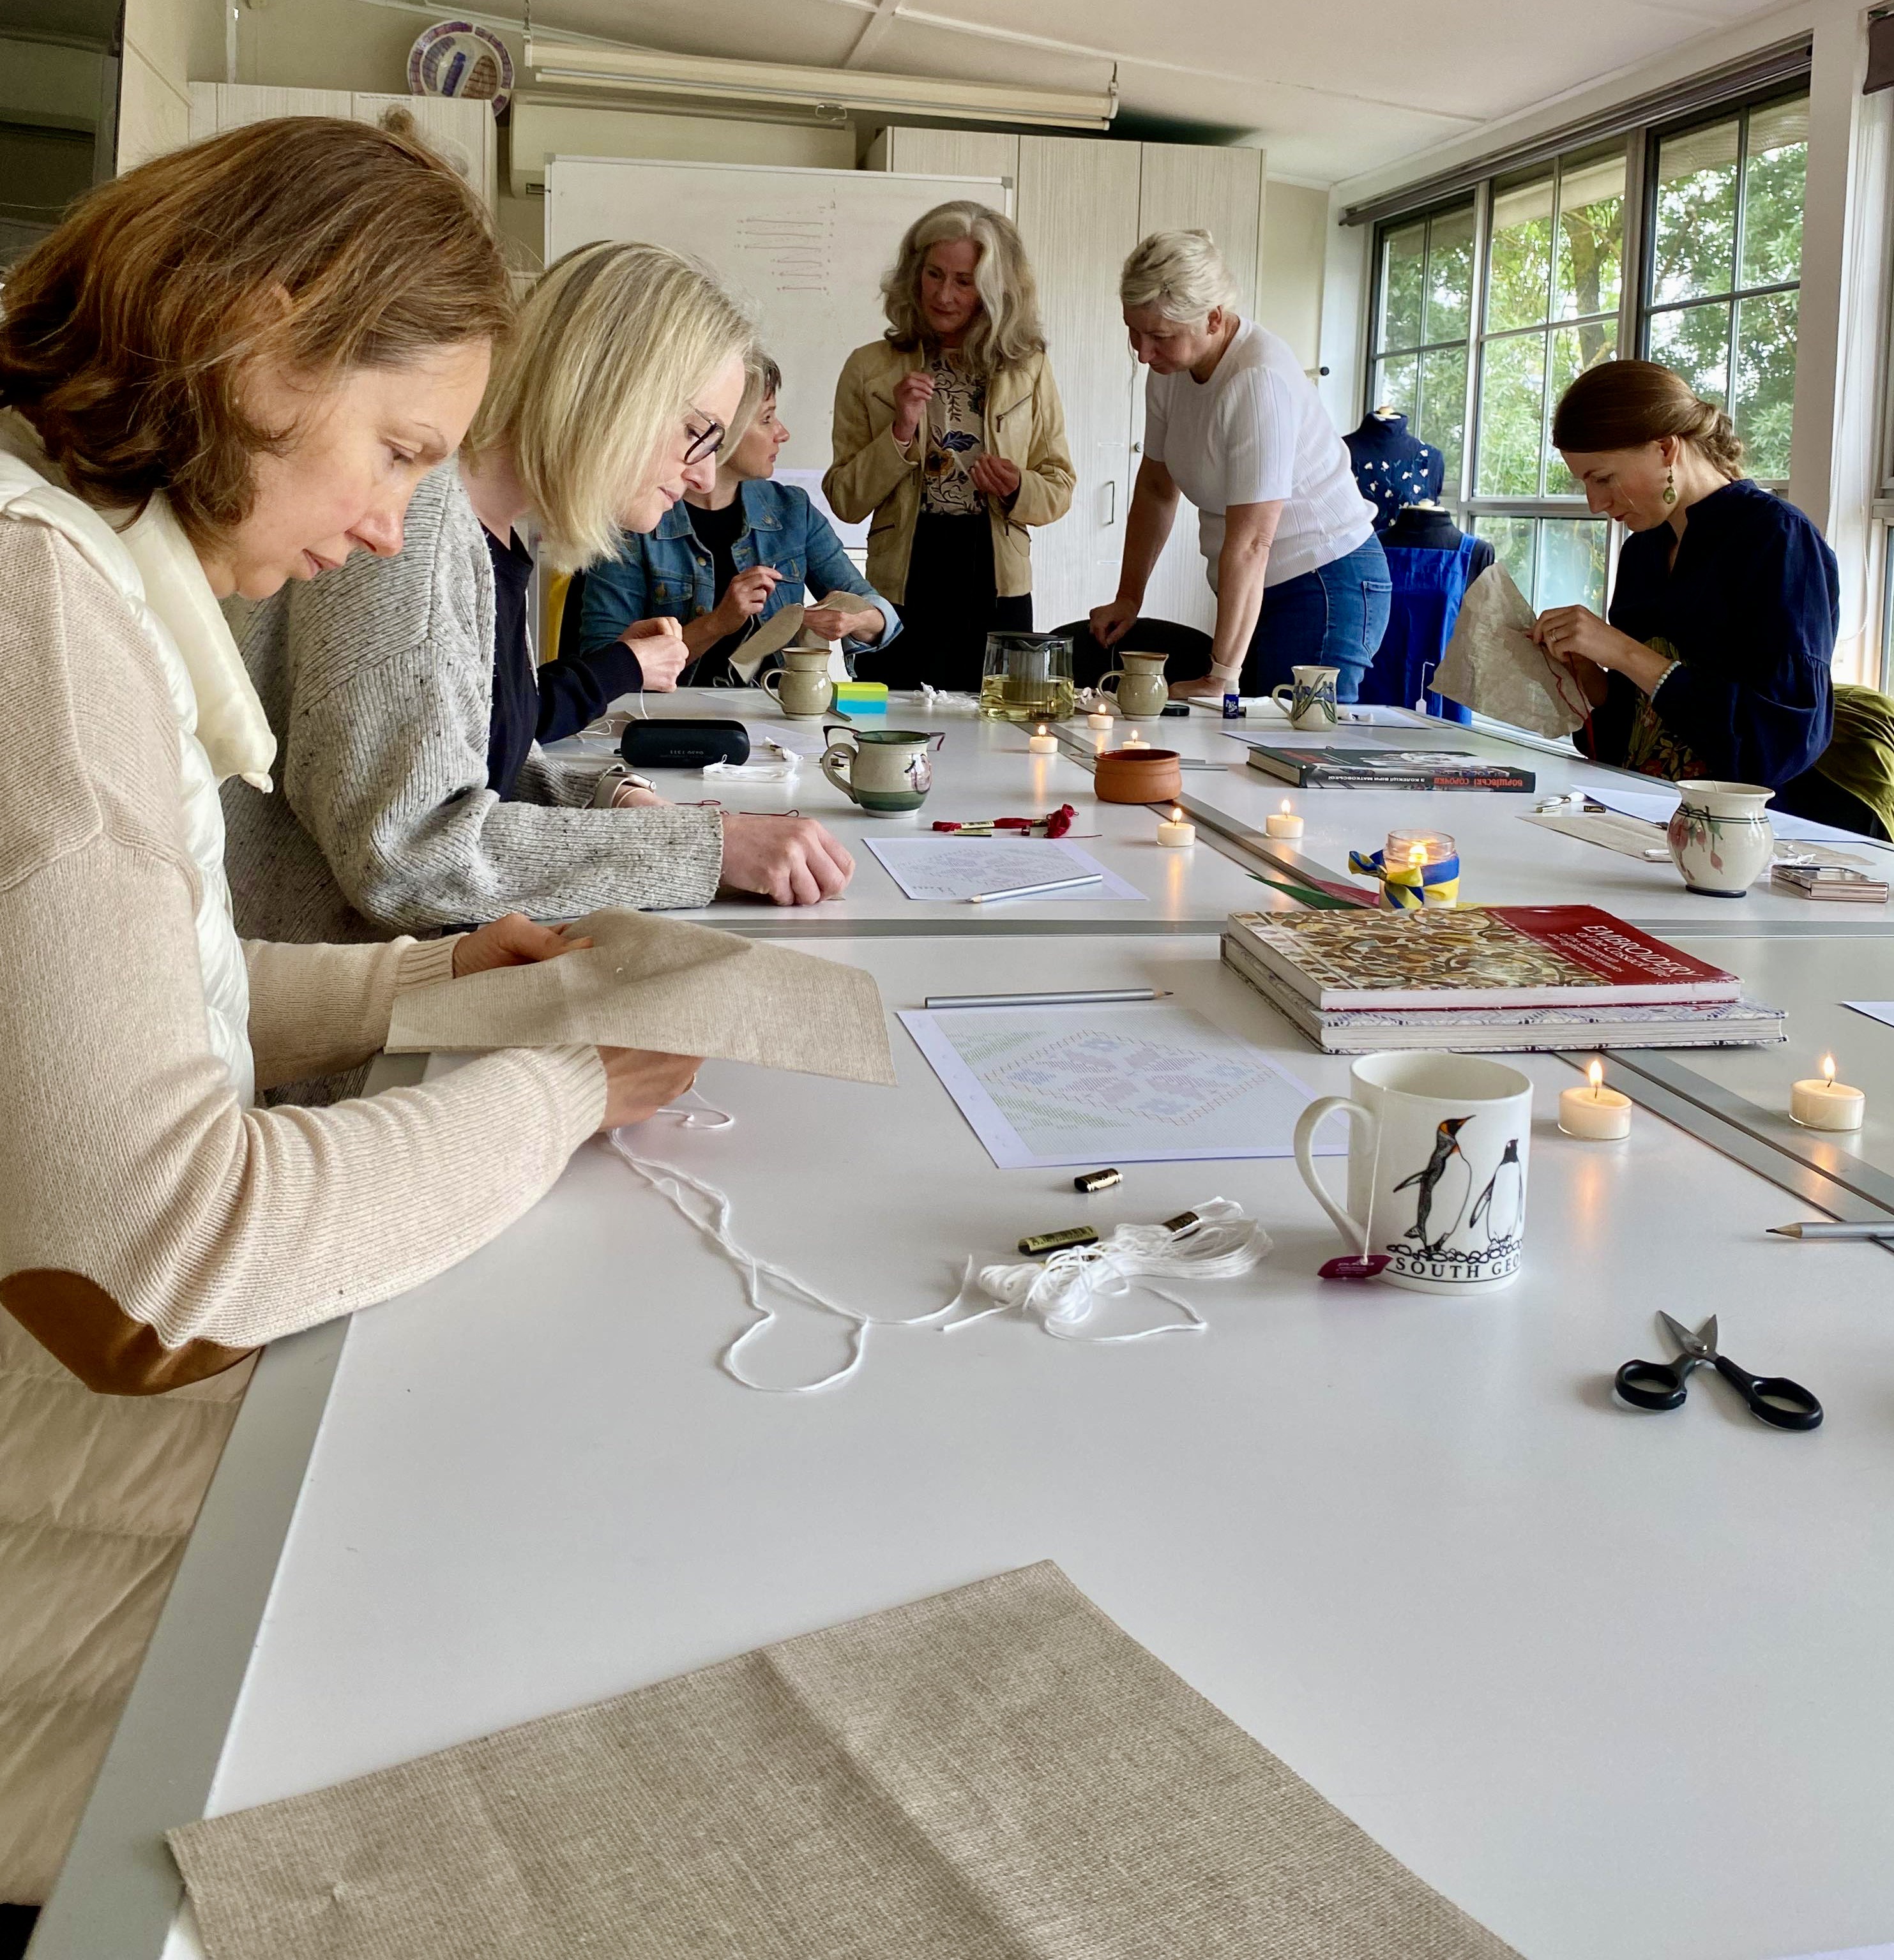
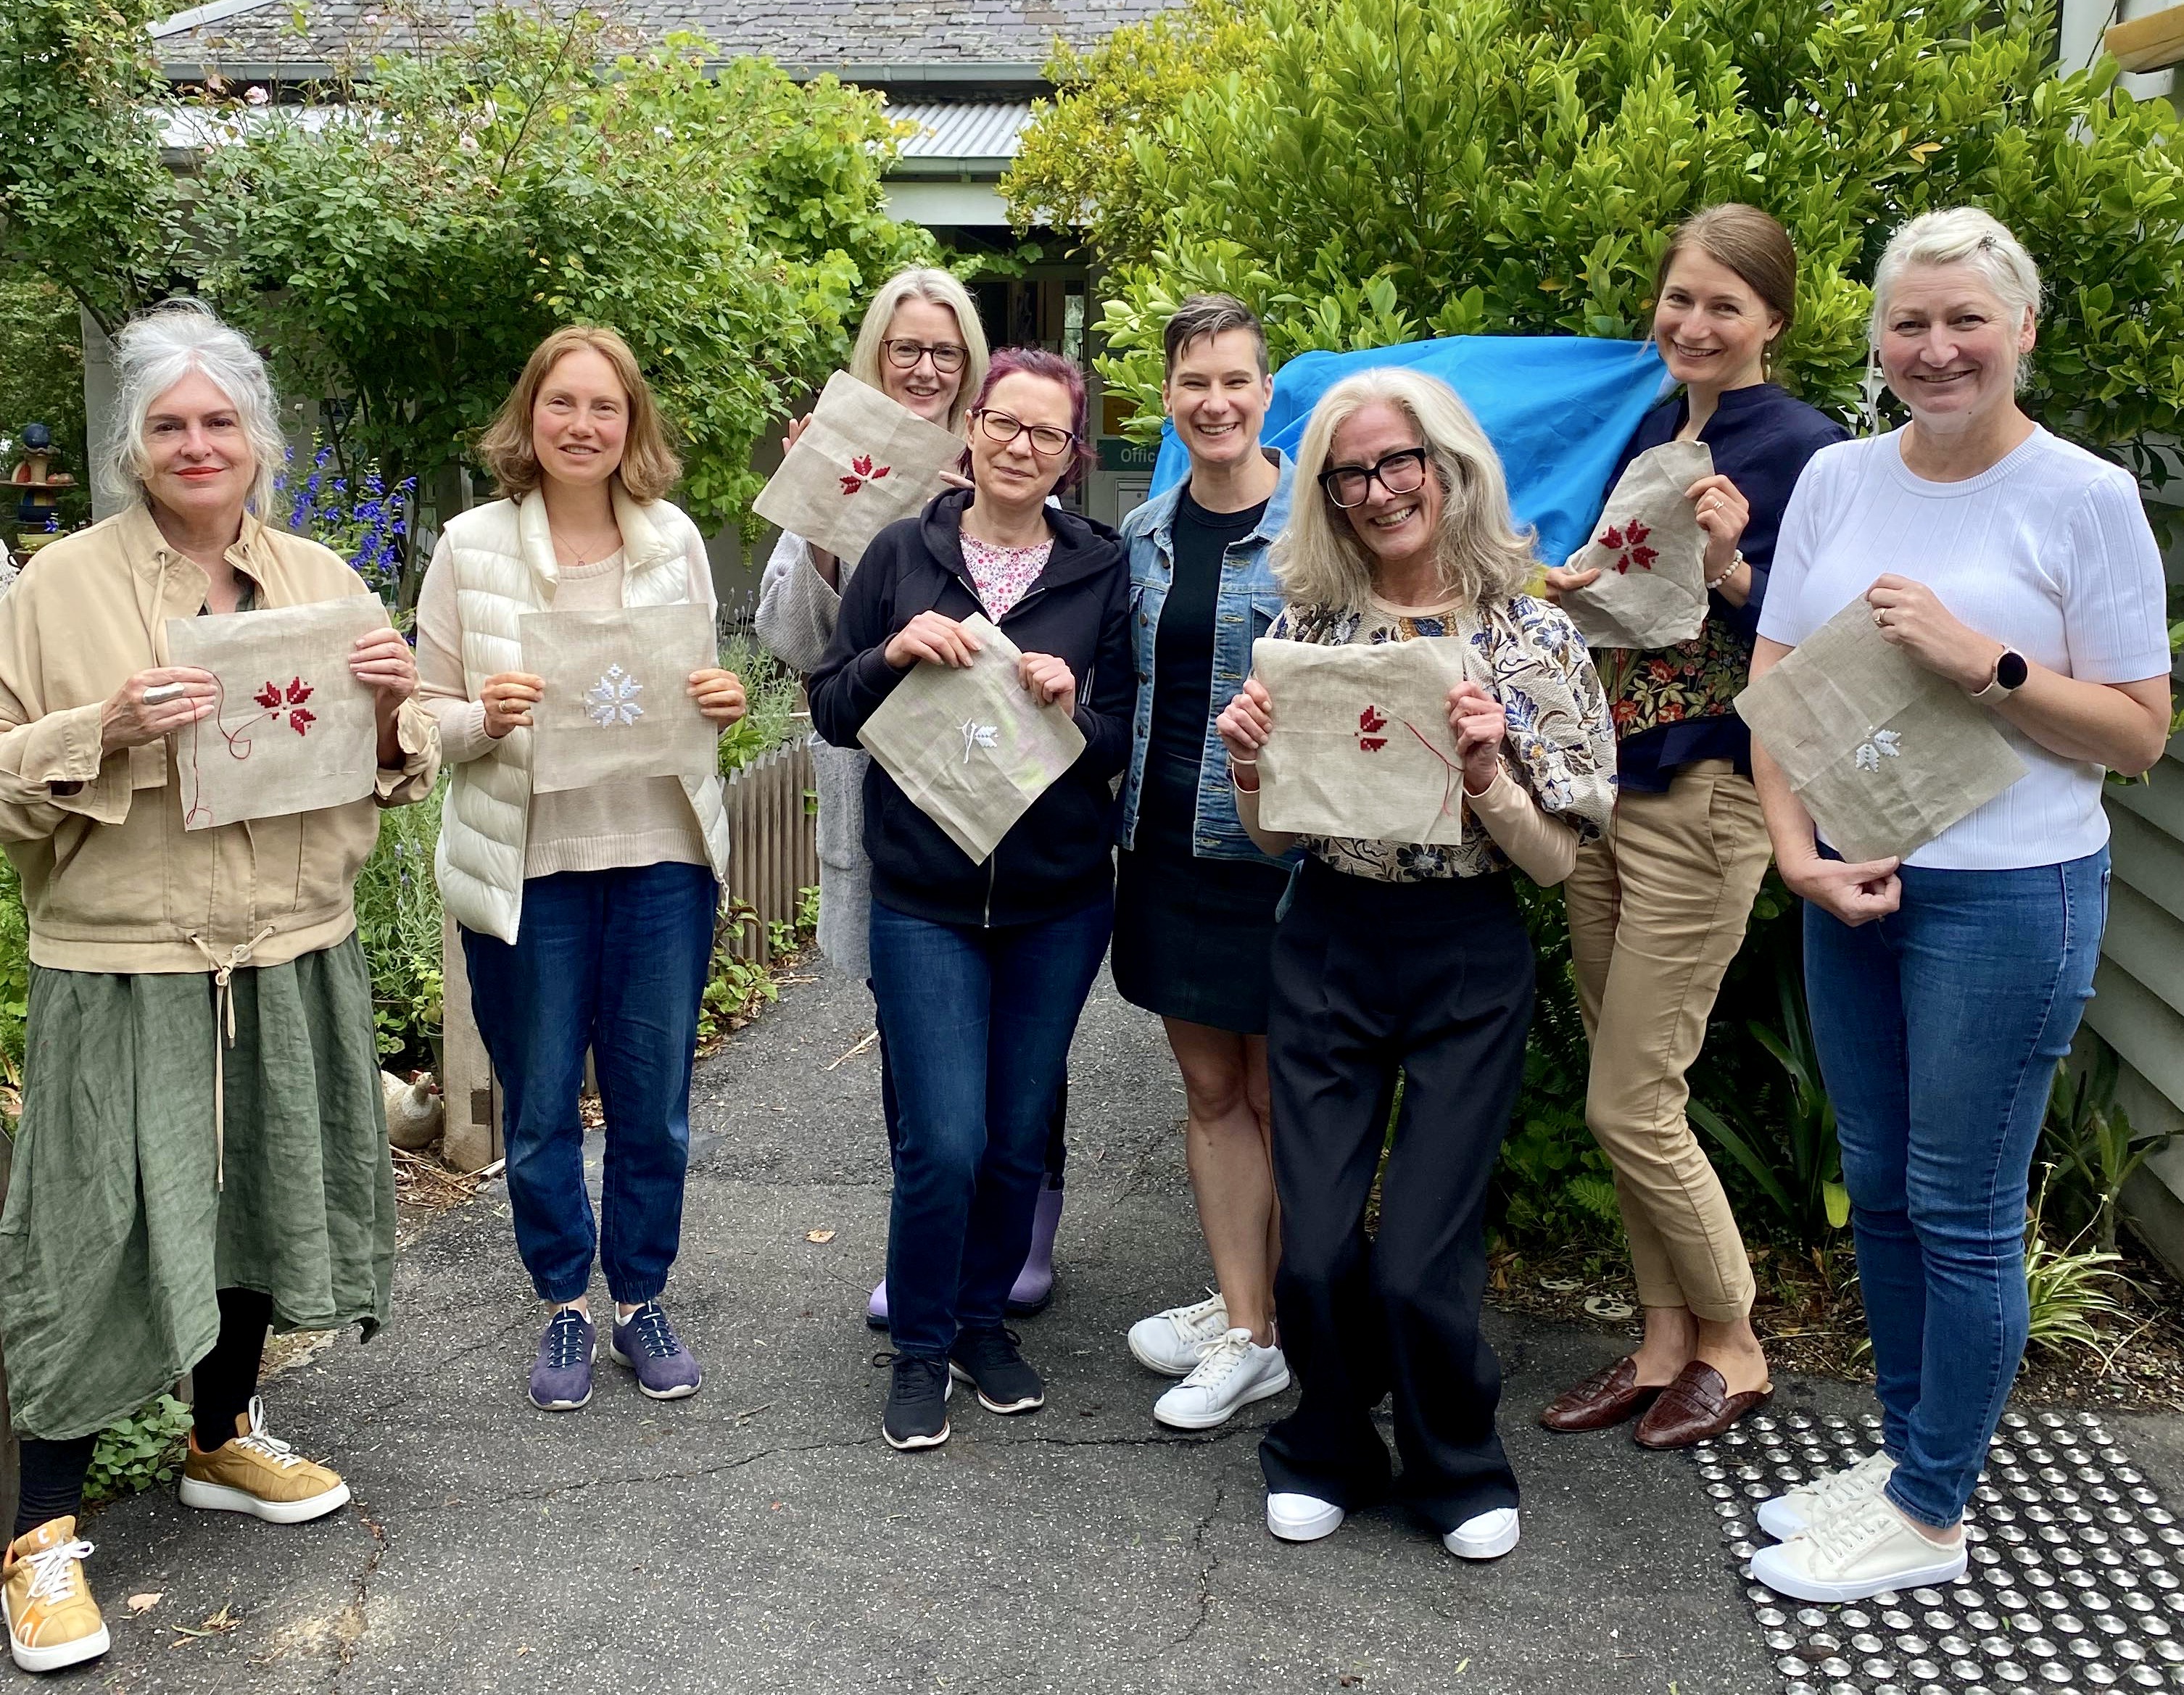
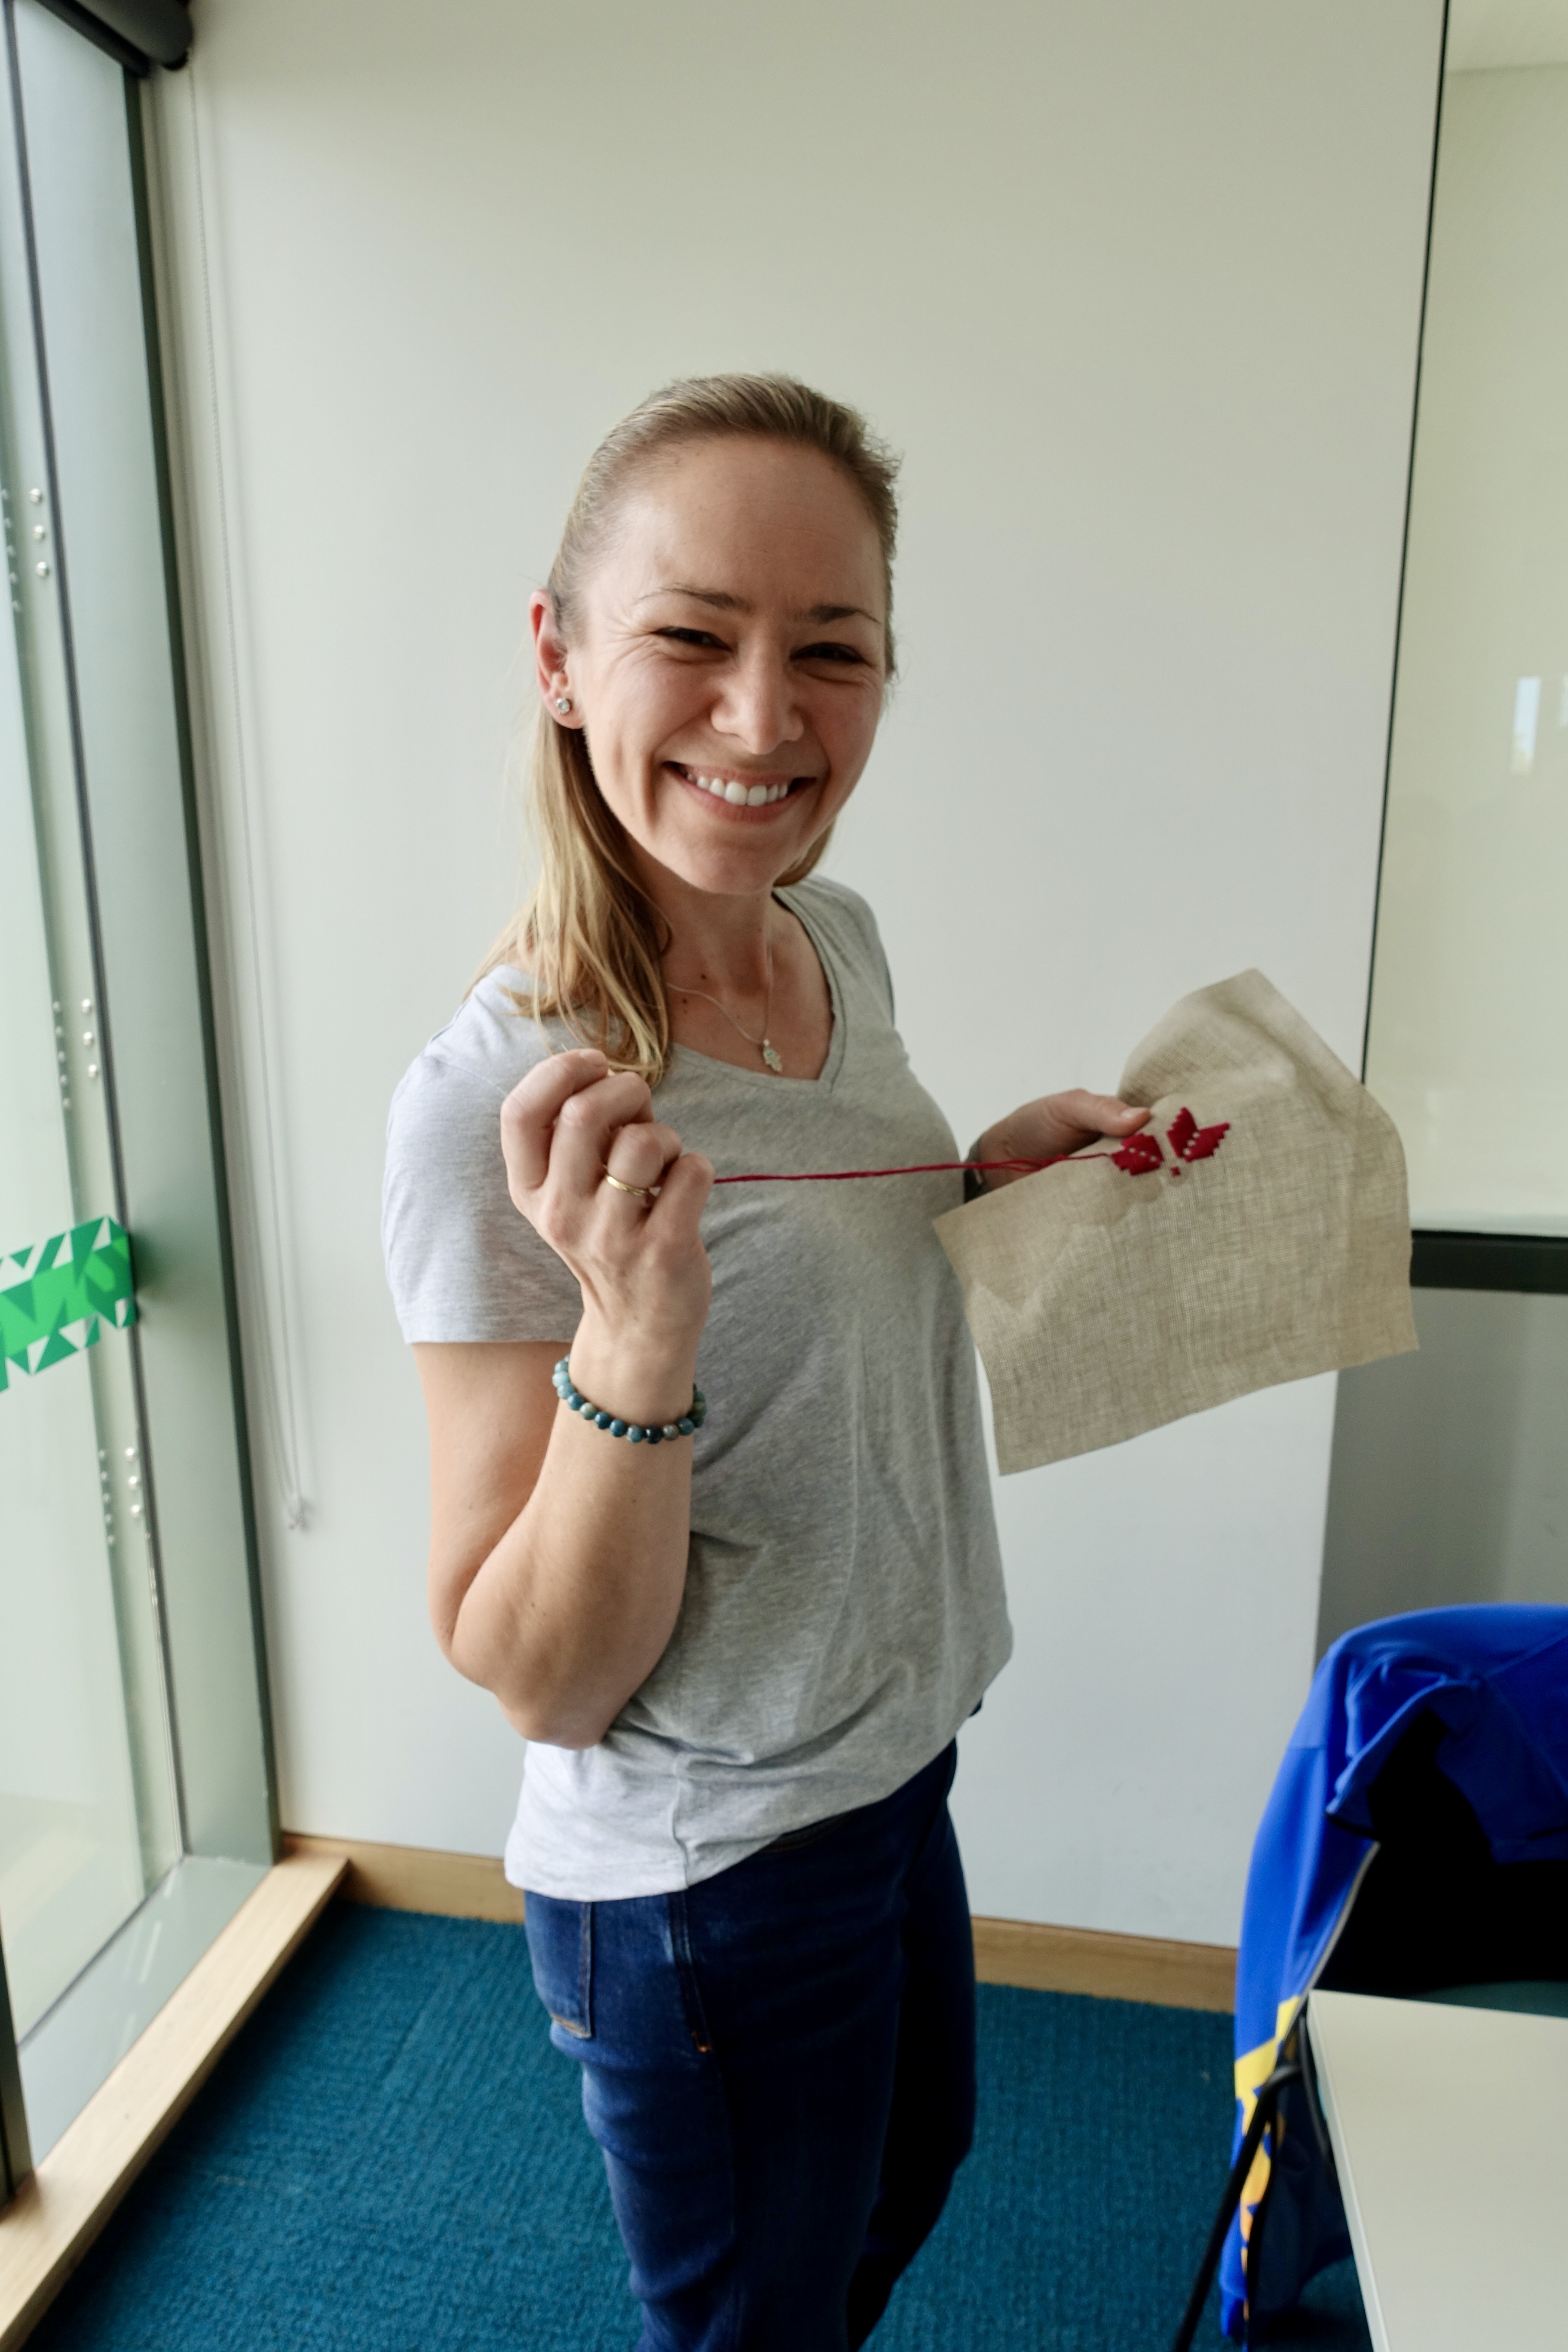
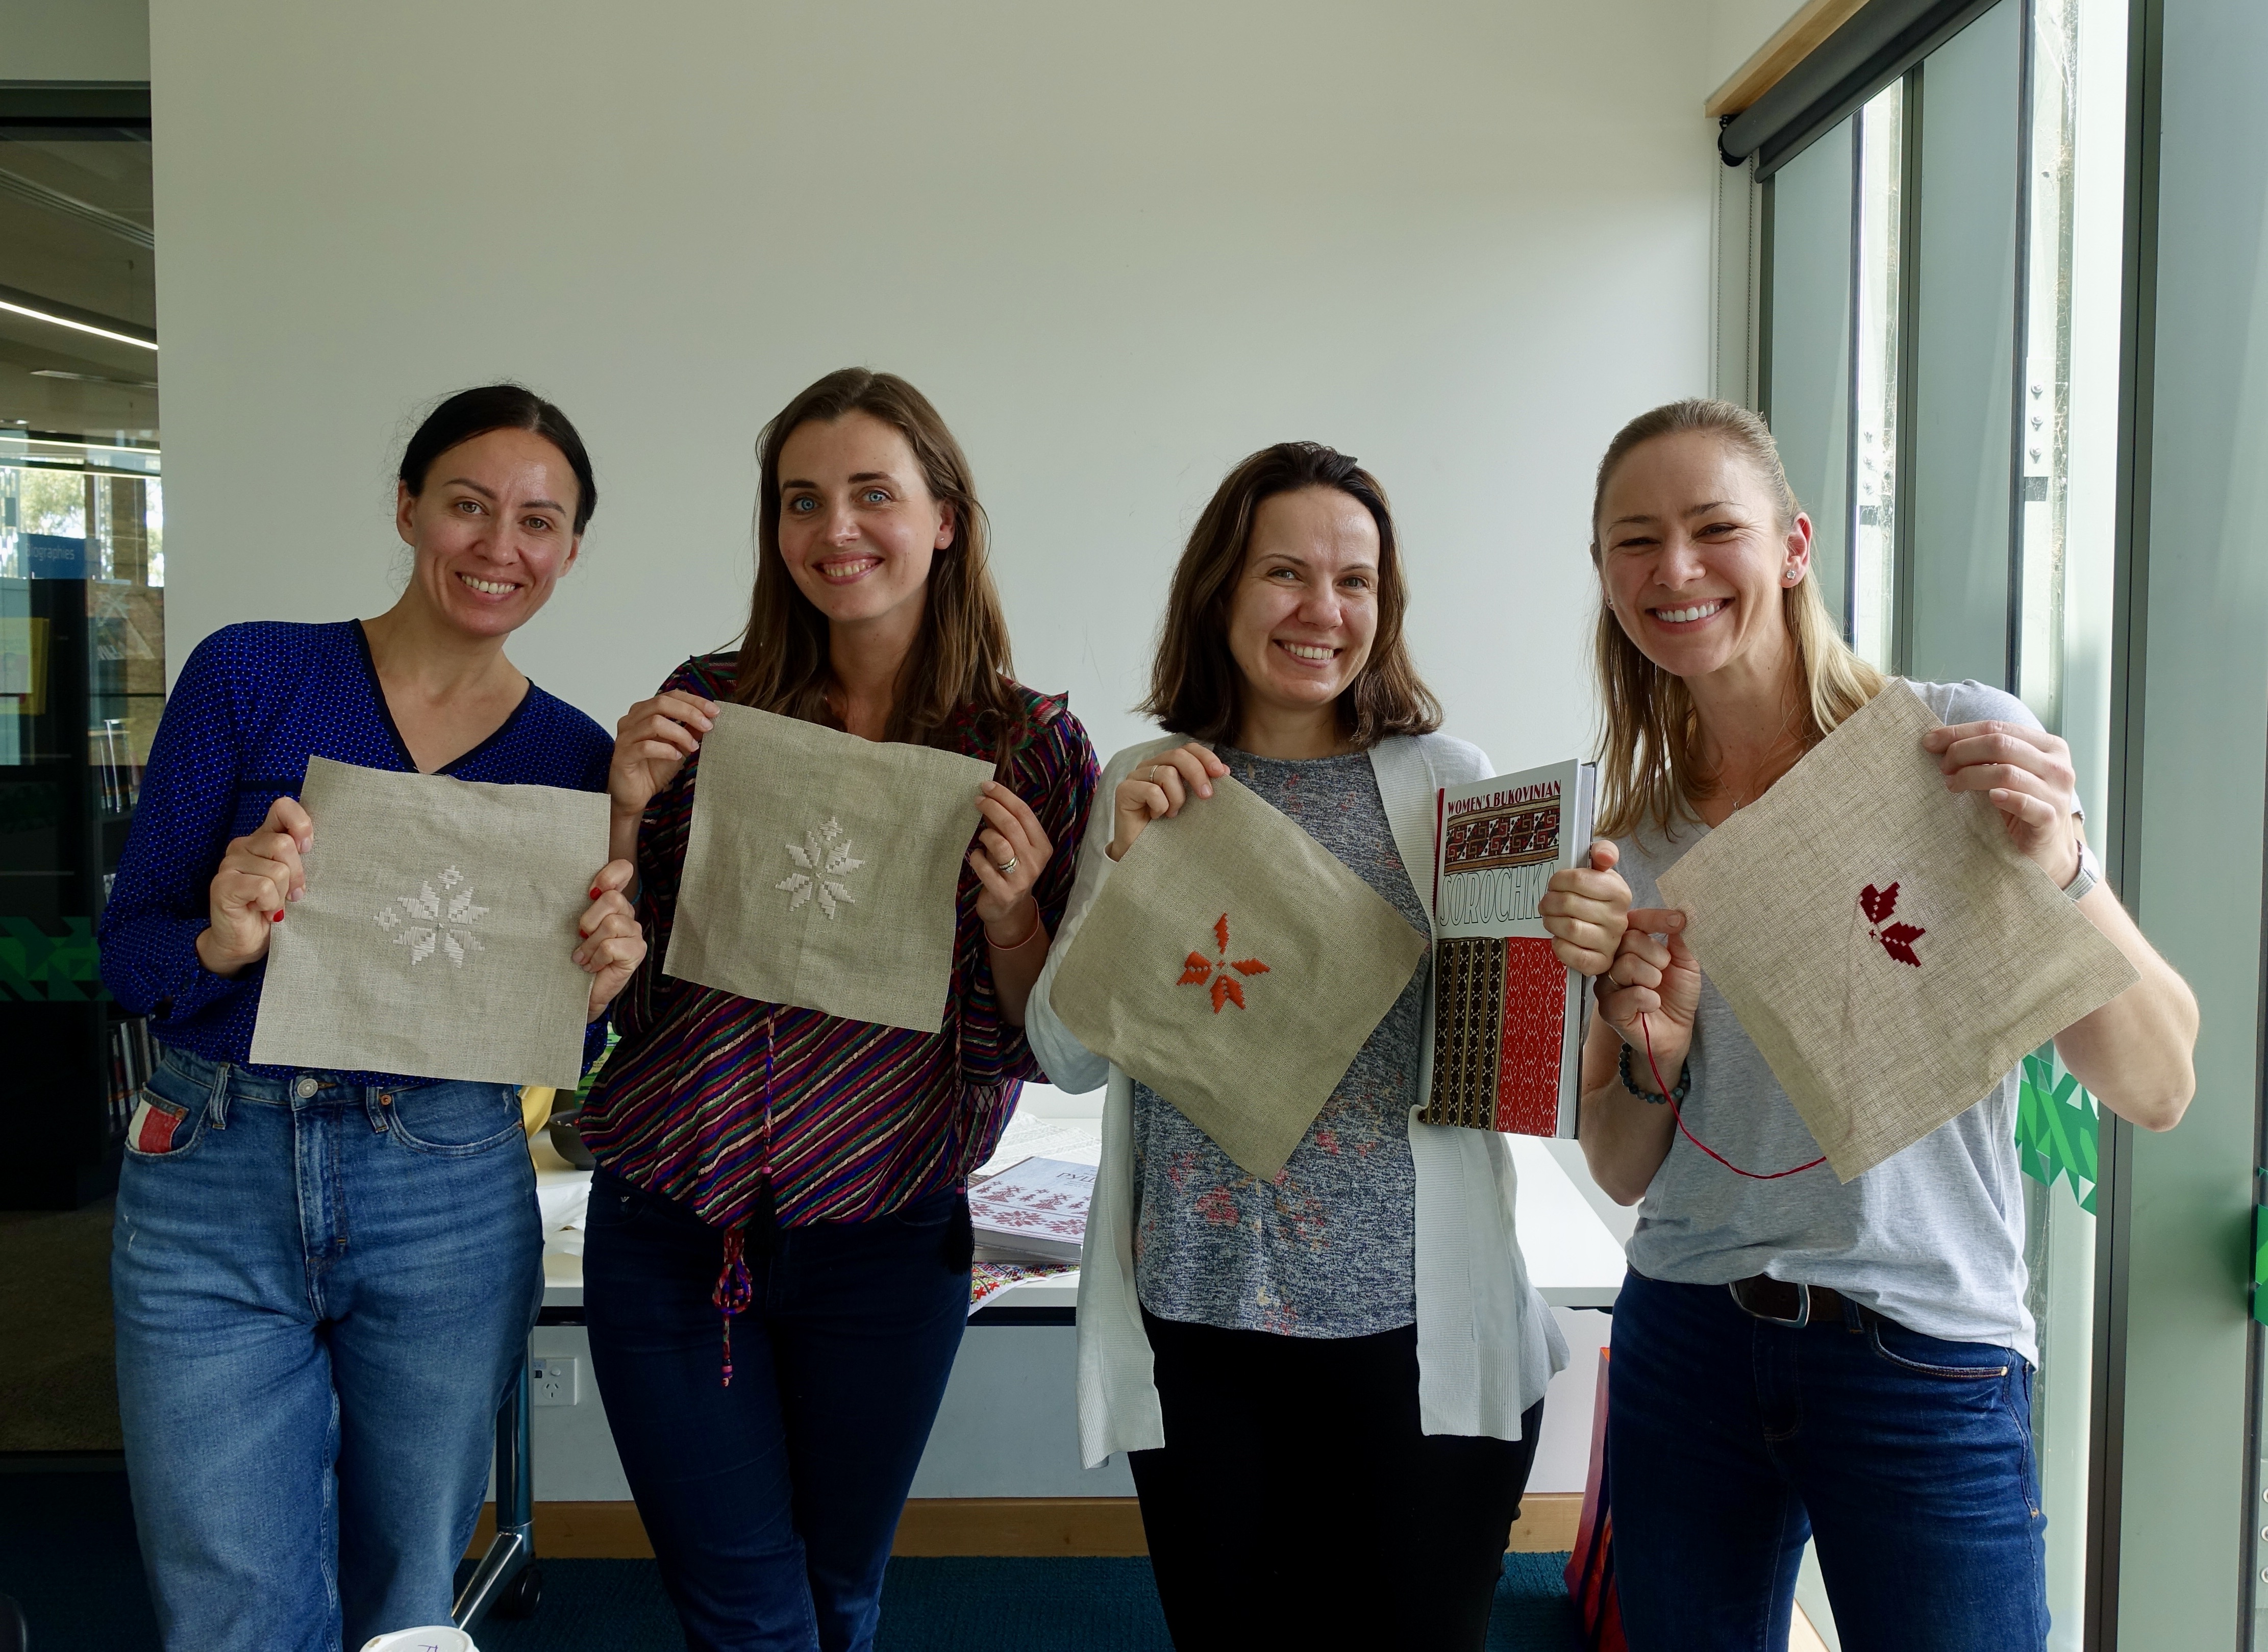
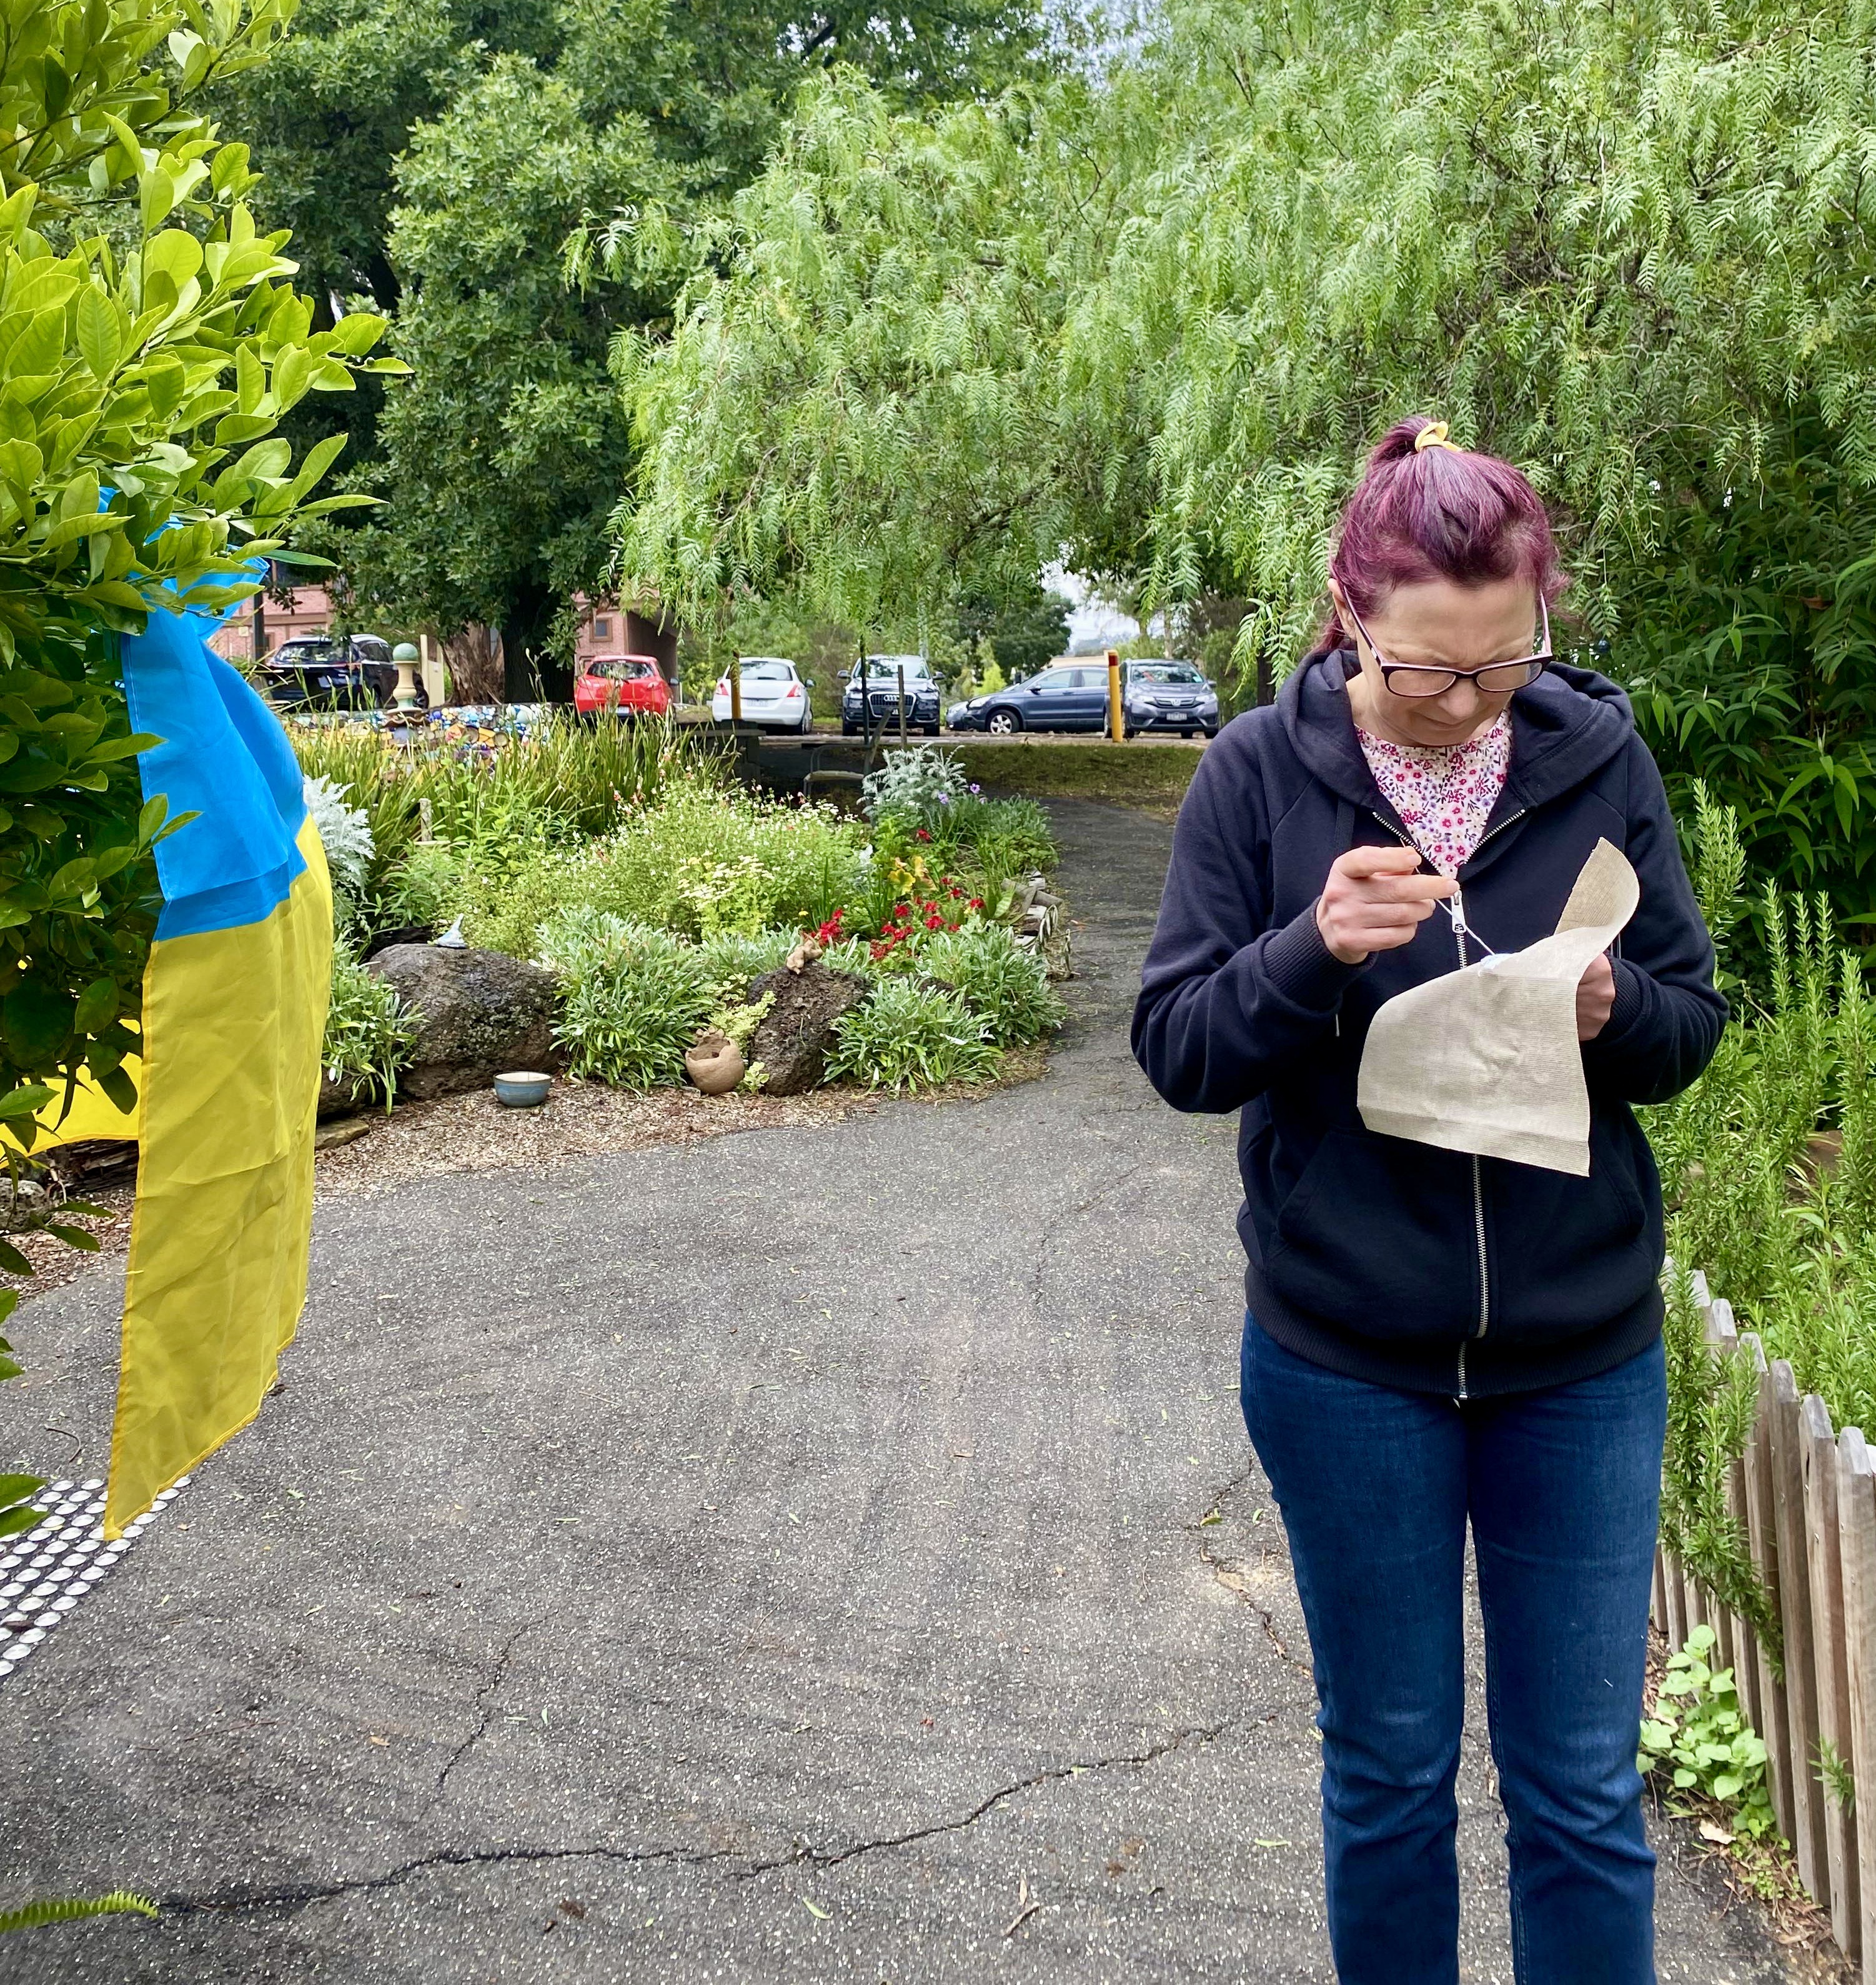
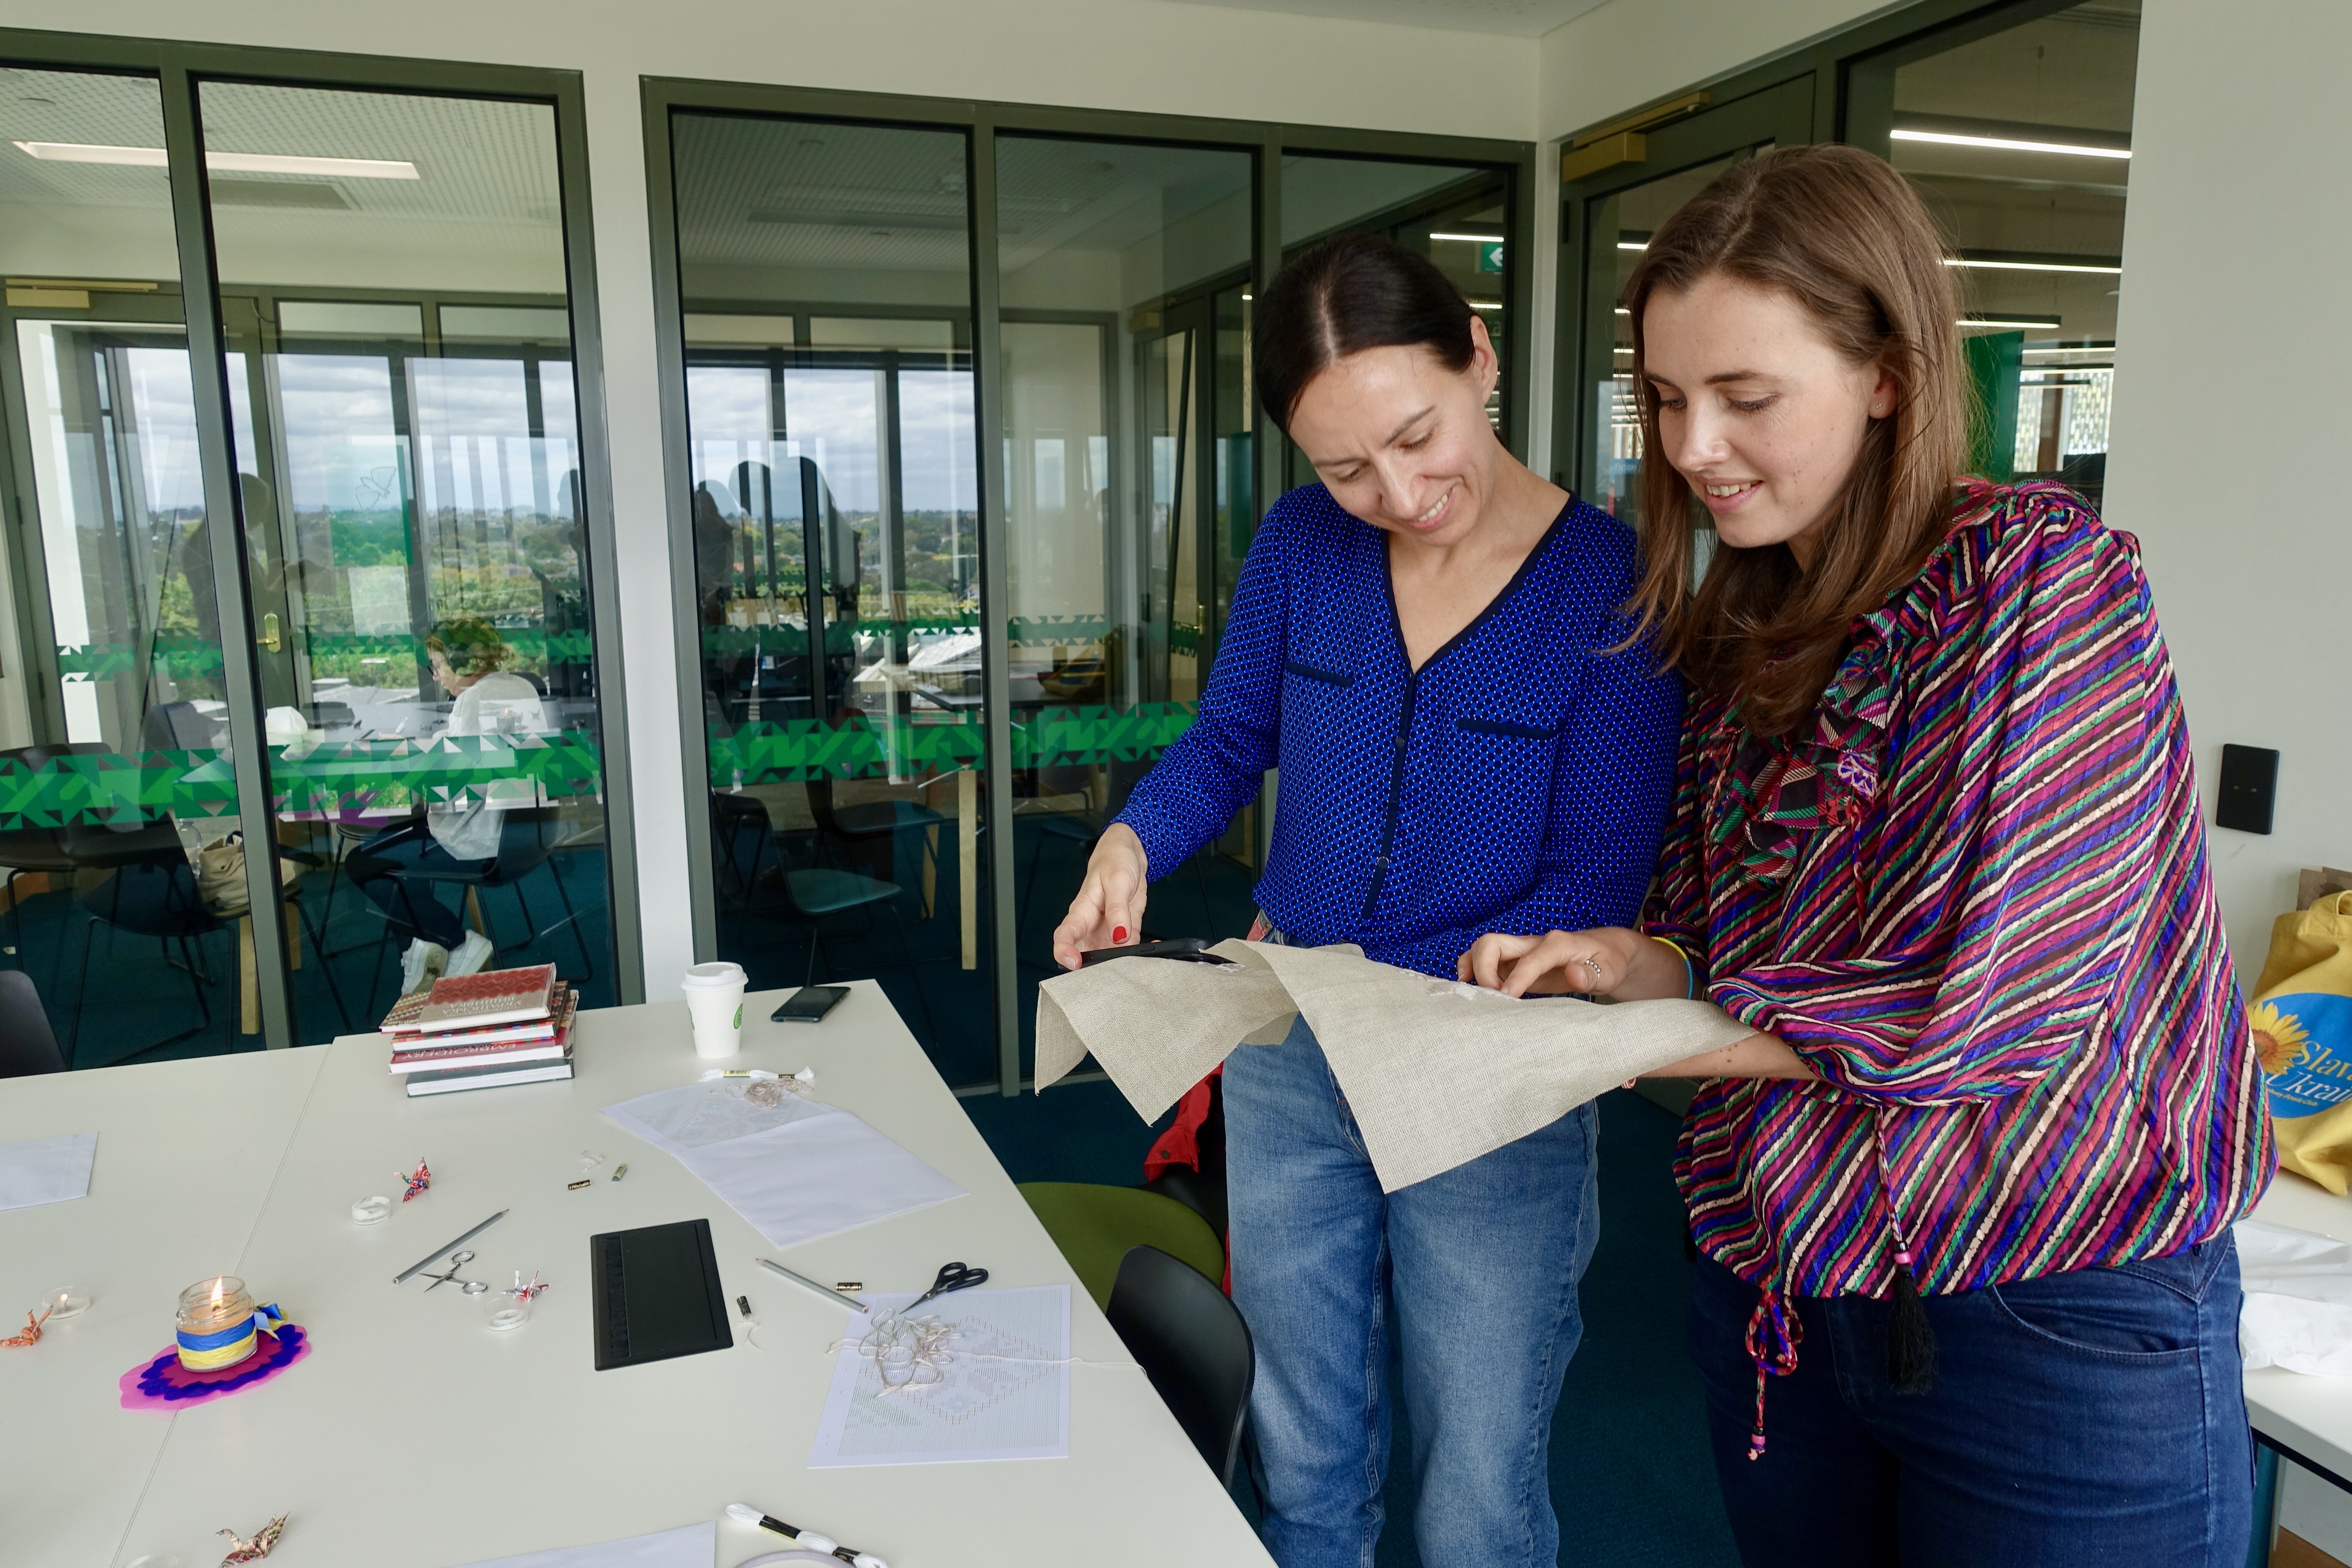
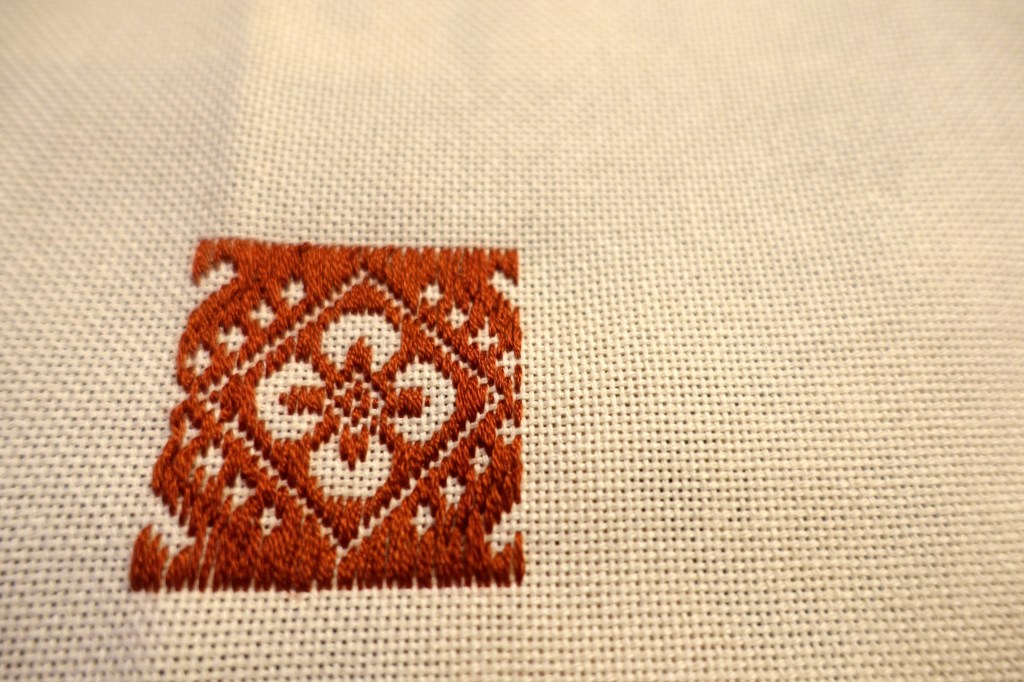
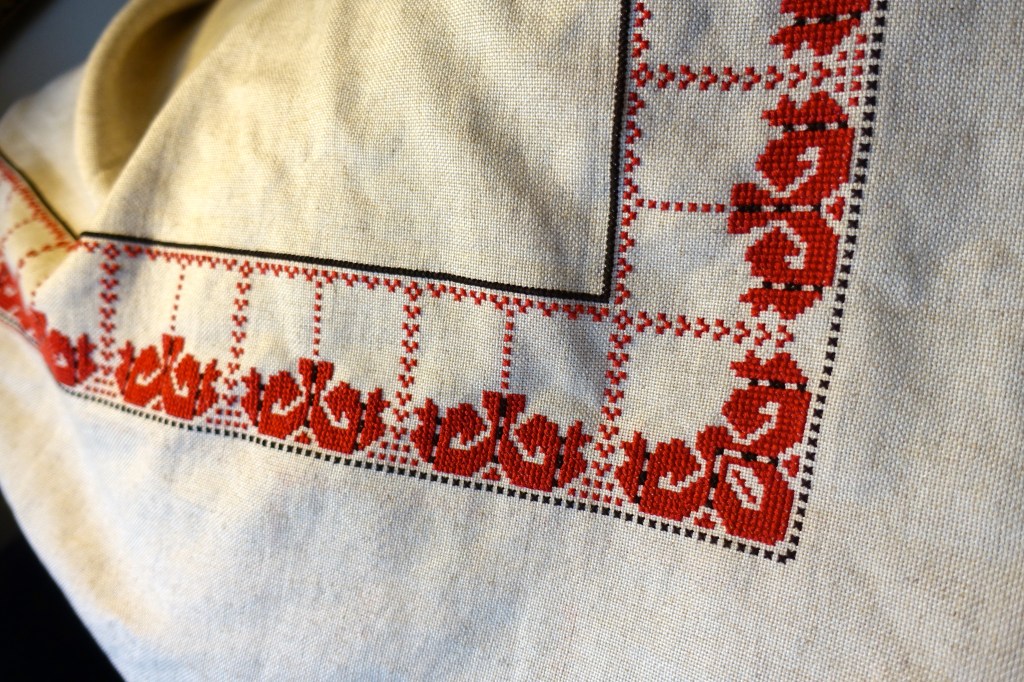
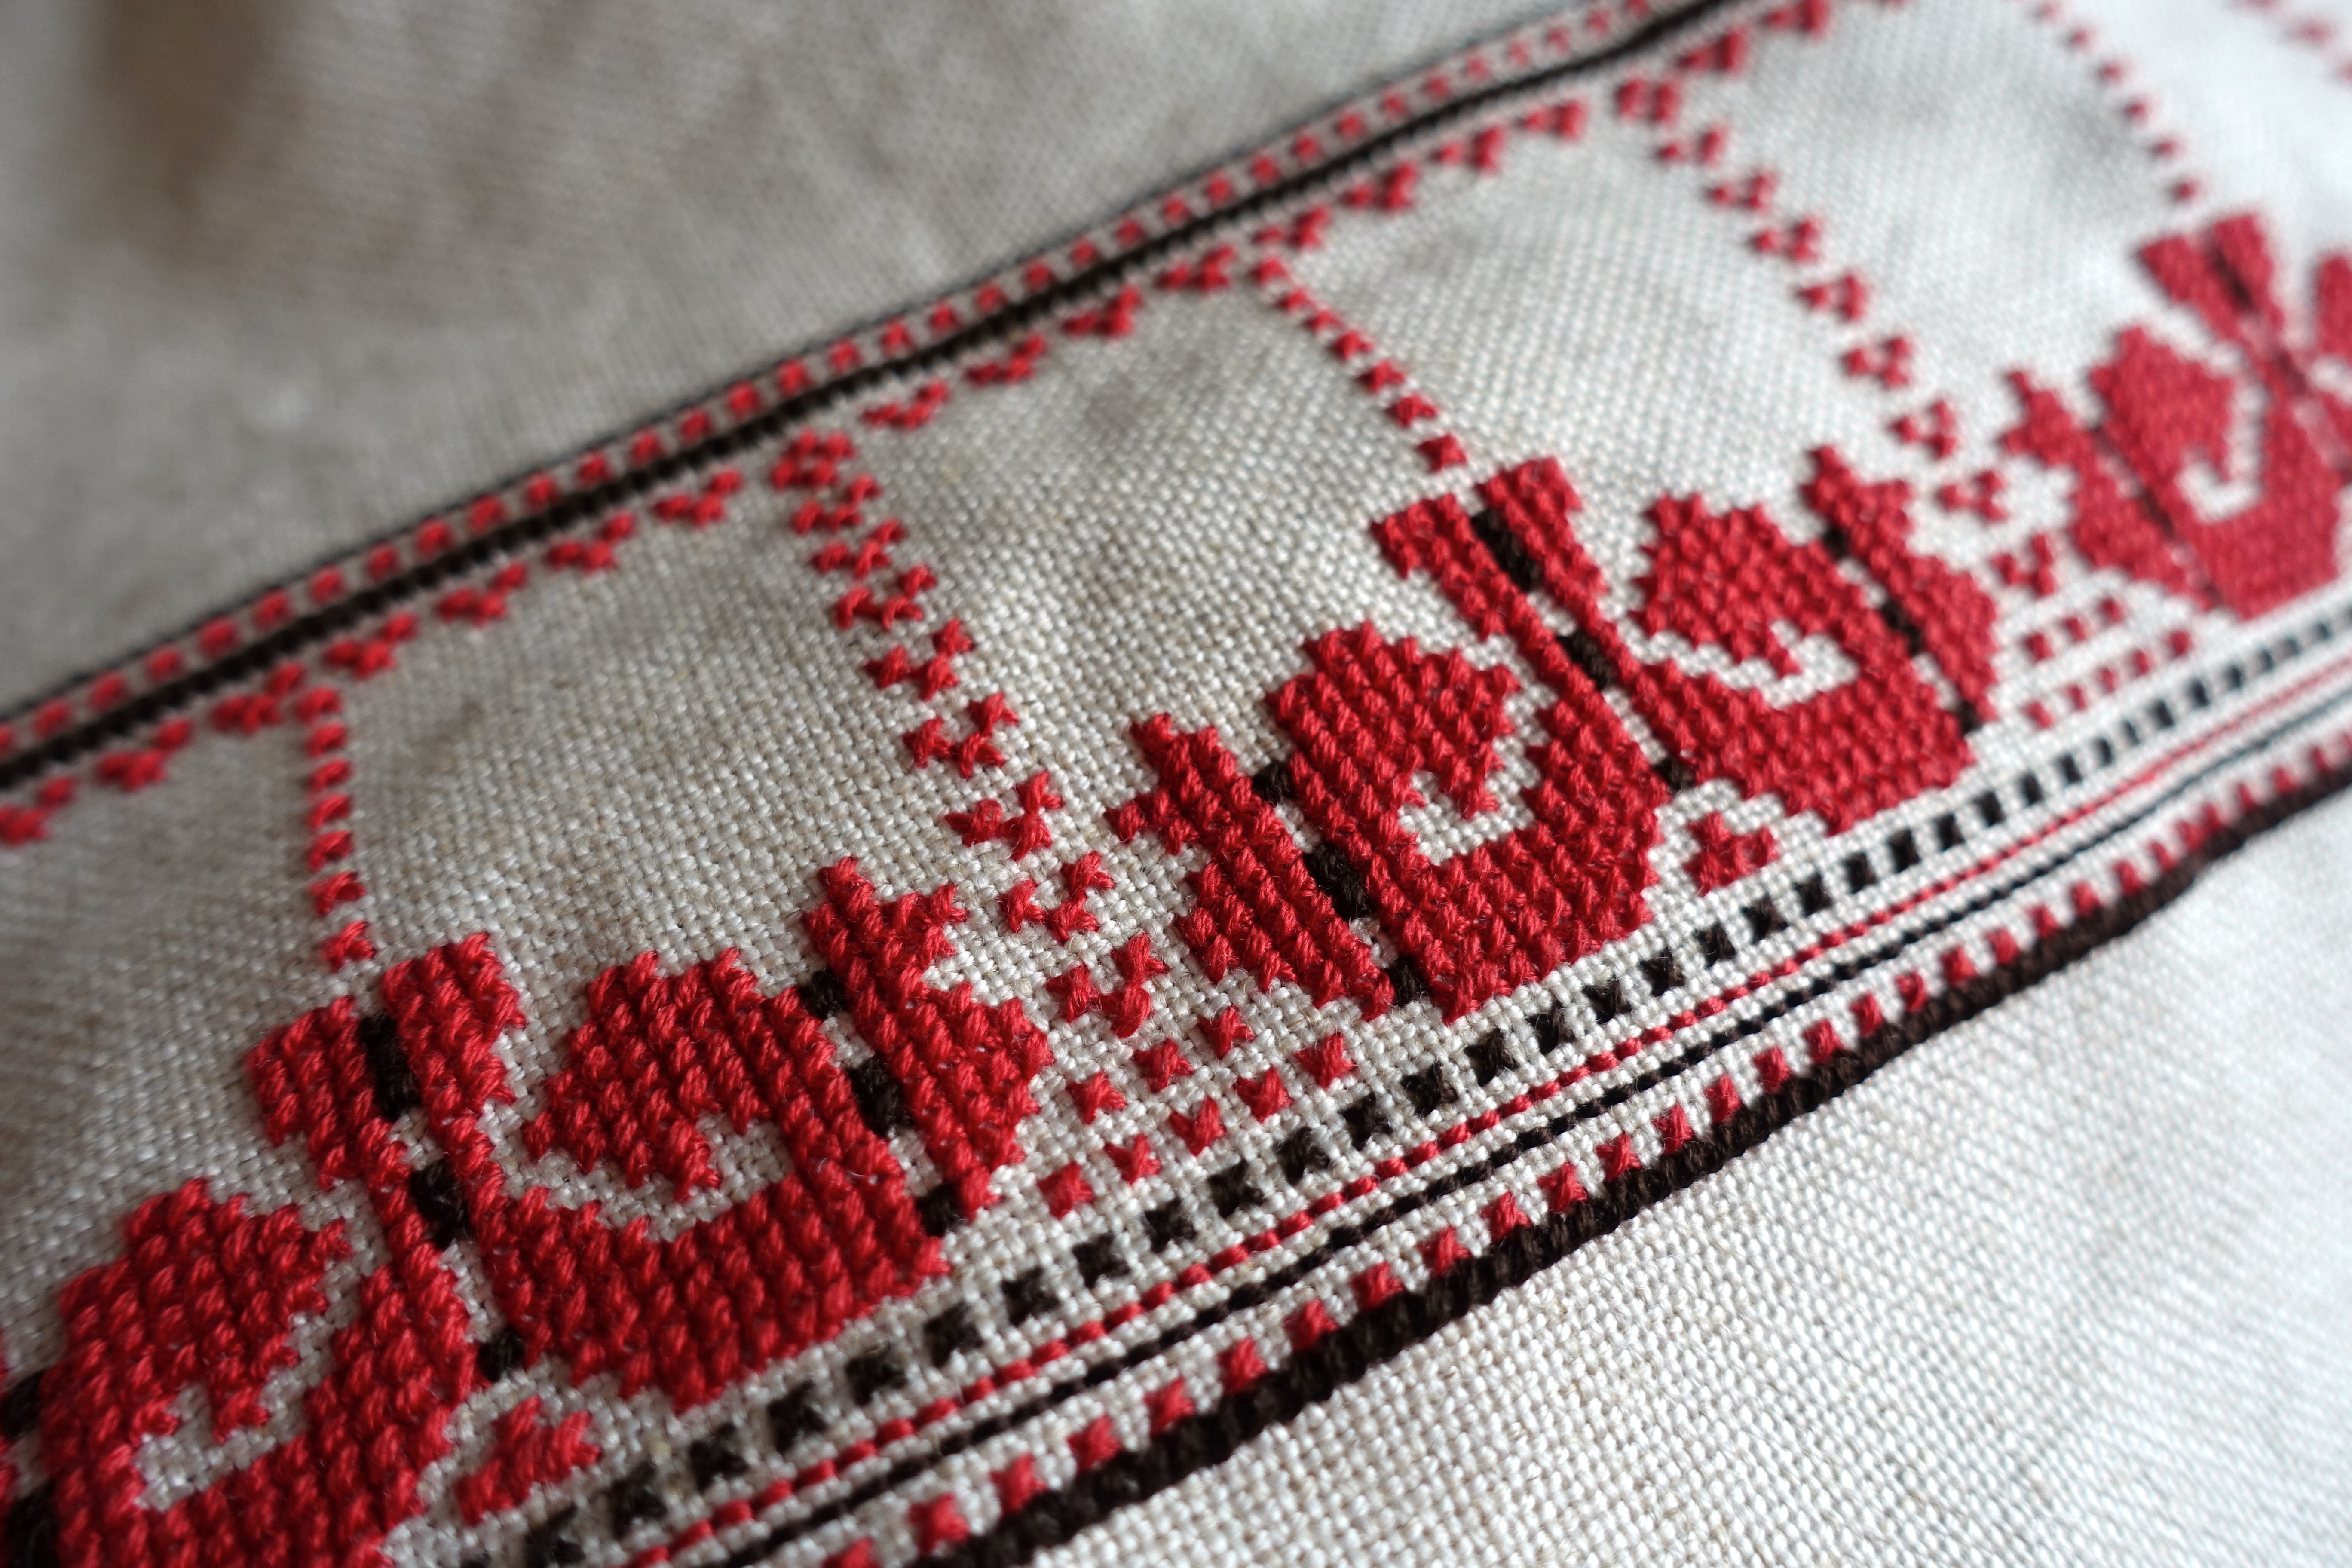
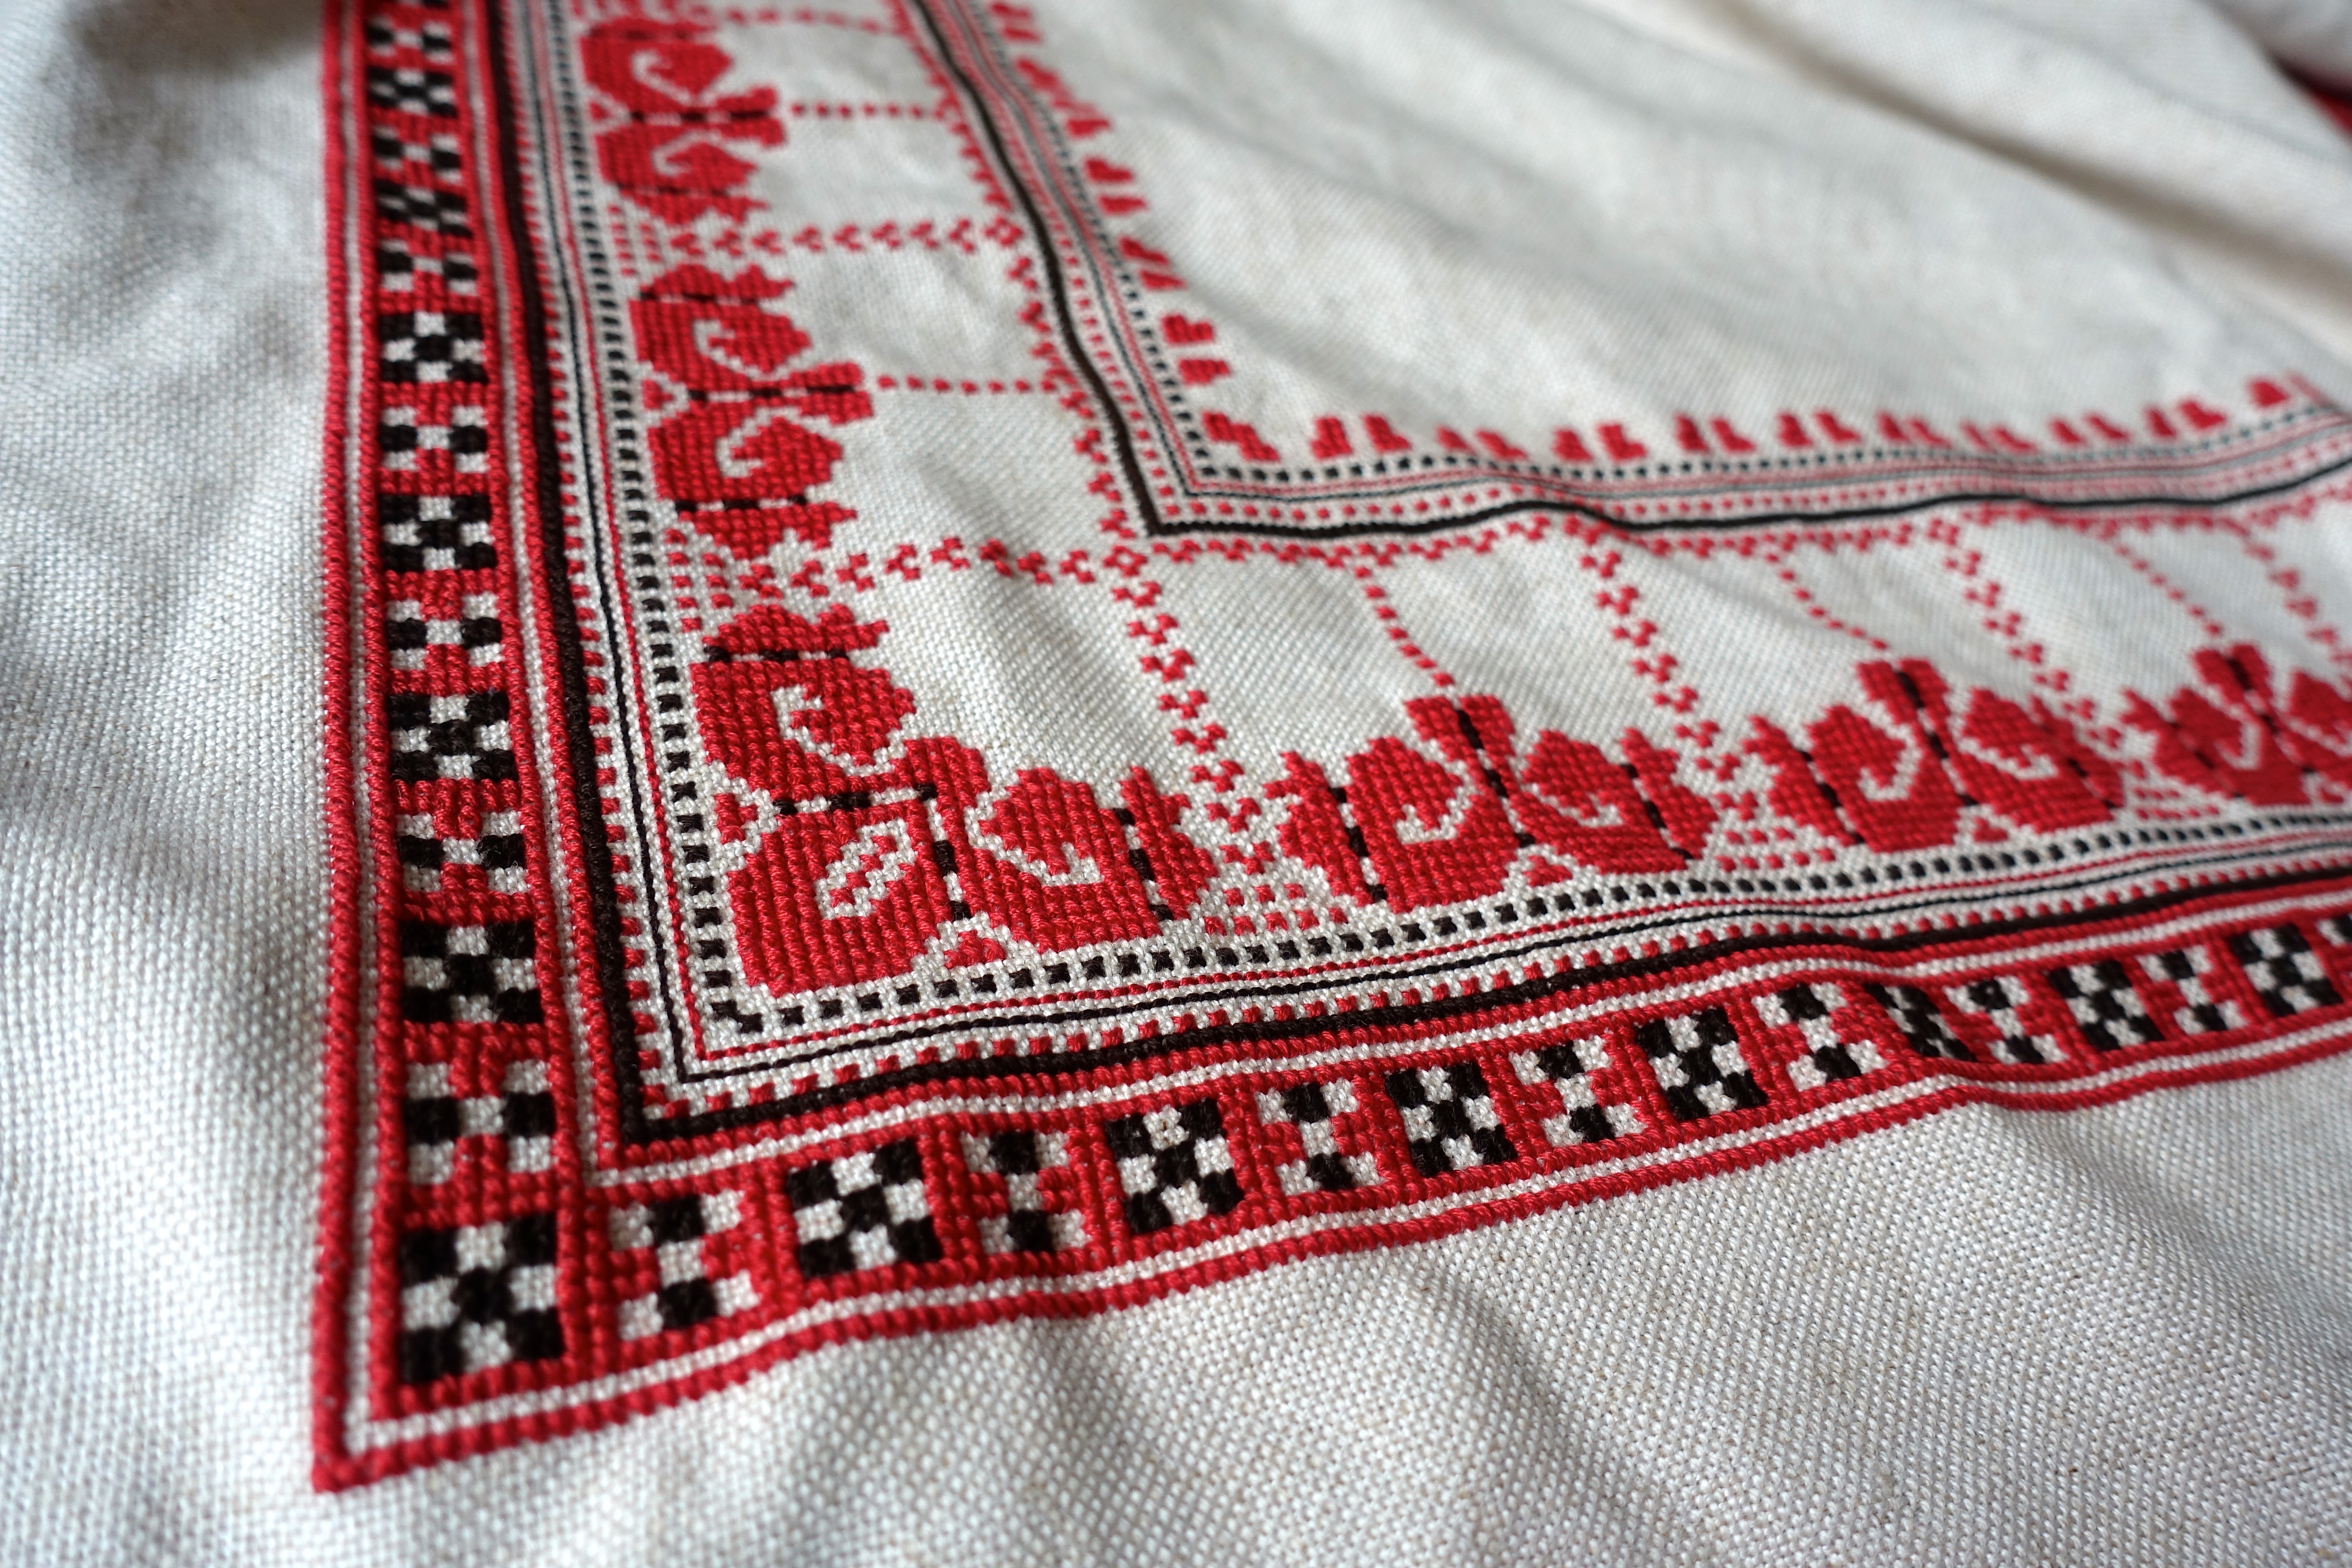
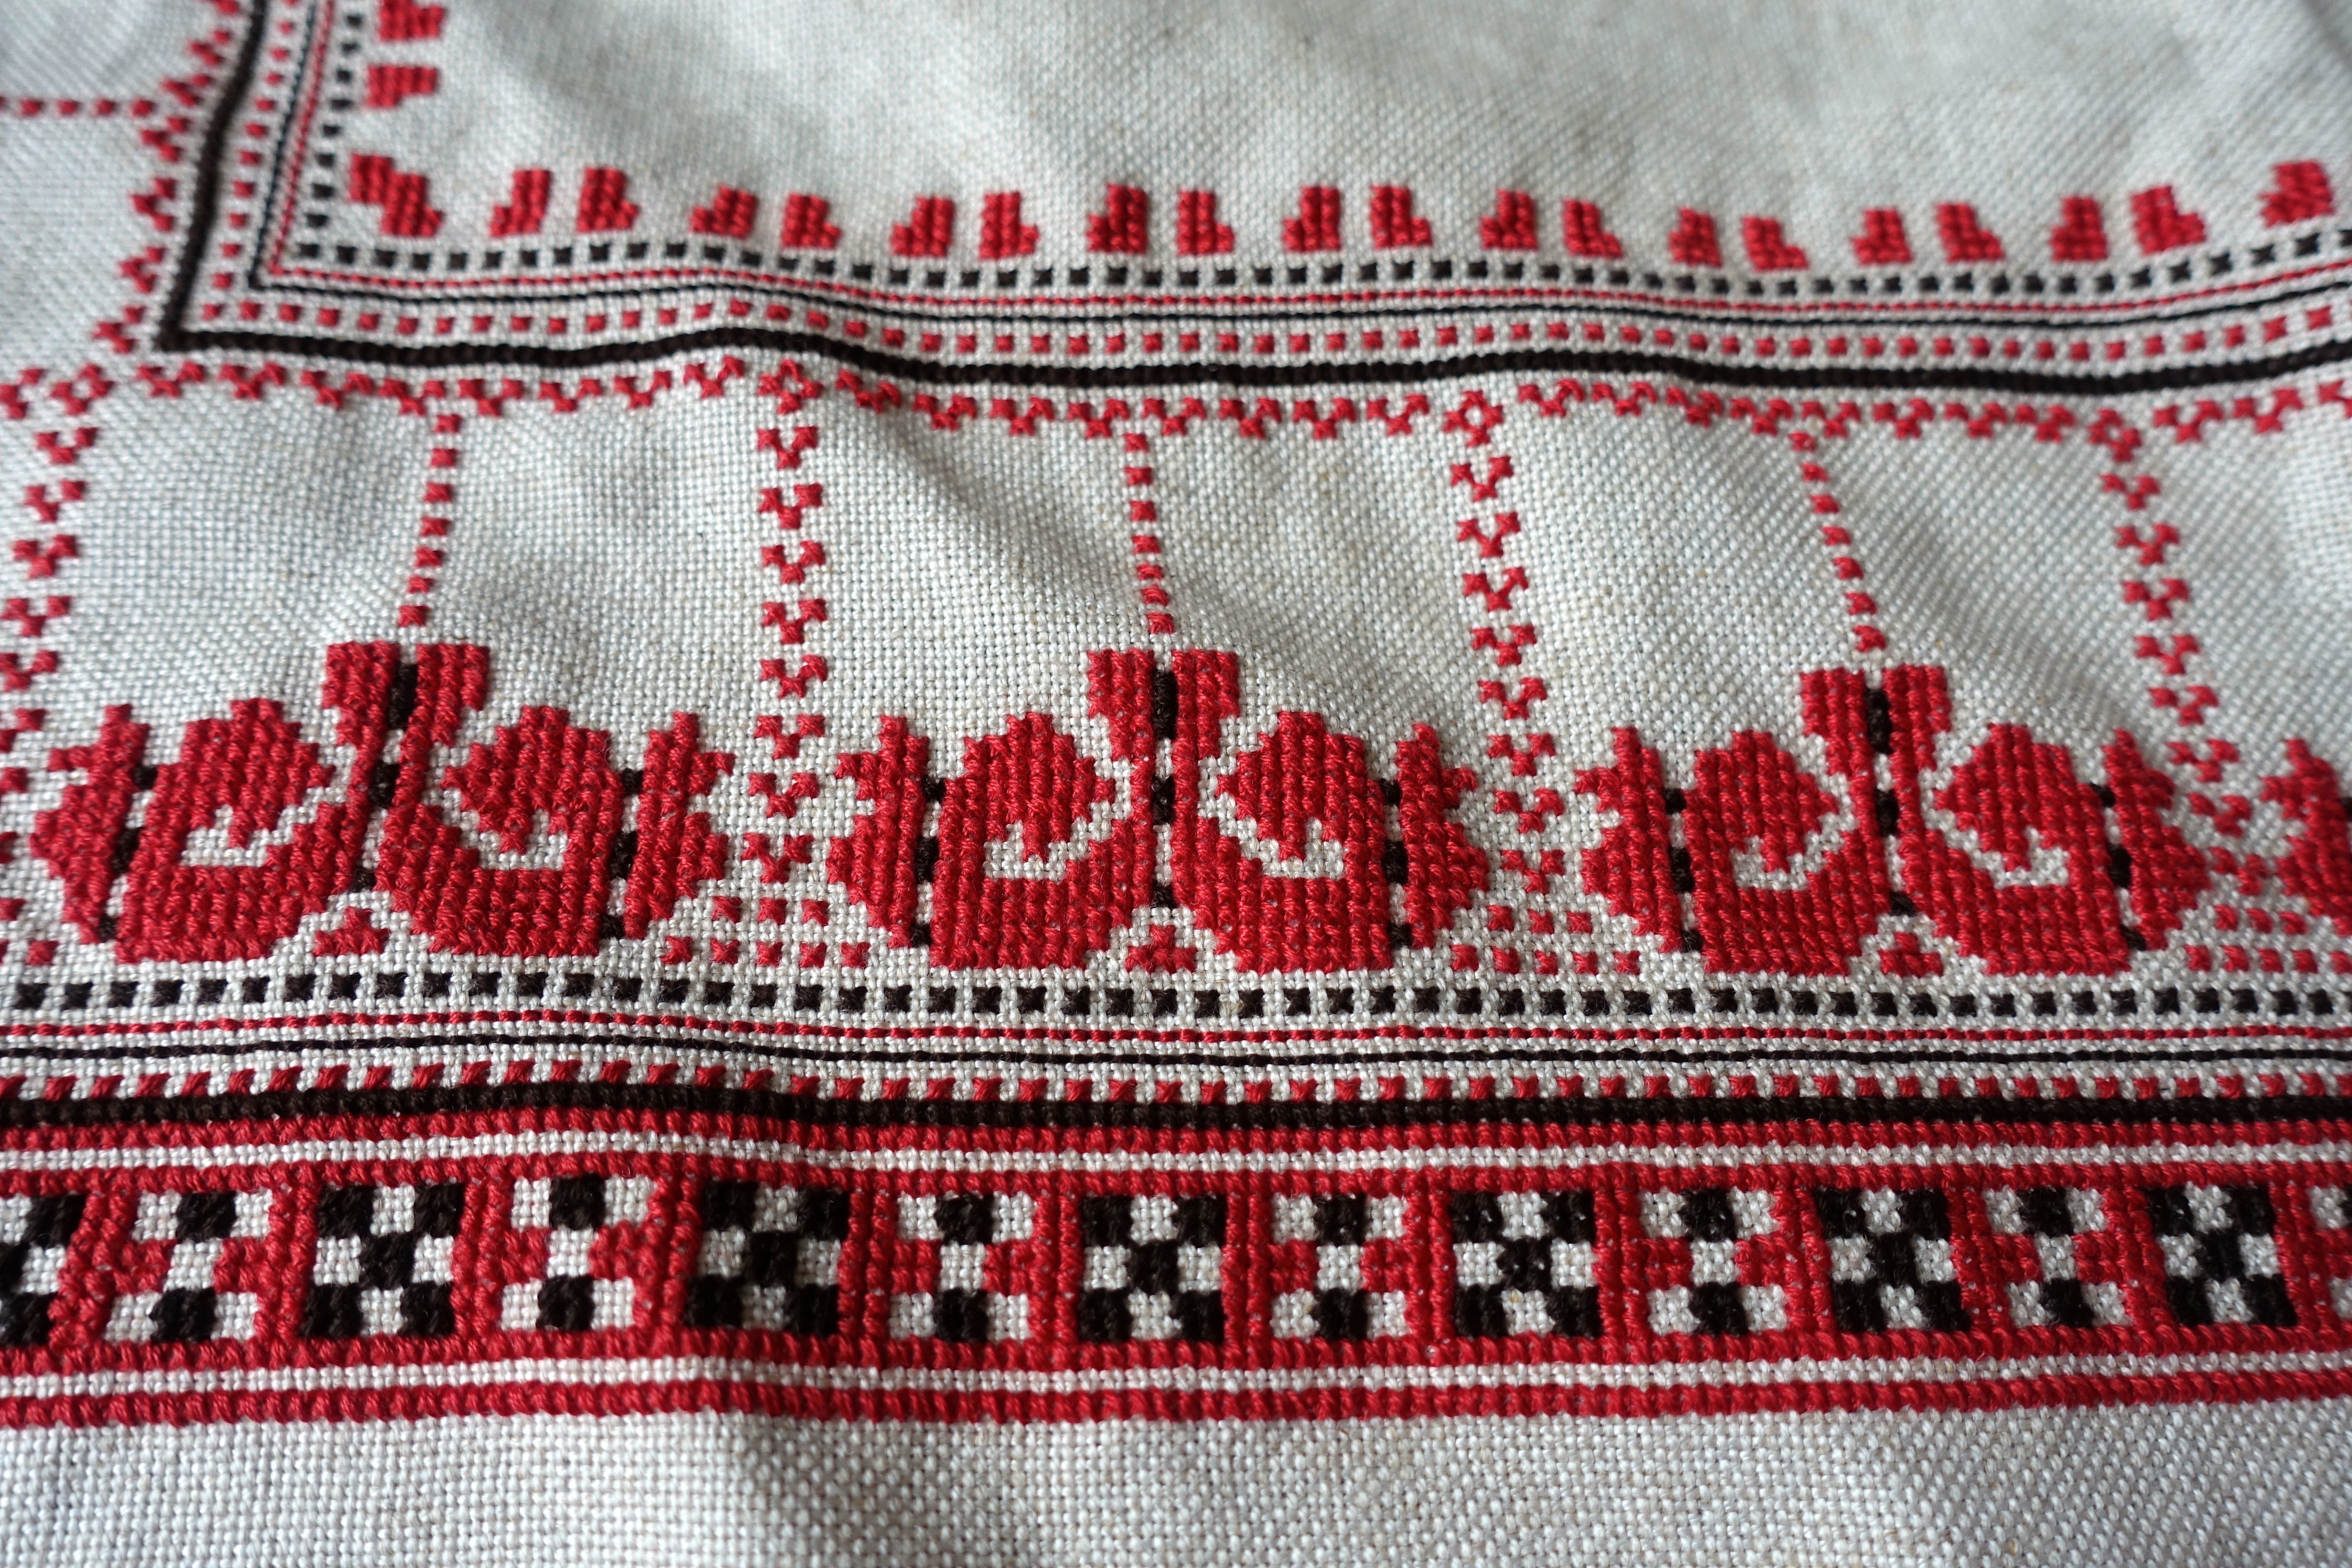
На двох майстеркласах, вчилися пряму лічильну гладь у формі оберегового взору із Волині 11 учасниць українського і австралійського походжень. За кожну хвилювалася – чи вдастся, чи сподобається, чи задовольнить? Кожна мене втішила! Ділюся відгуками деяких в низу. А й ще подивіться фотографії – які усмішки, яка увага, яке задоволення. Що мені найбільше сподобалося – коли в кінці вишивали стоячи! Це й я. Я це добре знаю! Деякі учасниці продовжили вишивати наш візерунок вдома, ділилися фотографіями і зовнішнього і зворотного виглядів (бабця Зіна всміхається з небес), висилали запити, збігали що другого дня в магазин придбати ще ниток, радилися про полотно, навіть одній відібрали ножитці на литовищі, коли несла з собою вишивку на перельот до Сіднею! Є охота вишивати обереги і висилати на фронт.

Мети цього проєкту прості до складної ситуації – в англомовному середовищі, на далекому континенті ділитися українською культурою у виді її прекрасної і виточненої вишивки (мені така велика честь це робити, що розчулює); збирати кошти на пожертву – цими коштами ми підтримали зусилля Фонду Притули щодо тактичної медицини prytulafoundation.org/help-army/direction/taktichna-mediczina; і, надіюся, своїми ділами дати знати українцям в Україні, що ми підтримуємо Вас і душевно стоїмо з Вами. Все присвячене Україні! Також значно розчулює.

Не уявляю ці майстеркласи без Наталі Орел, і в практичному сенсі би не відбулися без неї. Наталя скинула ідею мені в голову і дозволила до неї повернутися через довгий час. Дякую дуже, Наталю! Мене у творчій справі з вишивкою підтримують мої чудові брати і чудові подруги – також дякую! Всім учасницям, які прибули з довірою, що я ї’м покажу щось цікаве – дякую!

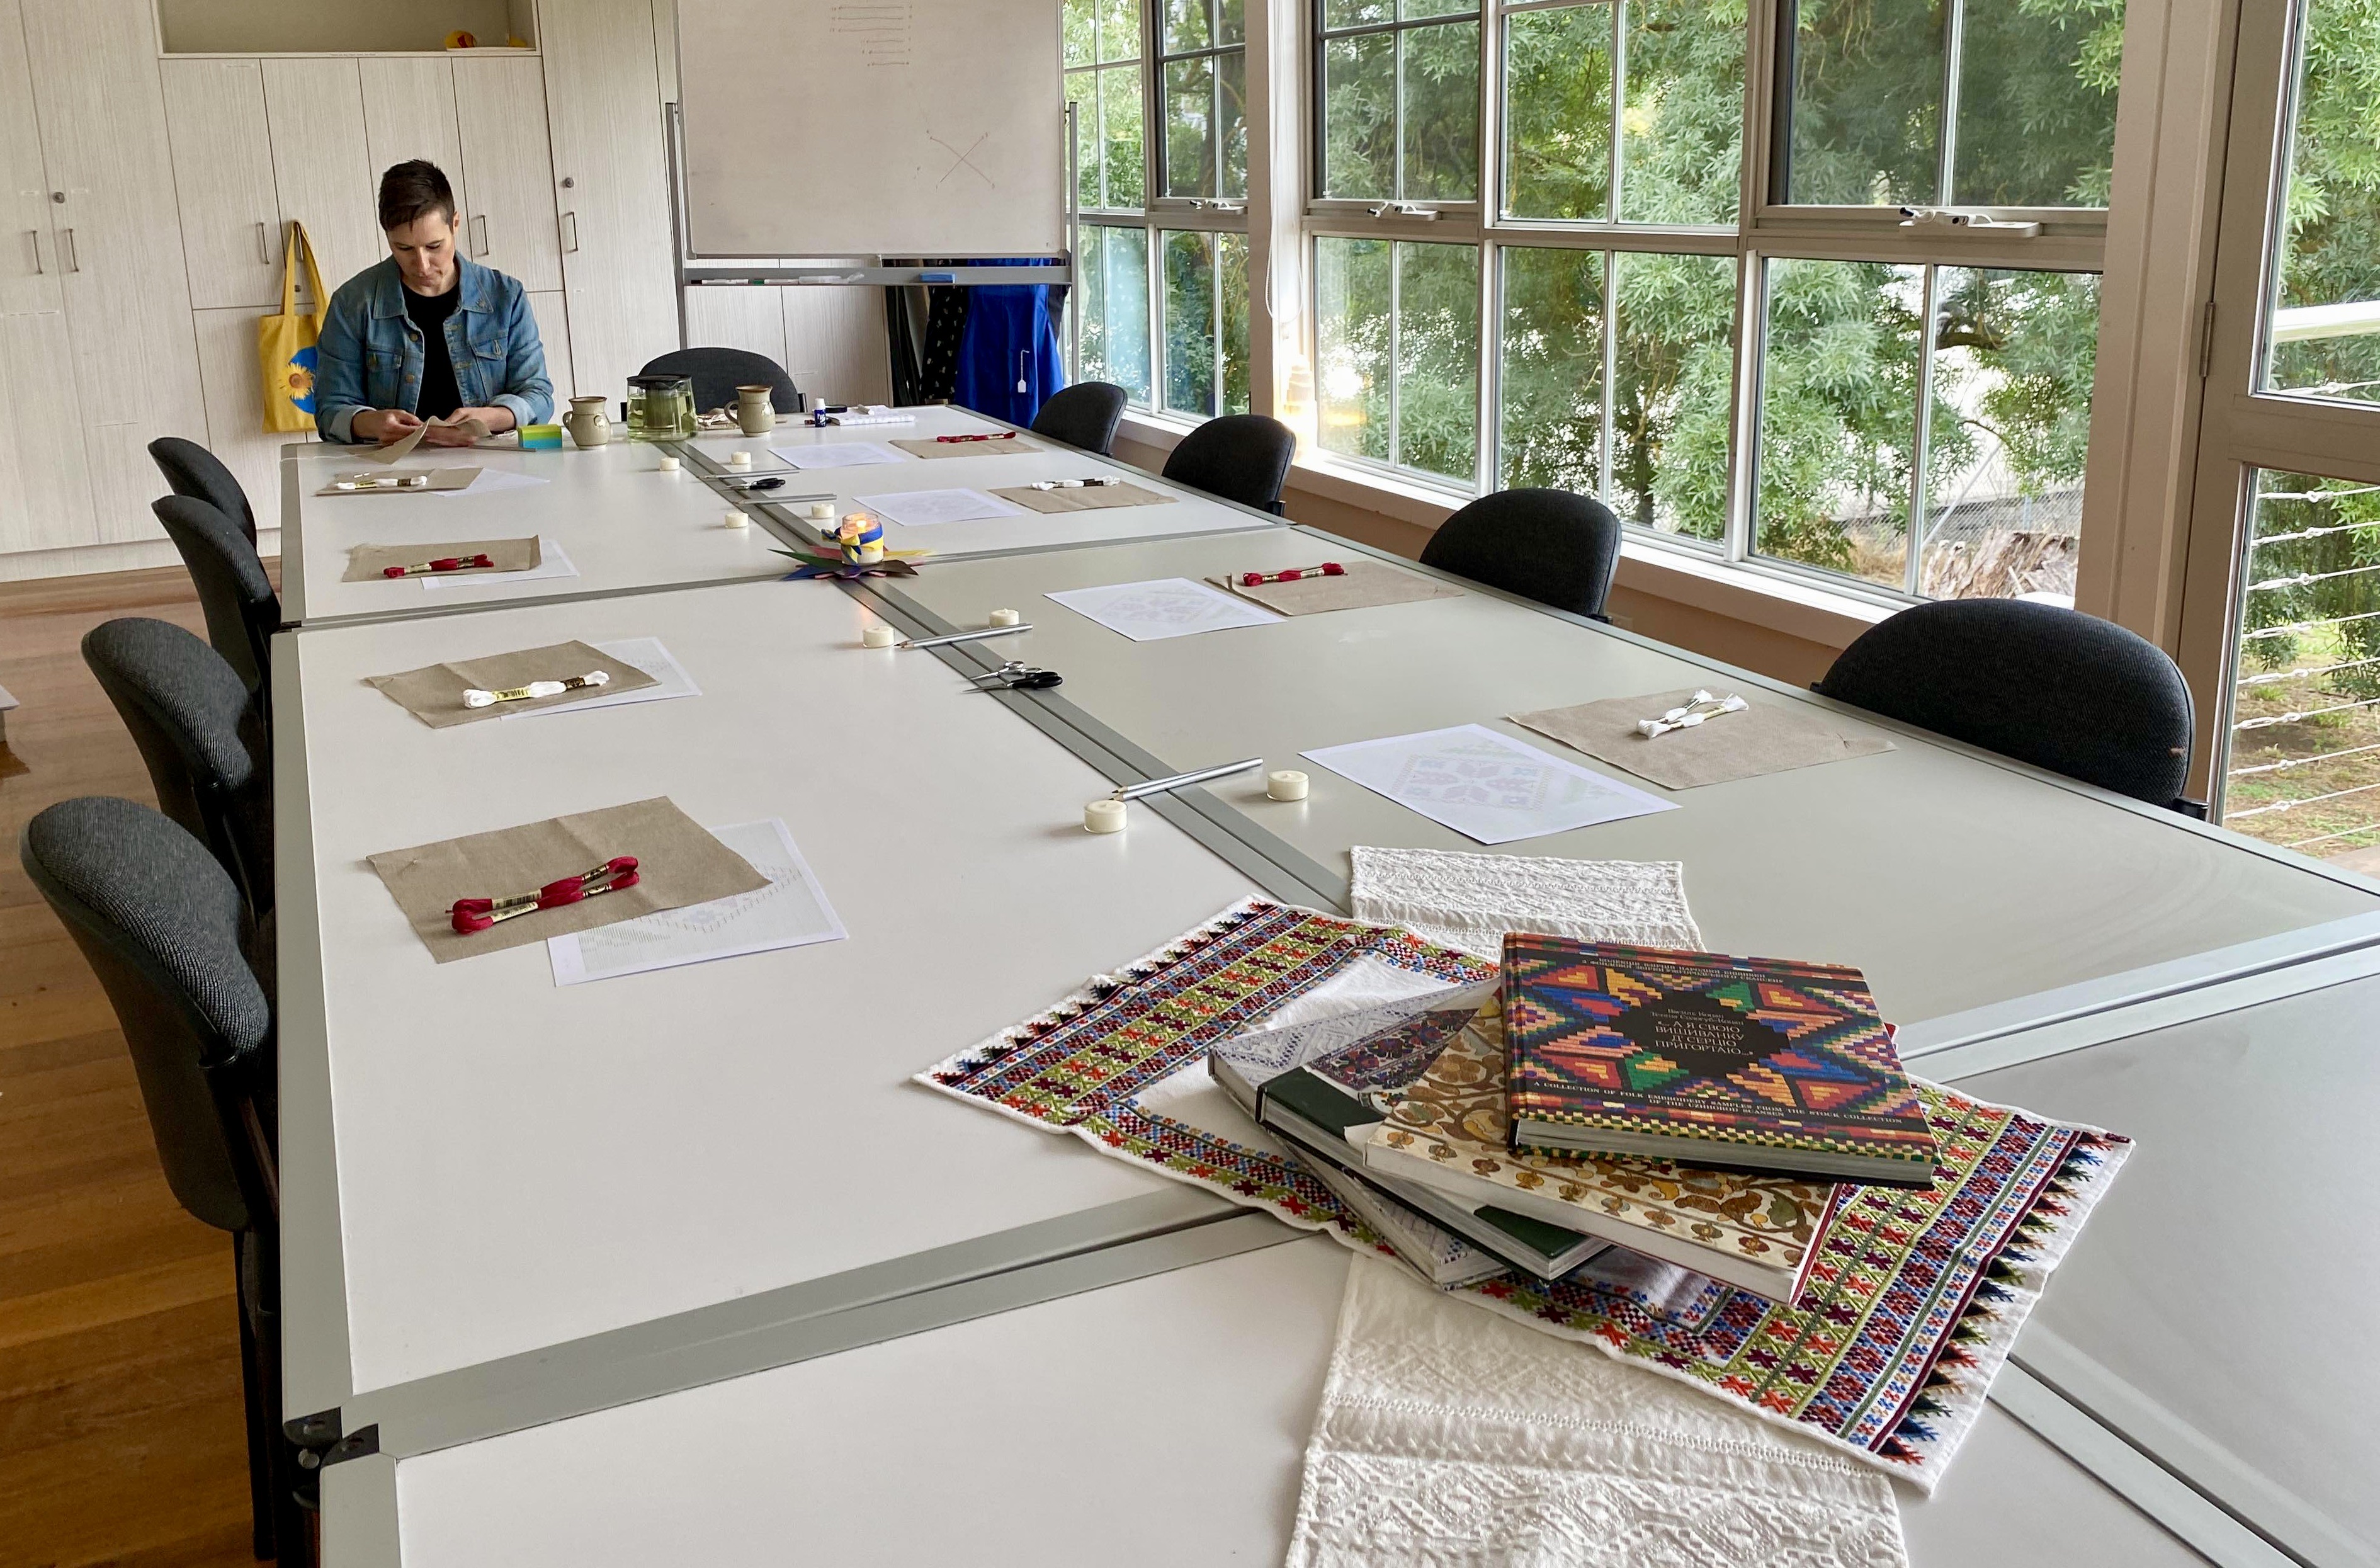
Особлива подяка Living and Learning Nillumbik Eltham і Ivanhoe Library and Cultural Hub за гарні, спокійні і творчі приміщення.

Натхення та ідею щодо цього майстеркласу мені показалися в соцмережах, у творчості, проєктах і зусиллях українських майстринь і майстра-знавця. Ділюся з вами:

  • пані Оксана Поступак і 100% захоплюючий проєкт #сорочкадлязахисника www.facebook.com/hashtag/сорочкадлязахисника/, в рамках якого я вперше побачила цей взір – дякую за таке велике натхення!
  • пані Тетяна Бабич, київська майстриня, і пан Юрій Мельничук, київський майстер і знавець української вишивки/українського костюму, на кого сторінках побачила взір у вишиті формі; а далі пан Мельничук ще відповів з інформацією про нього – дяукю що поділилися!
  • пані Ірина Зайцева – завжди крута і надихаюча, справді провідна особа у світі української вишивки – яка поділилася цим відео www.facebook.com/vihilasy/videos/1259785254508590. Не тре пояснювати як воно вплинуло. Дякую вам, бабцю Ірцю, що Ви є!

Якщо бажаєте дізнатися першими про майбутні майстеркласи вишики, будь ласка підпешіться на повідомлення від Наталі на сторінці createforukraine.wordpress.com. А на поки що, ділюся з Вами новим чеслом на наступний клас: FUNDRAISING.

Творити і ділитися – глибока насолода. Такий вид волонтерства надає найвищу нагороду яку собі могла уявити. Чекаю нагоди далі продовжувати цей спільний проєкт в Новому році!! До тоді!

Hello friends!

Slava Ukrajini!

I’m writing some impressions about our first masterclasses in Ukrainian embroidery in Melbourne, hosted in collaboration between this wee enthusiast and Natalia of Create for Ukraine Project createforukraine.wordpress.com/.

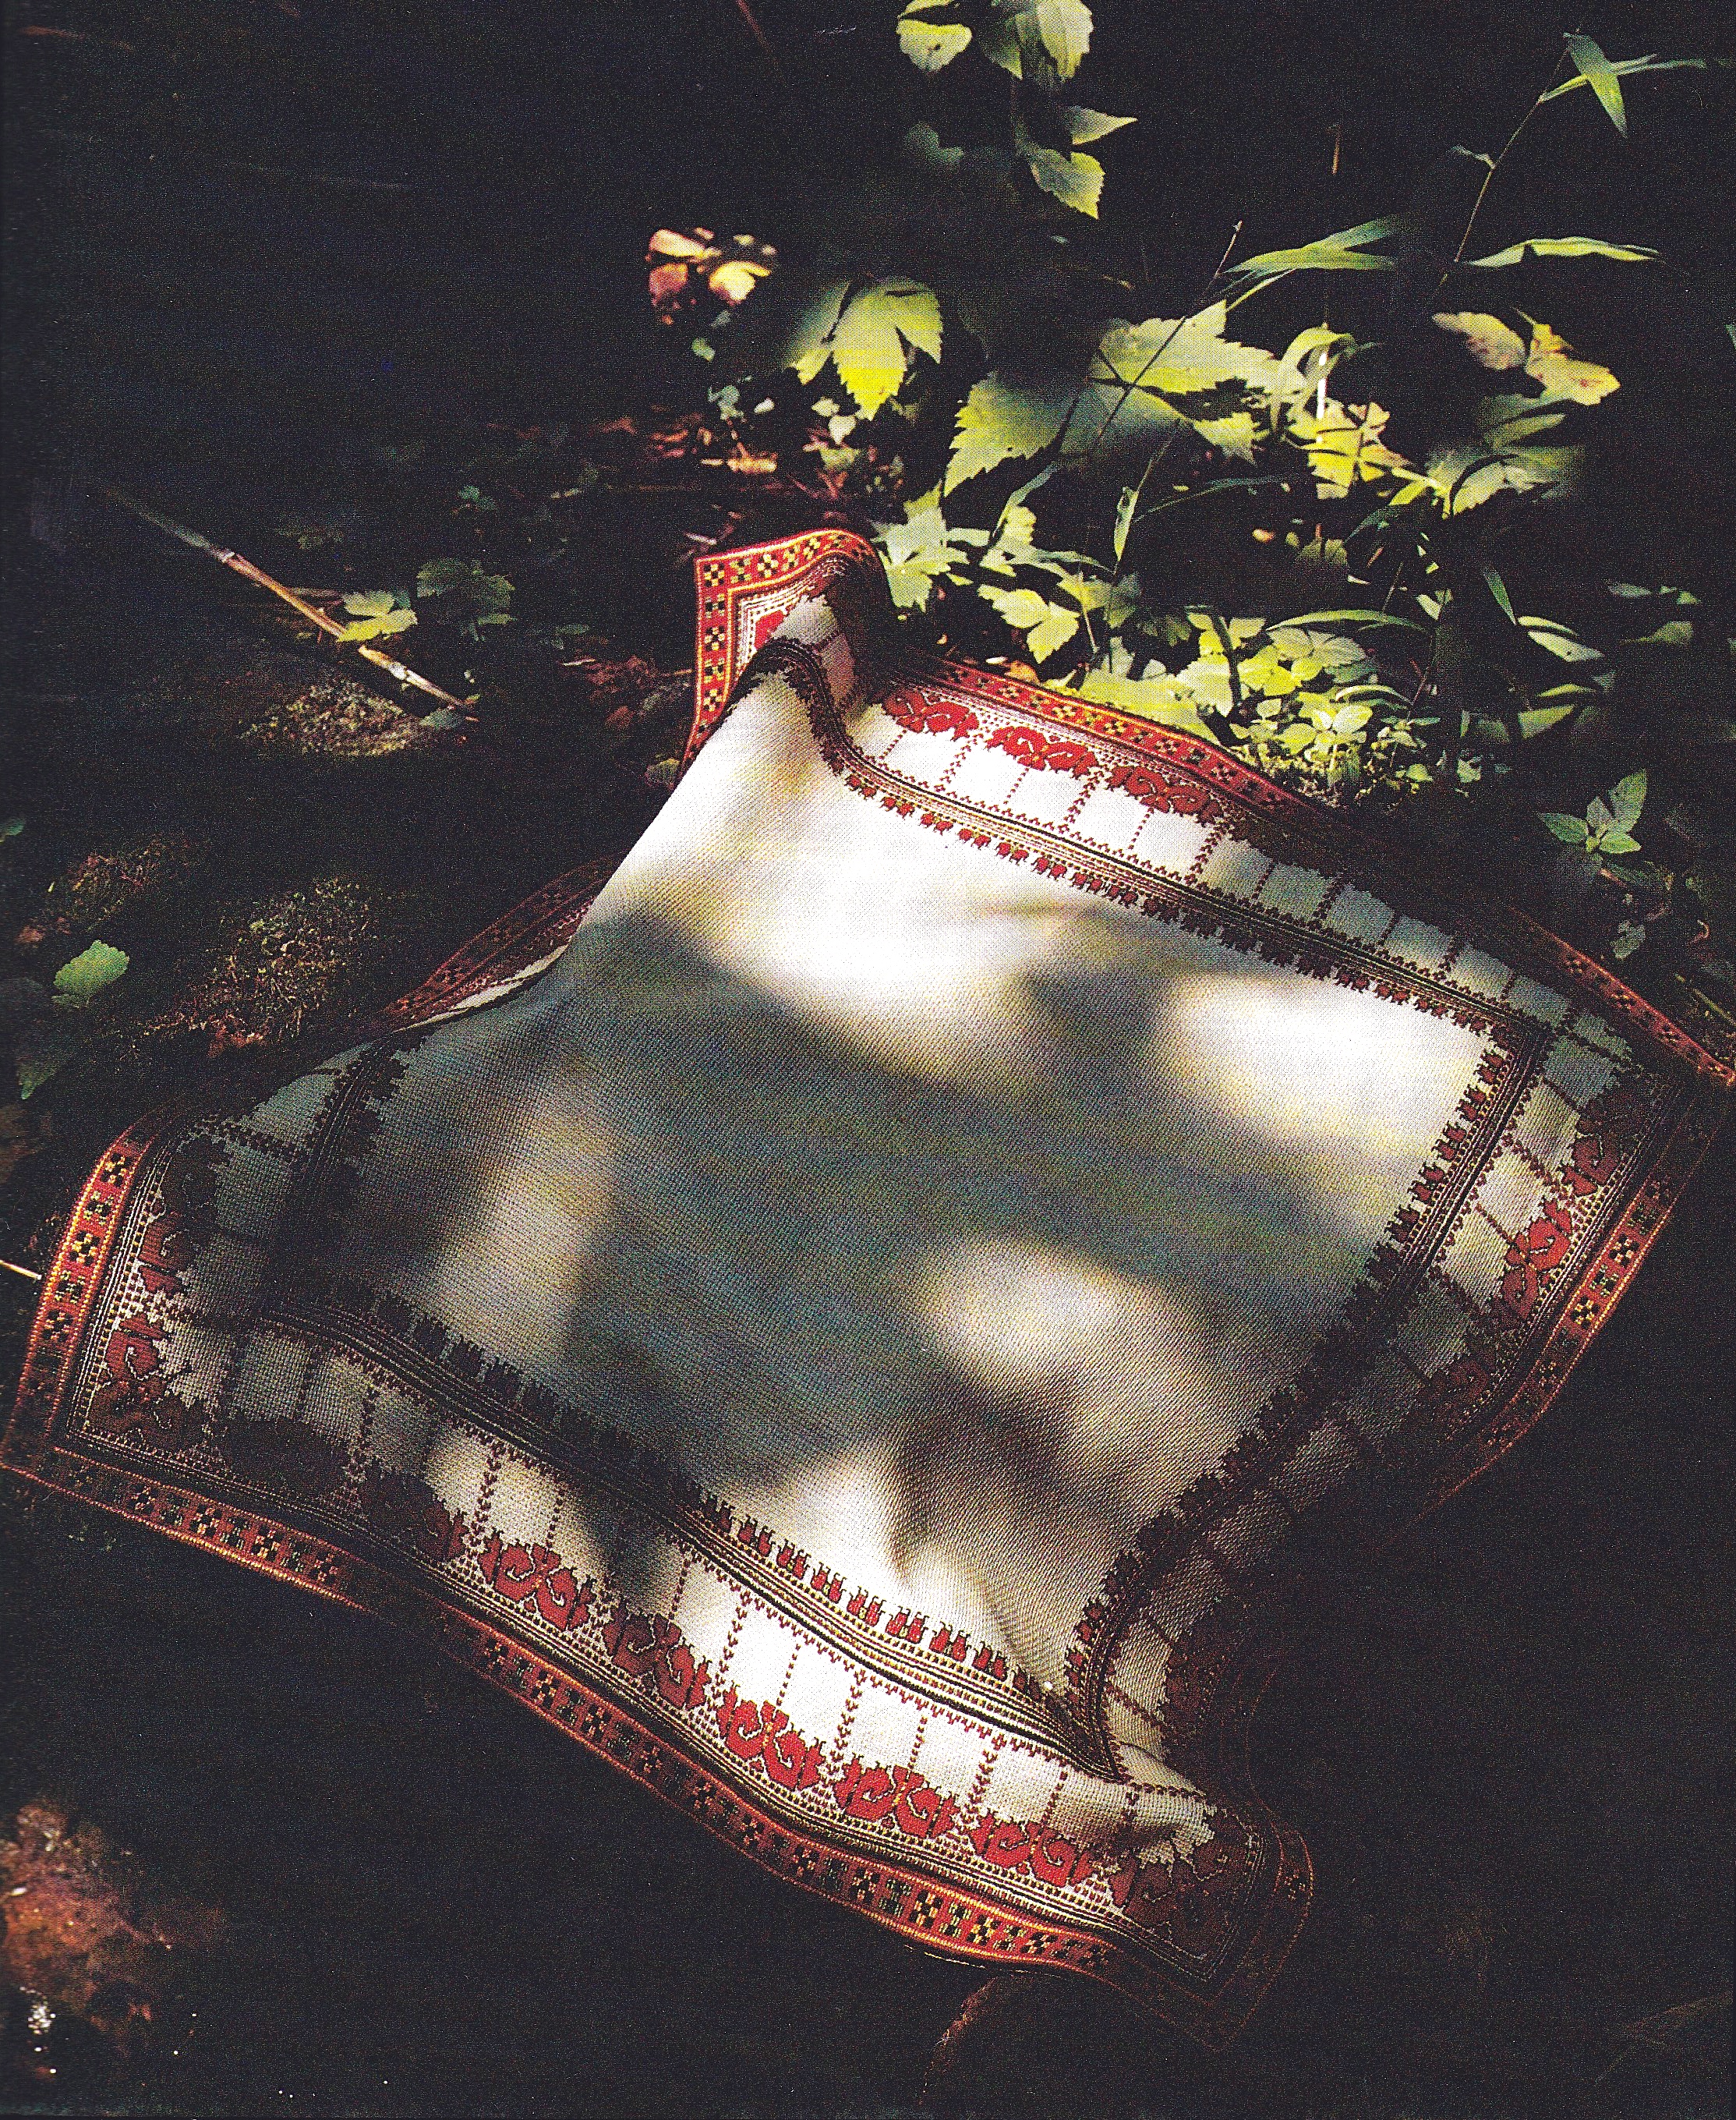
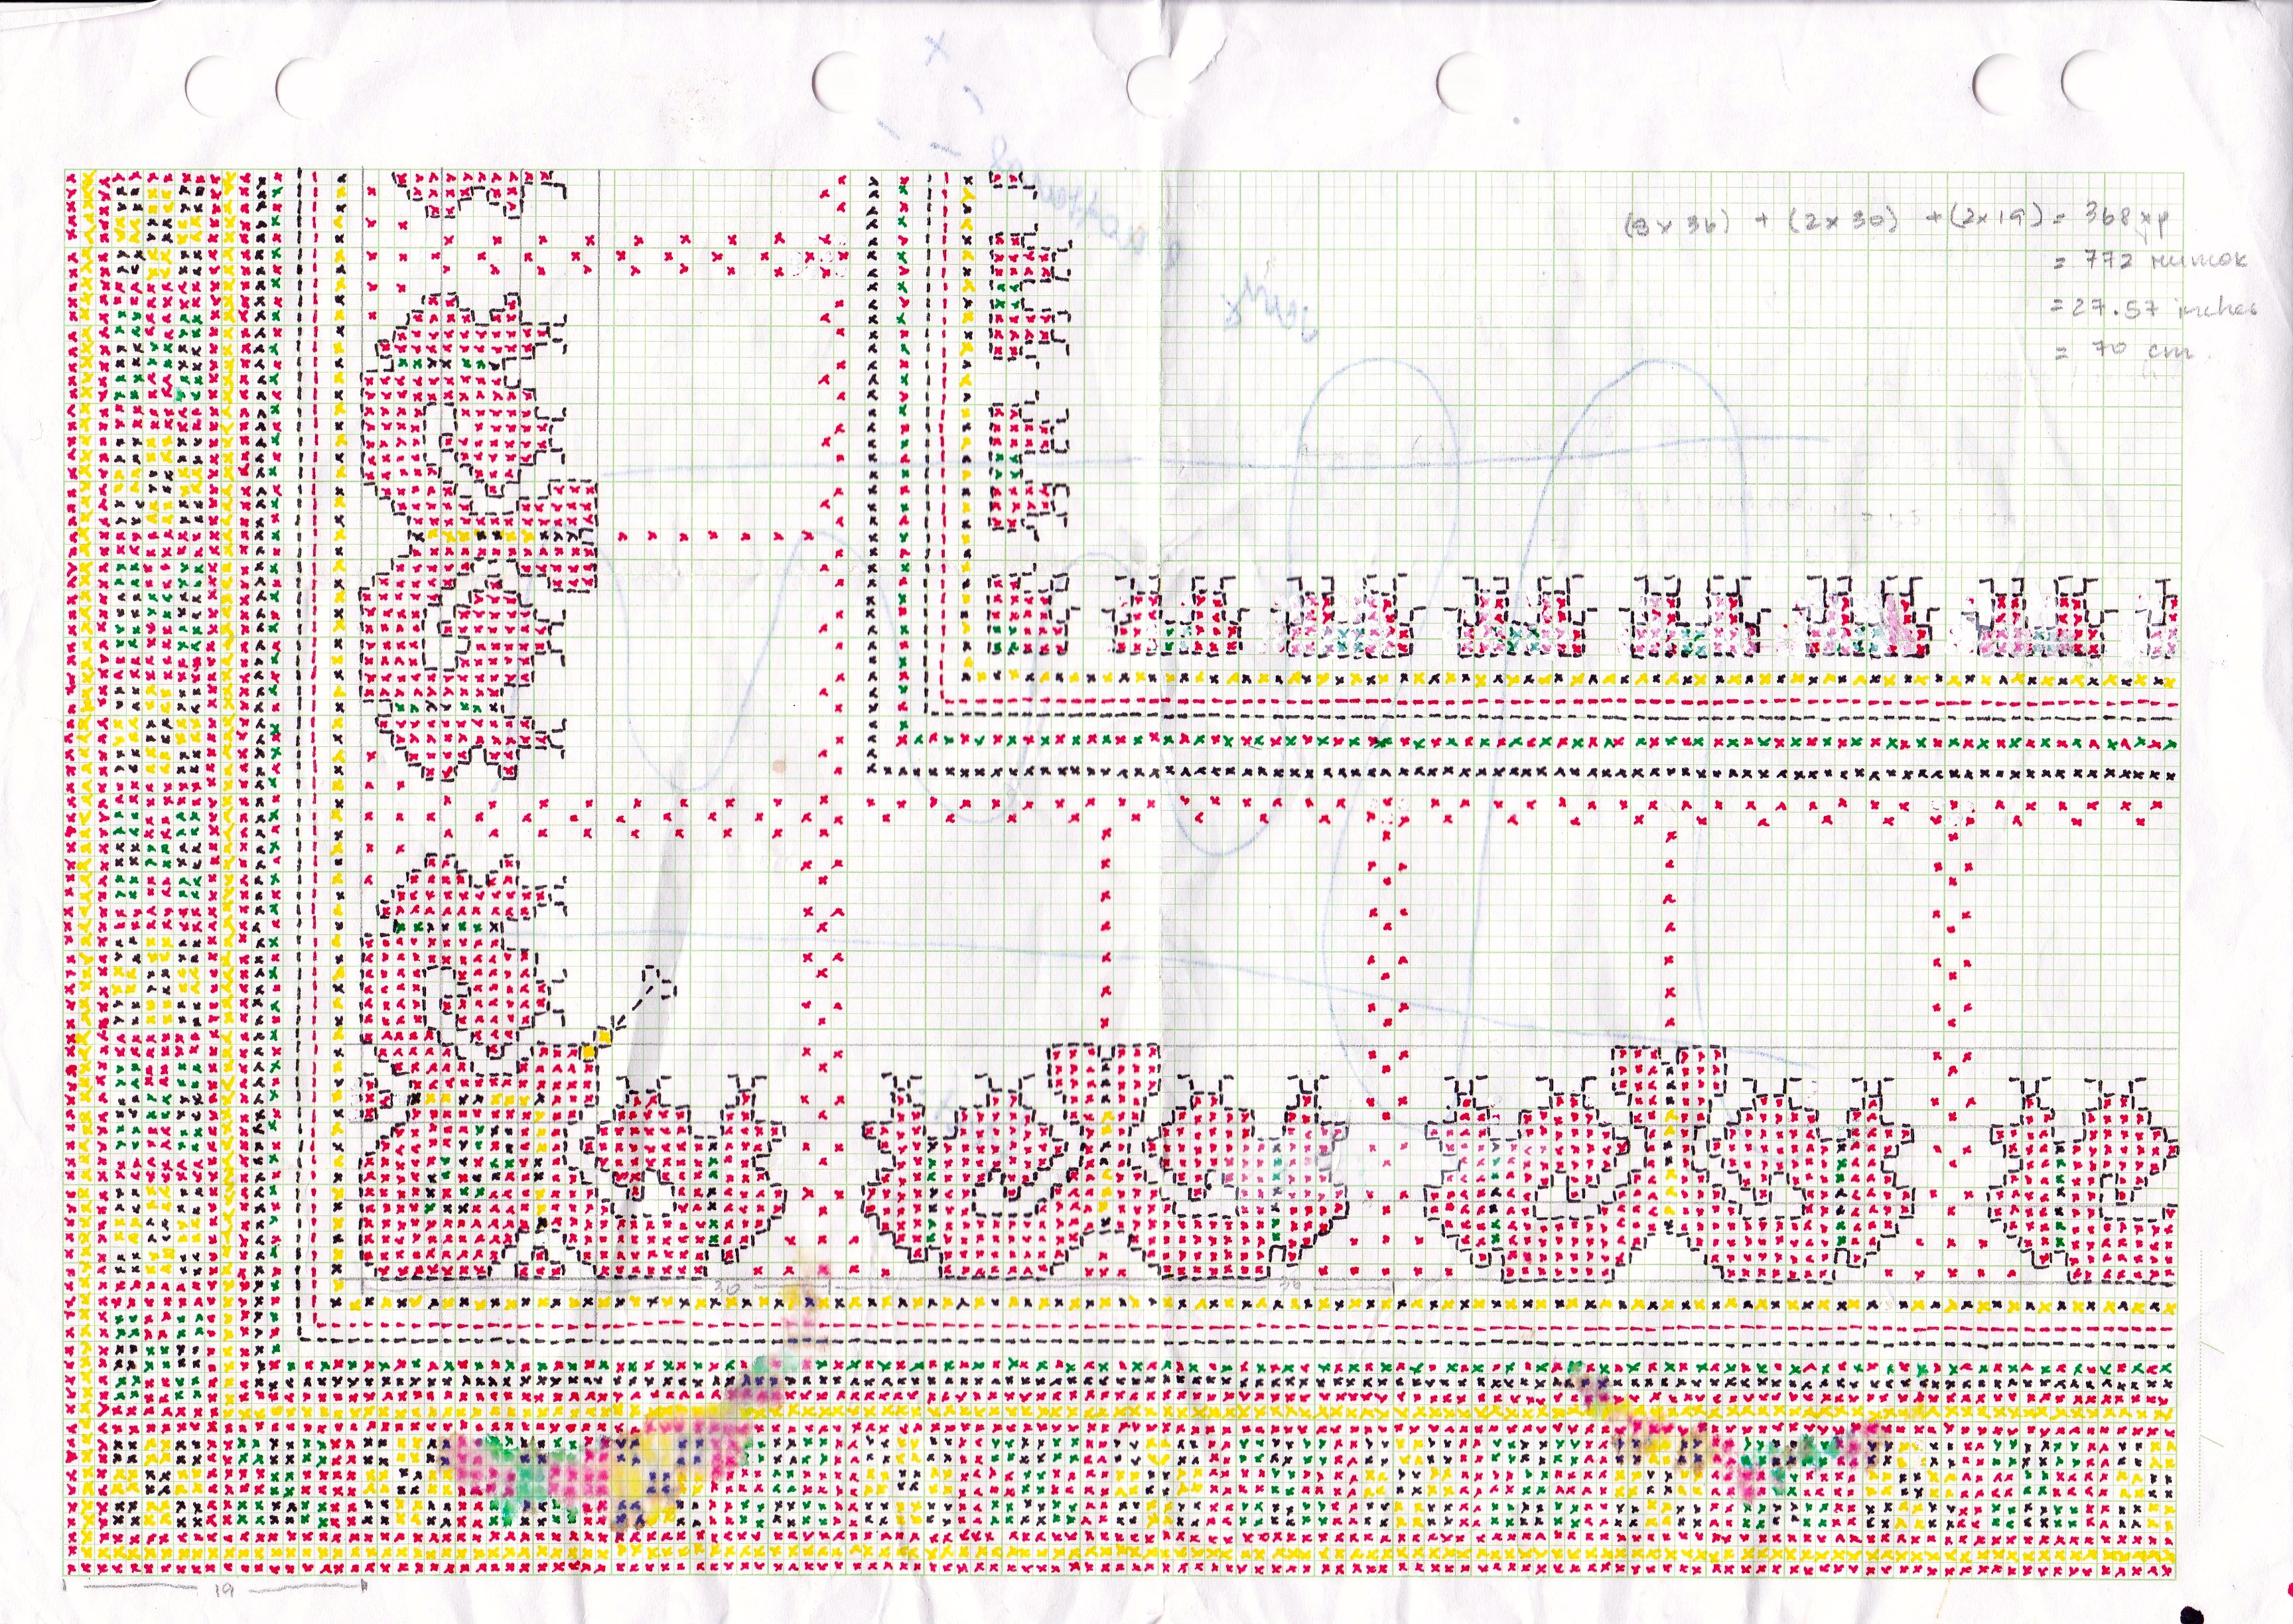
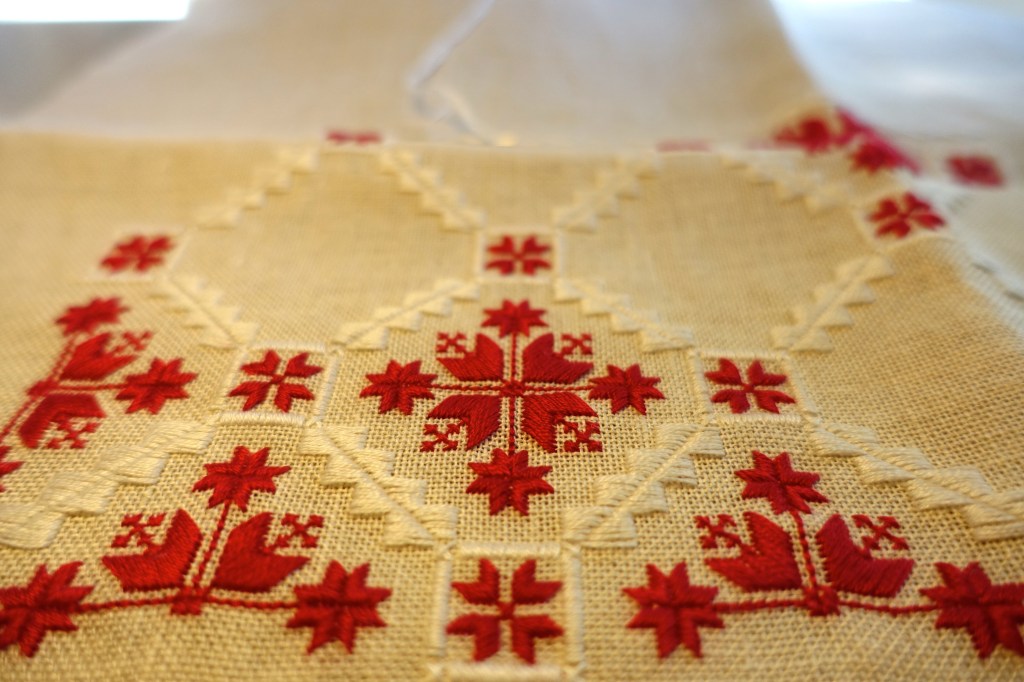
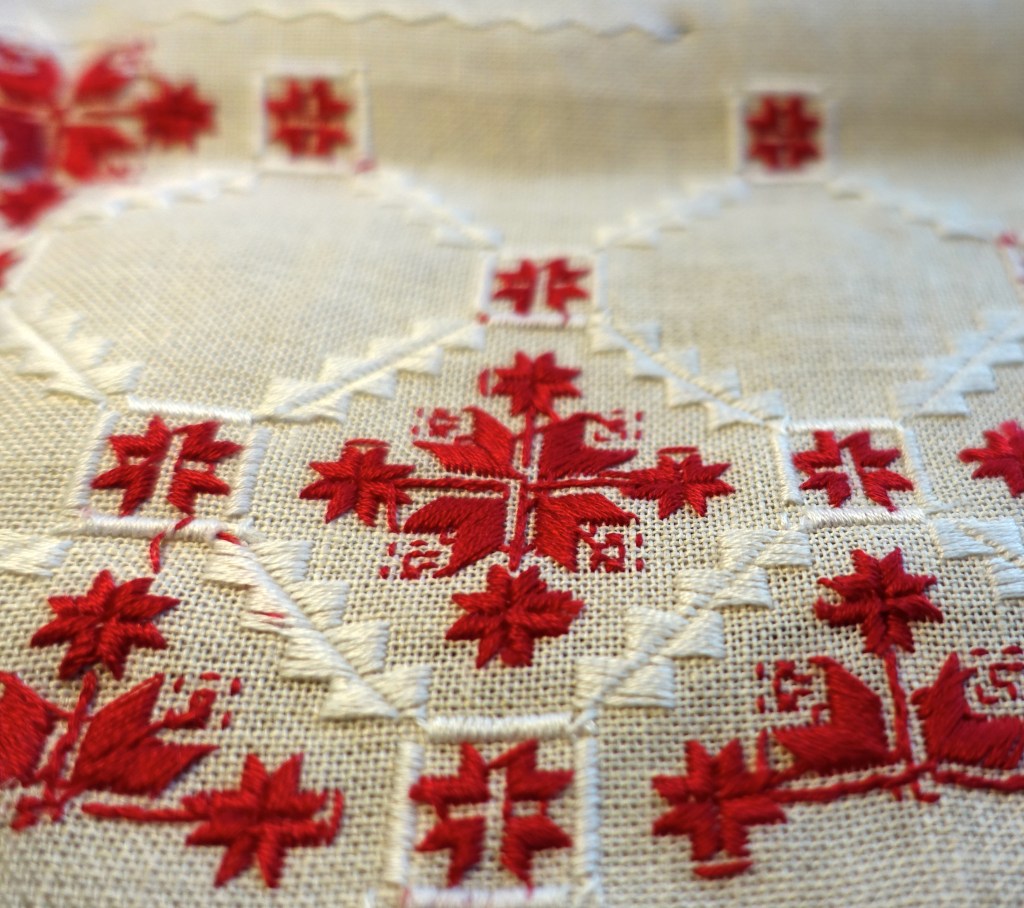
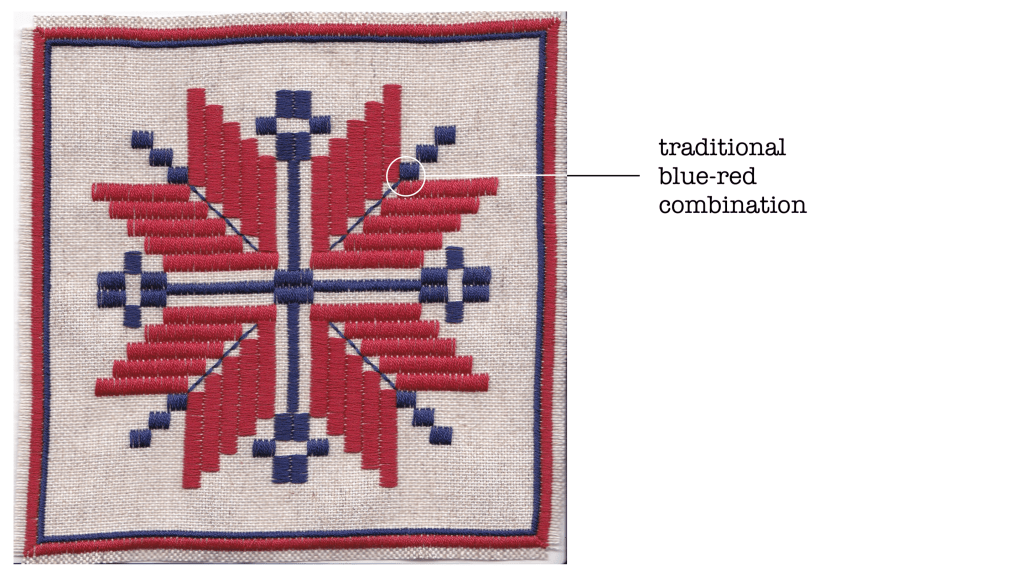
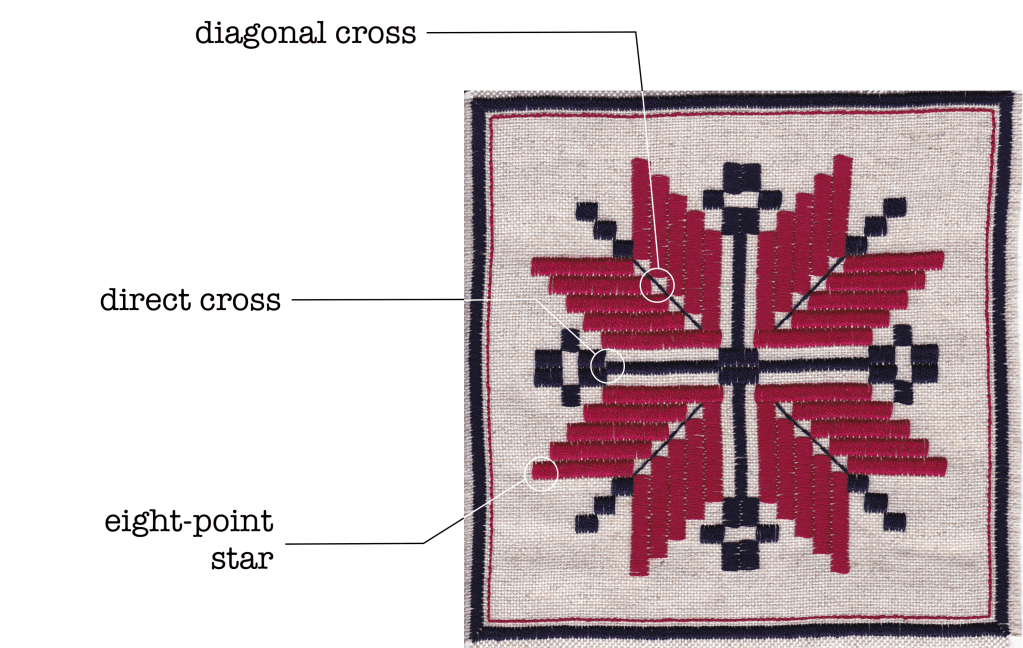
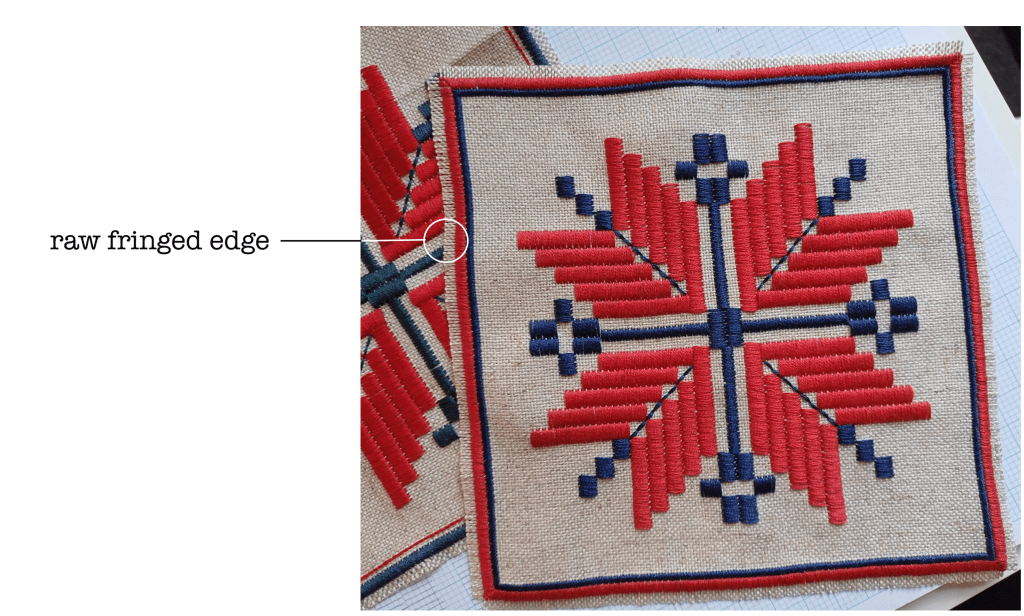
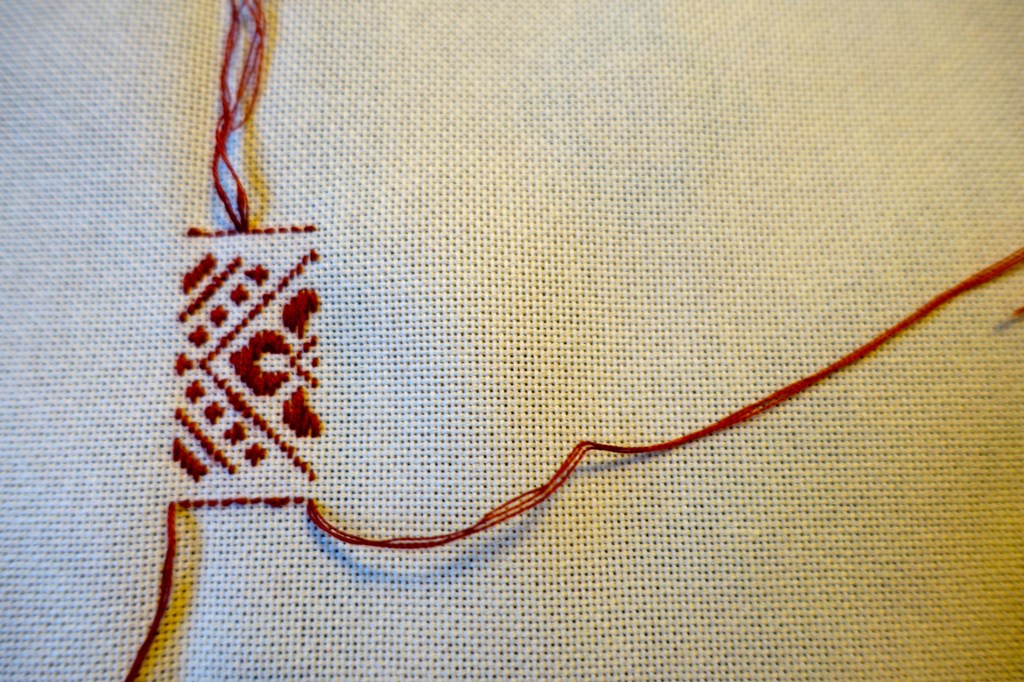
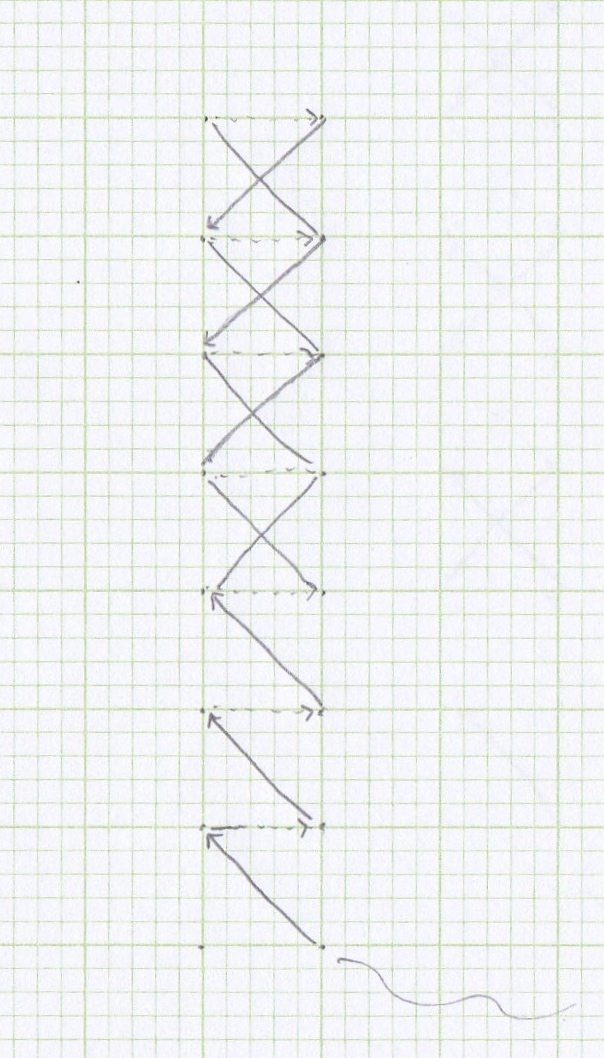
Over two masterclasses, 11 ladies of both Ukrainian and Aussie backgrounds learned direct/parallel satin stitch in the form of a protective design from the Volyn’ region of Ukraine.  I was anxious for every one of them – will it click, will she like it, will it be rewarding?  Every single one of them brought me the reward!  I’m sharing the comments of some below.  Also, check out the photos – look at the smiles and the concentration.  What I loved the most – the embroidering standing up at the end.  This is me!  I know this so well!  Some of the participants continued embroidering our design at home, sent photos of the front and reverse appearances (my grandma Zina is smiling down from above), asked questions, went shopping every second day to buy more threads, asked advice on embroidery fabrics and one of them even had her scissors confiscated at airport security, having packed her embroidery on a flight to Sydney! What more, there is a desire to send these embroidered amulets to the front lines in Ukraine.

The goals of this project are simple for a very complex situation – to share Ukrainian culture in the form of it’s beautiful and refined embroidery in an English-speaking environment, on a far-away continent (it’s such a great honour for me to be doing this, that I’m significantly humbled); to raise funds for donation – with the proceeds from these masterclasses, we have helped the efforts of the Prytula Foundation in the field of tactical medicine prytulafoundation.org/en/help-army/direction/taktichna-mediczina; and, I sincerely hope, to show Ukrainians in Ukraine that we are supporting them and that we stand with them in spirit. This all is devoted to Ukraine! which makes it even more extremely humbling.

I can’t imagine these masterclasses without Natalia Orel and in fact, in a practical sense, they wouldn’t have happened without her.  She planted the idea in my mind and let me return to it a long way down the line. Thank you, Natalia!  In embroidery and creativity, I get a lot of support and encouragement from my really quite awesome brothers and my really wonderful friends – thank you!  Thank you to all of those who came to our classes, trusting me that I would share something interesting with you! 

And thank you to Living and Learning Nillumbik Eltham and Ivanhoe Library and Cultural Hub for lending us their beautiful, calm and creative spaces!

The idea for this particular masterclass came entirely from the work, projects and efforts of embroiderers in Ukraine, whom I follow online.  To share with you:

  • Ms Oksana Postupak and the 100% captivating project #сорочкадлязахисника (translatable as “Shirts for Defenders”, www.facebook.com/hashtag/сорочкадлязахисника/, in the context which I first saw this design – thank you for such deep inspiration!
  • Ms Tetyana Babych, a Kyiv-based craftswoman and Mr Jurij Mel’nychuk, a Kyiv-based craftsman and expert in Ukrainian embroidery/Ukrainian costume, on who’s pages I saw this design in embroidered form; and also to Mr Mel’nychuk, who answered questions and provided me with information about it – thank you for sharing!
  • Ms Iryna Zaitseva – always so groovy and inspiring and really a leading figure in the world of Ukrainian embroidery – who posted this video www.facebook.com/vihilasy/videos/1259785254508590.  No explanation required for how it was influential.  Babcia Ircia – thank you for being you!

If you would like to be the first to hear about future masterclasses in Ukrainian embroidery, you can sign up for notifications from Natalia on her page createforukraine.wordpress.com. In the meantime, I can share with you the date for our next class: FUNDRAISING.

To create and to share – so enjoyable!  This form of volunteering has brought me the deepest reward that I could have imagined.  I’m really looking forward to continuing this project with Natalia in the New Year!  Until then!

~oOo~

Reviews from attendees at our first two Oberih masterclasses:

Відгуки учасиць на перші майстеркласи ‘Оберіг’:

To sit in a group with peace, artistry and tradition on their minds was a joy.  Under Ksenia’s gentle guidance, we stitched a traditional Ukrainian star pattern.  The day was not sunny, but the outcomes were, all round.  I am giving thanks for being part of this wonderful experience. – Kay

Сидіти в мирній, творчій групі в якій традиція тримається в думках було радісно.  Під ніжним керівництвом Ксені, ми вишивали традиційну, українську зіроньку.  День не був соняшним, але підсумки були.  Дякую за нагоду брати участ в такій творчій події. – Кей

The high quality rest for your brains is only possible in case of switching of activities and the best option is to switch to something completely new for you.  This masterclass was a mindfulness activity with visible results after it – highly recommended if you are looking for something exciting and relaxing. - Arina

Якісний відпочинок для мозку можливий лише за умовами зміни видів діяльності, а найкращий варіант – переключитися на щось вам абсолютно нове. Цей майстерклас був усвідомленою діяльністю з видимими результатами – настійно рекомендую, якщо ви шукаєте щось захоплююче та розслаблююче. - Аріна

A brilliant workshop that will leave you wanting it to continue.  The smaller group numbers enables the attendee to relax into a welcoming and supportive environment, as Ksenia is able to generously offer individual guidance where needed, to ensure all are enjoying the experience and feeling at ease with their own learning and at their own pace.

What I love most about the structure of this workshop is that not only is it inviting to non-Ukrainians, or the fact that by participating one is contributing to the spread of a strong, peaceful and beautiful Ukrainian tradition, but that funds received go towards medical supplies for the Armed Forces of Ukraine.

As for the instructor’s level of expertise, it’s really of professional standard, not just come skill, but also knowledge.  Highly recommended, even if it’s just for some artistic fun, you won’t be disappointed.  If anything, you’ll walk away with a heart full of positivity, creativity and maybe even inspiration. - Jules

Блискучий семінар, який залишить бажання, щоб продовжувався. Обмежене чесло осіб в групі дозволяє учасницям розслабитися в привітній та сприятливій атмосфері, оскільки дозволяє Ксені щедро займається індивідуальним керівництвом, де це необхідно, щоб забезпечити кожній насолоду, і щоб кожна почувалася невимушеною підчас власного навчання та у власному темпі.

Що мені найбільше подобається в структурі цього семінару, є не лише те, що він запрошує осіб інших походжень, що участь робить свій внесок у поширення сильної, мирної та красивої української традиції, але й те, що отримані кошти йдуть на забезпечення медичних засобів для Збройних Сил України.

А що стосується рівня досвіду інструкторки – він дійсно відповідає на професійний рівень, не тільки вмінням а й знанням. Настійно рекомендую – навіть якщо це лише для творчої розваги, ви не будете розчарованими. У будь-якому разі, ви відійдете з серцем сповненим позитиву, творчості та можливо навіть й натхненням. - Юля

~oOo~

Beauty as Resistance ~ Краса, як вид спротиву

Please scroll down for English.

Привіт друзі,

Слава Україні!

Окрім повідомлення про прогрес одної серветки, пишу перший пост із 24-го лютого 2022 року. Це не через брак думок і емоцій, не через брак чогось сказати або чим поділитись. Просто… ну, тому що складно. Так було. Так і є. Місяцями задумувалася про таку тему – Краса, як вид спротиву – а сьогодні вечером сідаю про неї щось написати, тому що день сумний, тому що ми сильні, тому що сьогодні 8-го березня і хочу посвяткувати вишивальниць, майстринь, свою бабцю, яка мене навчила вишивати, нашу маму, яка залишила за собою скарб виточнених вишивок.

Як і до того, протягом останніх 12 місяців, я стережу в соцмережах, на скільки зараз в Україні займаються майстрині вишиттям – сходяться в групи, діляться, вивчають вишивку, святкують своє. Мене захопив проєкт #сорочкадлязахисника (дивіться у Фейсбуці https://www.facebook.com/hashtag/сорочкадлязахисника), в якому вишивальниці і майстрині вишивають і збирають сорочки для захисниць і захисників України, який витягнув традиційну сорочку на щось гіпер-сучасне і сто відсотково вкоріннене в нашому часі. На окремі сторінці, існує звітування своєї роботи за останніх двох тижнів, де здають фогографії і підтримують одна одну. Записані майстеркласи в Ютюбі надають доступні інструкції, як вишити і вшити жіночу блюзку чи чоловічу хлоп’янку. Розсилаються книжки. Малюються схеми. Вишивають біля вікон в день, коли бракує світло. Святкують, святкують, свяктують своє. І діляться цією силою.

Таке натхнення шаную я. Я екстра взялася за голку і нитку. Вишивати – це мені стало ніби притулком для душі. Я вже розписувалася і всім говор’ю (хто мене вислухає) якими гарними, якими пишними я важаю наші взори.

Краса – це протеотрута від потворних вчинків. Творити – це протеотрута від беглуздого нищення. Плекати своє – це спротив троте того, який прийшов його нищити.

А крім того, роблю в цьому пості маленький анонс…

Недовго вже задумувалася над цим… продавати свої роботи і пожертвувати кошти на підтримку наших захисниць і захисників, на допомогу людям. Зараз сьогодні, готую і представляю вам свій онлайн магазинчик і ділюся першою серветкою, яку приготувала до продажу. Дивіться на сторінку BIG RED #2 ~ ВЕЛИКА ЧЕРВОНЮХА НОМЕР 2 про саму серветку, а на сторінку STORE про магазинчик. Більша частина зібраних коштів висилатиму прямо на поміч ЗСУ і гуманітарним проєктам. Хочу в такий спосіб перетворити своїми руками стровену красу (якщо ви погодетеся, буду рада!) на частинку нашого національного спротиву.

Hello friends,

Slava Ukrajini!

Apart from some updates about the work in progress on a particular piece, this is the first post I’m writing since February 24th 2022, not at all due to some lack of thoughts or emotions, not at all due to a lack of something to say or share. Simply…. it’s complicated. It has been. It remains so. For months, I’ve been thinking about this idea – Beauty as Resistance – and this evening, I’ve sat down to finally write something about it, because it’s been a sad day, because we remain strong, because it’s International Women’s Day and I want to celebrate the women who embroider and create, my grandmother, who taught me to embroider, our mother, who left for us a small treasure trove of sophistication in stitch.

As in the past, over the last 12 months, I’ve been watching how very much women in Ukraine are embroidering – they come together in groups, share their work (lots online), teach and learn techniques, celebrate their own. I’ve been especially captivated by the project #сорочкадлязахисника – Shirt for a Defender – (check it out on Facebook https://www.facebook.com/hashtag/сорочкадлязахисника), in which women have come together to make embroidered shirts for Ukrainian soldiers. It has morphed something deeply traditional into the hyper-contemporary, objects, items of clothing that are 100% rooted in our times and in this experience. On a separate page, a group fortnightly reports in on the progress of their work by sending in photos and then encourage and support one another. On Youtube, detailed masterclasses provide accessible instructions for embroidering and putting together a traditional blouse or shirt. Books are being dispatched. Designs are being graphed. Women embroider by daylight sitting at their windows during times of interrupted power supply. They cherish and celebrate their own. And the strength is shared.

I can only honour such inspiration. Over the last 12 months, I’ve embroidered a lot. Being with my linens and needles and threads has become somewhat of a refuge for my soul. I love Ukrainian embroidery so much. Spending time with something beautiful has been a source of restoration.

Beauty is an antidote to ugly deeds. To create is an antidote to senseless destruction. To celebrate one’s own is a resistance to those who come to destroy it.

And so, with this post, I’m making a little announcement…

Not for too long now, I’ve been thinking about this… selling my embroideries and donating the funds to support our defenders of Ukraine and the people whom they defend. Today, this evening, I am introducing to you my online store and the first of my embroideries that I’ve created for sale. Please check out BIG RED #2 ~ ВЕЛИКА ЧЕРВОНЮХА НОМЕР 2 for the embroidery and STORE for the store. A large proportion of the proceeds from sale will go directly to Ukraine to assist the Armed Forces of Ukraine and also humanitarian projects. In this way, I would like my hand-made beauty (if you agree, I’ll be very glad) to be another small part of the Ukrainian national resistance.

~oOo~

The Evolution Of Beauty 3

Well, it’s been a long time since Big Red #1 got any love and attention. In fact, another celebration of Red has been started and completed since then. I’ve enjoyed using two very different reds, imagining how they will look, trying them out alongside other colours, finding out they work, at least for my taste – it’s all part of the, I’ll admit it, excitement of Uki embroidery for me.

The last time I left this gorgeous thing THE EVOLUTION OF BEAUTY 2, it was done up in red and deep brown, which I substituted in for black to create a gentler look and as a nod to embroideries I’ve seen long ago, where the raw linen colour of the fabric and the choice of brown or orange or other burnt shades made something that as a kid I thought of as very 70s! Funny how these reminiscences return!

Having decided to go off-piste with the secondary and detailing colours to work in with this delicious almost pastel red, a yellow and a green, as asked for in the original design, just didn’t seem to work here. So, it became a shuffle through the Draws of All Threads:

to find suitable friends for this pairing. I’ve shown the outcome of this funnest of fun processes before. I landed on this combination:

Maybe it’s the time spent with these four colours, doing the next parts of the embroidery, or maybe it’s just my own impression of a good choice – the fact that over 3 years later, I’m still happy with the combination bears out for me!

Here is Big Red #1 in her current state, with the copper and green added and completed:

I have always especially loved how such simple details as a row or two of cross stitch or some back stitch, as shown here, can add such complexity. To me, this sort of addition to a design is genius.

There’s not much left to do now – backstitching the entire design in dark dark brown will add the final details that make this design so grand and so beautiful. The next episode will be the last.

(To view previous posts on this piece of work, see THE EVOLUTION OF BEAUTY and THE EVOLUTION OF BEAUTY 2.)

~oOo~

It’s Her, Eternal

A poem by Ksenia X.

It began, as it does, with a sunrise
and a goddess – Oriana.
She blessed the earth
and made it black, its fertility
a gift for generations.

Then came a river, north to south,
On its banks the wind-bent willows,
Where child-like mermaids played
and, turning their faces upwards,
Told poems to the moon.

At three fields, you fired your earthenware
and buried it underground.
You cast your gold
and told your life.
You made relics that we cherish.

We were agrarian, hunters, fishermen,
traders.  We had our gods
of sun and thunder,
You your nymphs and forest sprites.
These were our religion.

He was the ancient ferryman.
Or were they the three brothers,
Who sailed downriver with their sister?
And greeting destiny with arms 
thrown back, we began in earnest.

We built our grand and ancient capital,
The seat of our civilization,
Whose chain-mailed princes
were conquerors and great and wise,
Whose daughters became the wives of monarchs.

They gave us their tridents
and first blessed us
and on they stand in silence.
They built first domes, touched by the same sun
turned golden and now will be forever.

We were the dark-eyed beauties
fit to beguile a sultan.
We were the warrior horsemen
building our island fortress
beyond the churning, burning rapids.

We lived in freedom and democracy.
We minted them with our horses’ hooves,
Striking sparks from the soil
of our grasslands, as we thundered forth
to defend them.

We were buried, eyes bound in silk,
In great mounds on the steppes.
On our bones grow wheat and rye,
That golden expanse meeting at the horizon
with the ever blue of sky.

And we learned about ourselves
from the blind bard led
by his little orphan guide.
We built white houses beside cherry orchards
And slept by them in summer.

Come winter we gather together
and await the rising star.
We light a candle to the harvest,
Feed our cattle, feast
and welcome song, the visitor.

Come spring we plough and sow
and draw the gifts of your
fertility onto fresh, new-white life,
Onto delicate shells.
You bless us and we share.

Come the next summer we
see you explode in life and flowers
and berries.  We imbibe your bounty
and we paint it 
onto the walls of our houses.

There are times, it’s true,
When our great poets statuesque
once again bend their furrowed brows,
When the guelder roses bow
with worry.  Then we know our task.

Come if you will.  Try to tell us
we are not.  We have giants.
There are lions amongst us
whom you’ll wake from slumber.
You do not truly know us.

We have been and we will be,
For our heroes do not die.
Bring your war.  You will create more.
And we’ll tell you
our unanimous reply:  We are!

On the eve of summer solstice,
On high mountain meadows,
She’ll gather the fleetingly red rue
and walk forgotten paths to find me
where I dream in my forest clearing.

We’ll dye our threads
the colours of her flora
and with them we’ll embroider
the contents of our souls and wear
our hearts on our sleeves.

We’ll drink from mountain streams
so clear as to play music
with their crystal.
Bonfires will light a night sky
perfumed by fur and pine

and, as the shadows of our
forgotten ancestors dance on her
stone cliff faces,
We’ll remember how we can, if we must,
Protect what is precious with our hands.

Then we’ll walk the sloping parks
of our grand and ancient capital.
We’ll sing our hymn again
on the playground of our freedom,
Beneath our beautiful - Sophia.

We’ll gather sunflowers and poppies,
Braid ribbons, light candles
and set our wreaths to sail.
They will lead us to our love.
Of course, it’s her, eternal.


Melbourne, April 2022

~oOo~

On Nyzynka and Coziness

About a fortnight of my non-work time during peak viral social distancing in Melbourne was spent on this nyzynka.  I’ve had this design for YEARS and have always wanted to do it in this colour.  It came from a servetka seen covering someone’s paska during a Velyka subota many years ago and lent to me to copy.  The colour is the deepest in a row of copper brown shades on the DMC colour chart, all of which appeal to my eyes every time I open my colour draws (which I’ll need to share with you another time.)

Nyzynka is a funny thing.  How was such a technique invented, embroidered from the back to give a crisp design on the front, row on row of design deviating by a thread from its neighbour defining perfect diagonals?  Always one to watch carefully – mistakes can hide easily and are a cause of much, much unpicking in this technique.

Here is the beginnings of a nyzynka design.

What starts as really a couple of blebs on a fabric becomes surprisingly rich.  This design makes me think so much of derevoriz’ba.  Before long, it is looking like this:

DSC02552
DSC02549
DSC02550

Now, as social distancing eases throughout Australia, winter is settling in.  This morning there is a light, light rain, low cloud and I can’t see the city-scape I usually see from my study window.  In the corner, my cozy armchair and cushions, my very comfortable place to stay warm, listen to pods or music and work on this gorgeous nyzynka.

DSC02553

~oOo~

The Evolution of Beauty 2

I previously had left this piece when it was so far all in red and ready to have some more additions.

Like dark chocolate to a Cherry Ripe, adding some rows of deep brown.

DSC02404

Here it has further rows of cross stitch and back stitch in both brown and red.  This is what Uki embroidery can do really well sometimes and one of the things I love about this design – using very, very simple elements to create visual complexity.

DSC02525
DSC02526
DSC02528

All red and brown completed!  (This took a little while.)  The design is now at its full width and a lot of the detail is there.  In my opinion, it is starting to look special.  But there is so much gorgeousness yet to come!

What to do next – orange or green?

~oOo~

Cross Stitch From Scratch ~a how to post~

I had a really chilled break recently, visiting some very old friends in Grafton.  During that time, two special little people became interested in my most recent monster of a servetka project and wanted to cross stitch with me.  So I taught them how to cross stitch just the way my Baba taught me.  The day after arriving home, I was sent a photo of a bookmark completed.  It was so lovely to teach these two sweet enthusiasts and I’ve been inspired by them to post on how to cross stitch.

These posts on learning to cross stitch are dedicated to Georgia and Nick.

A lesson in red and gold.

DSC02416
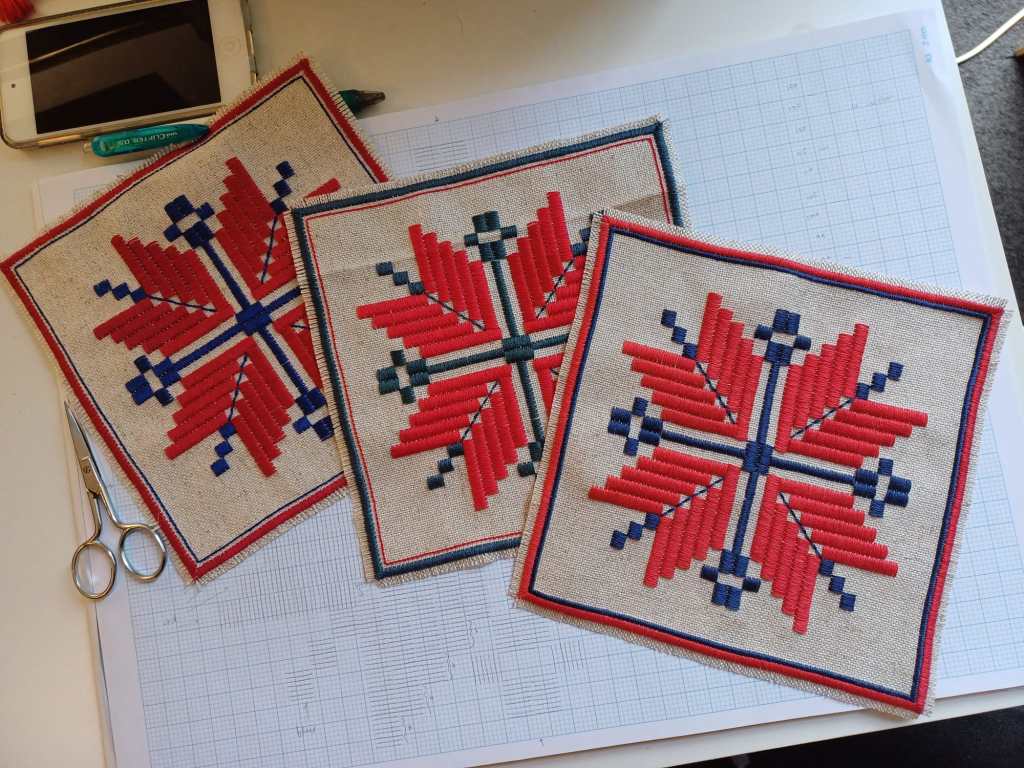
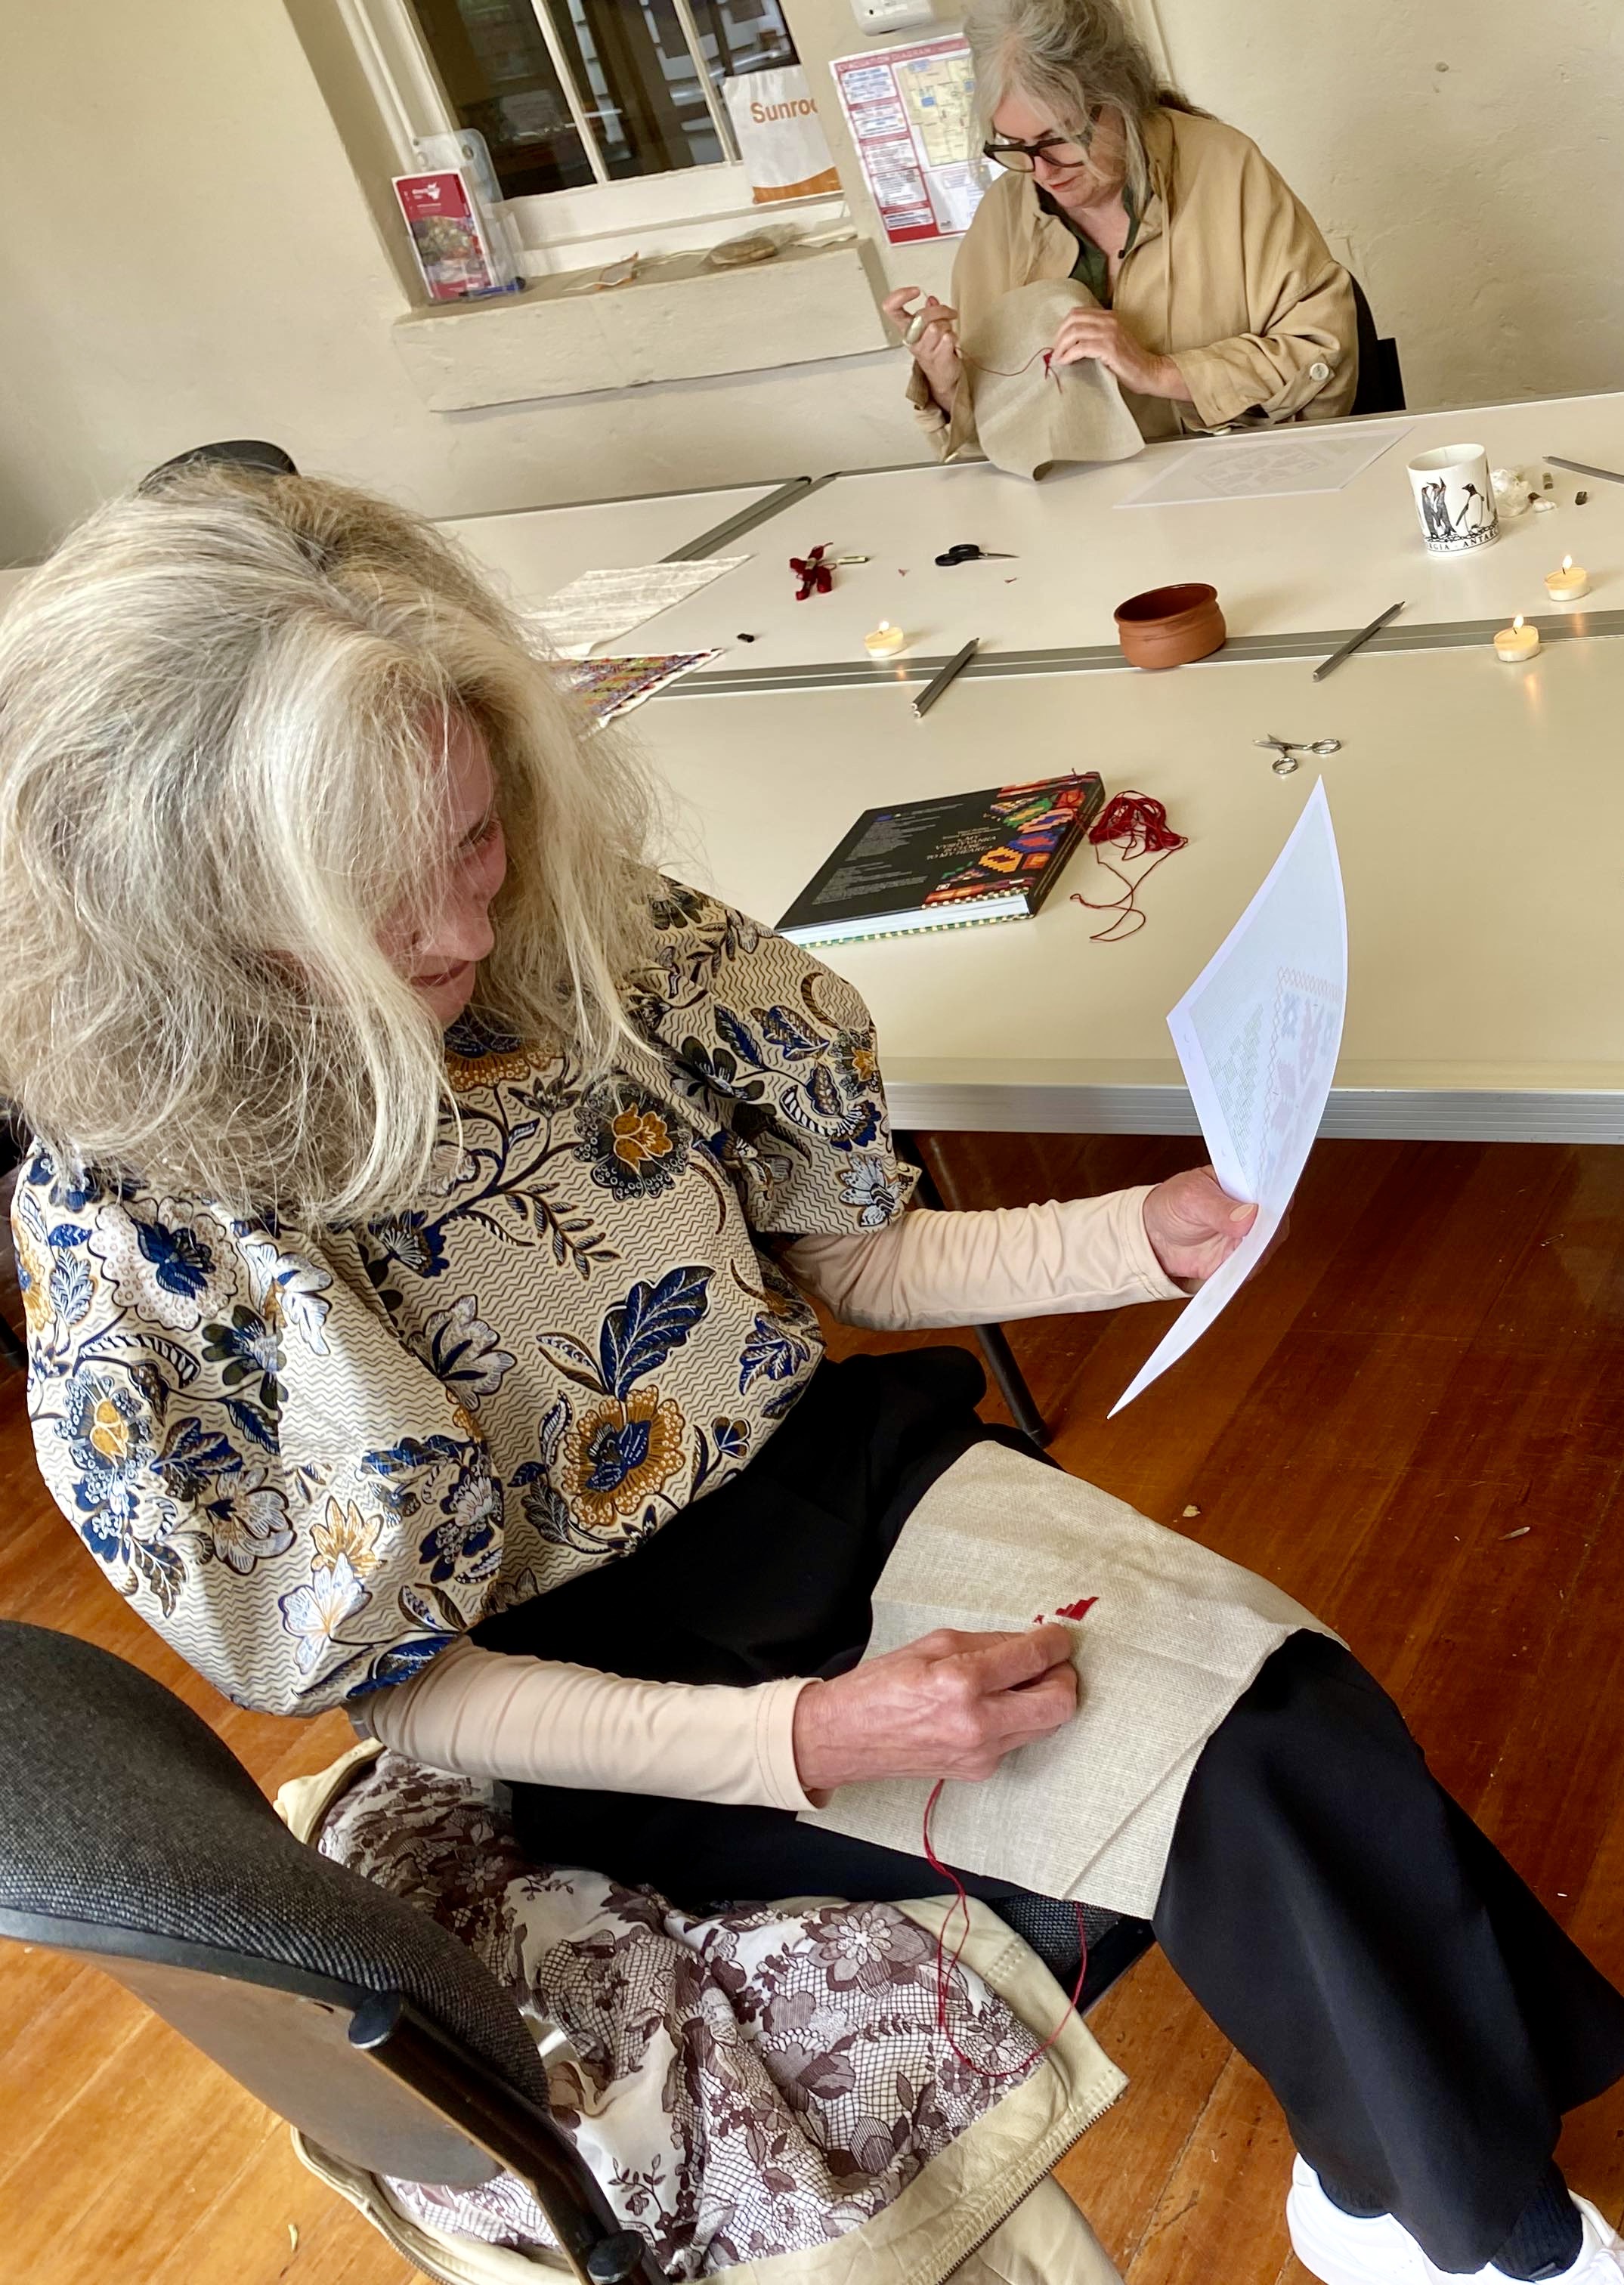
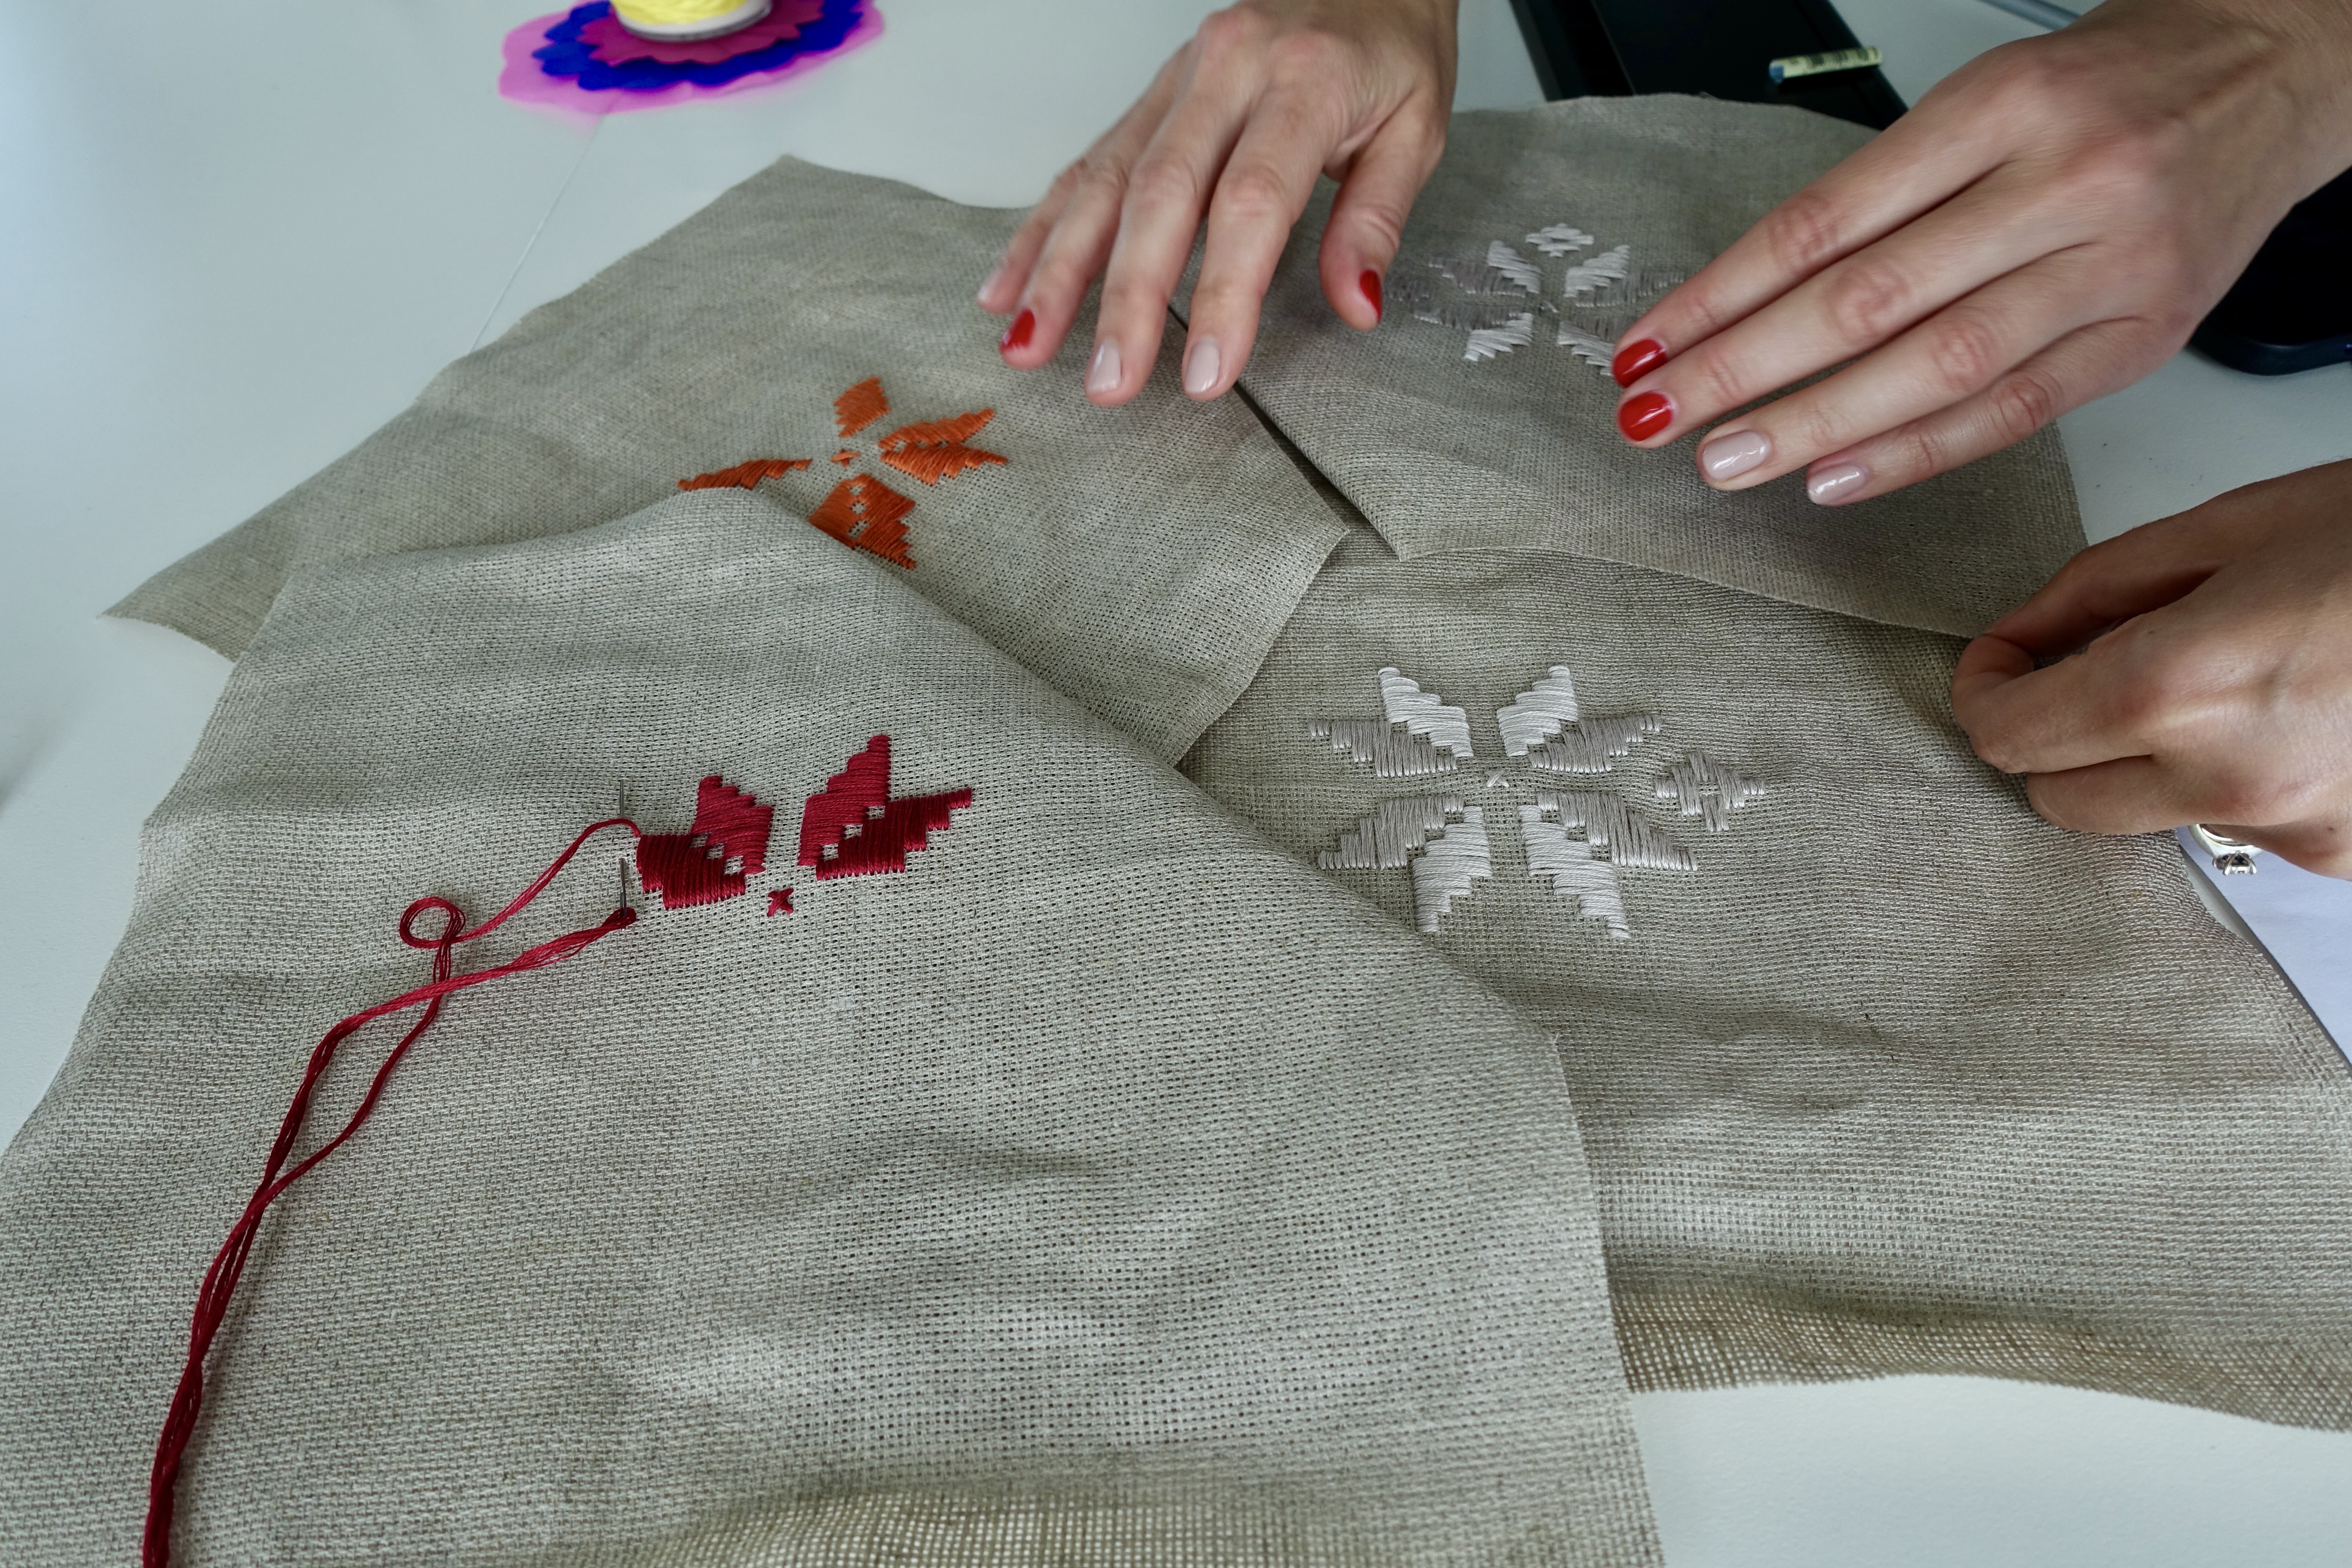
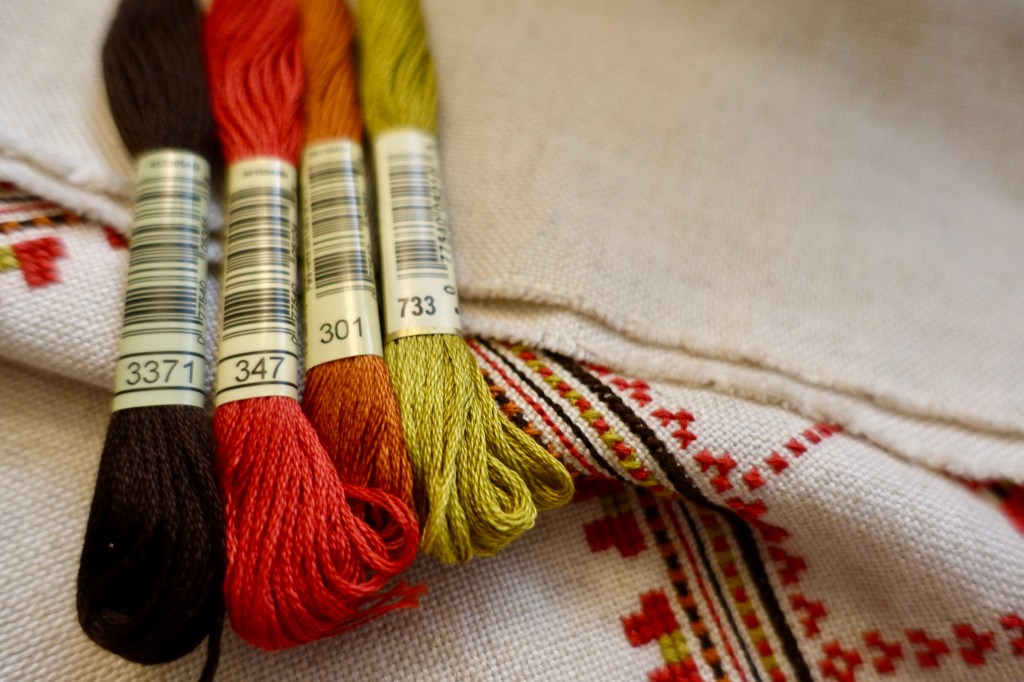
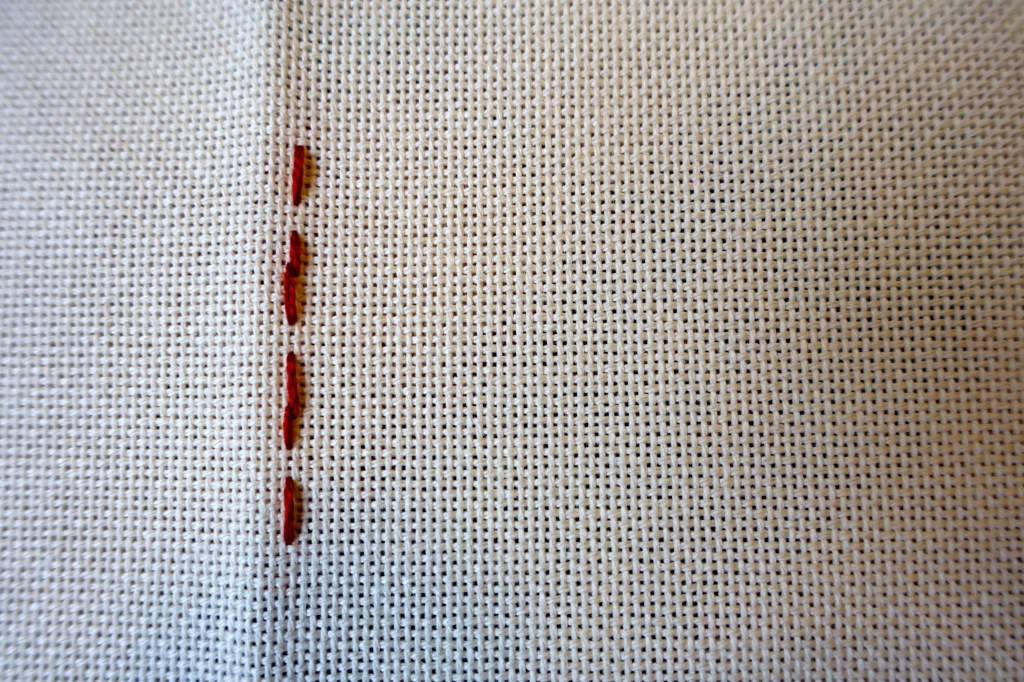
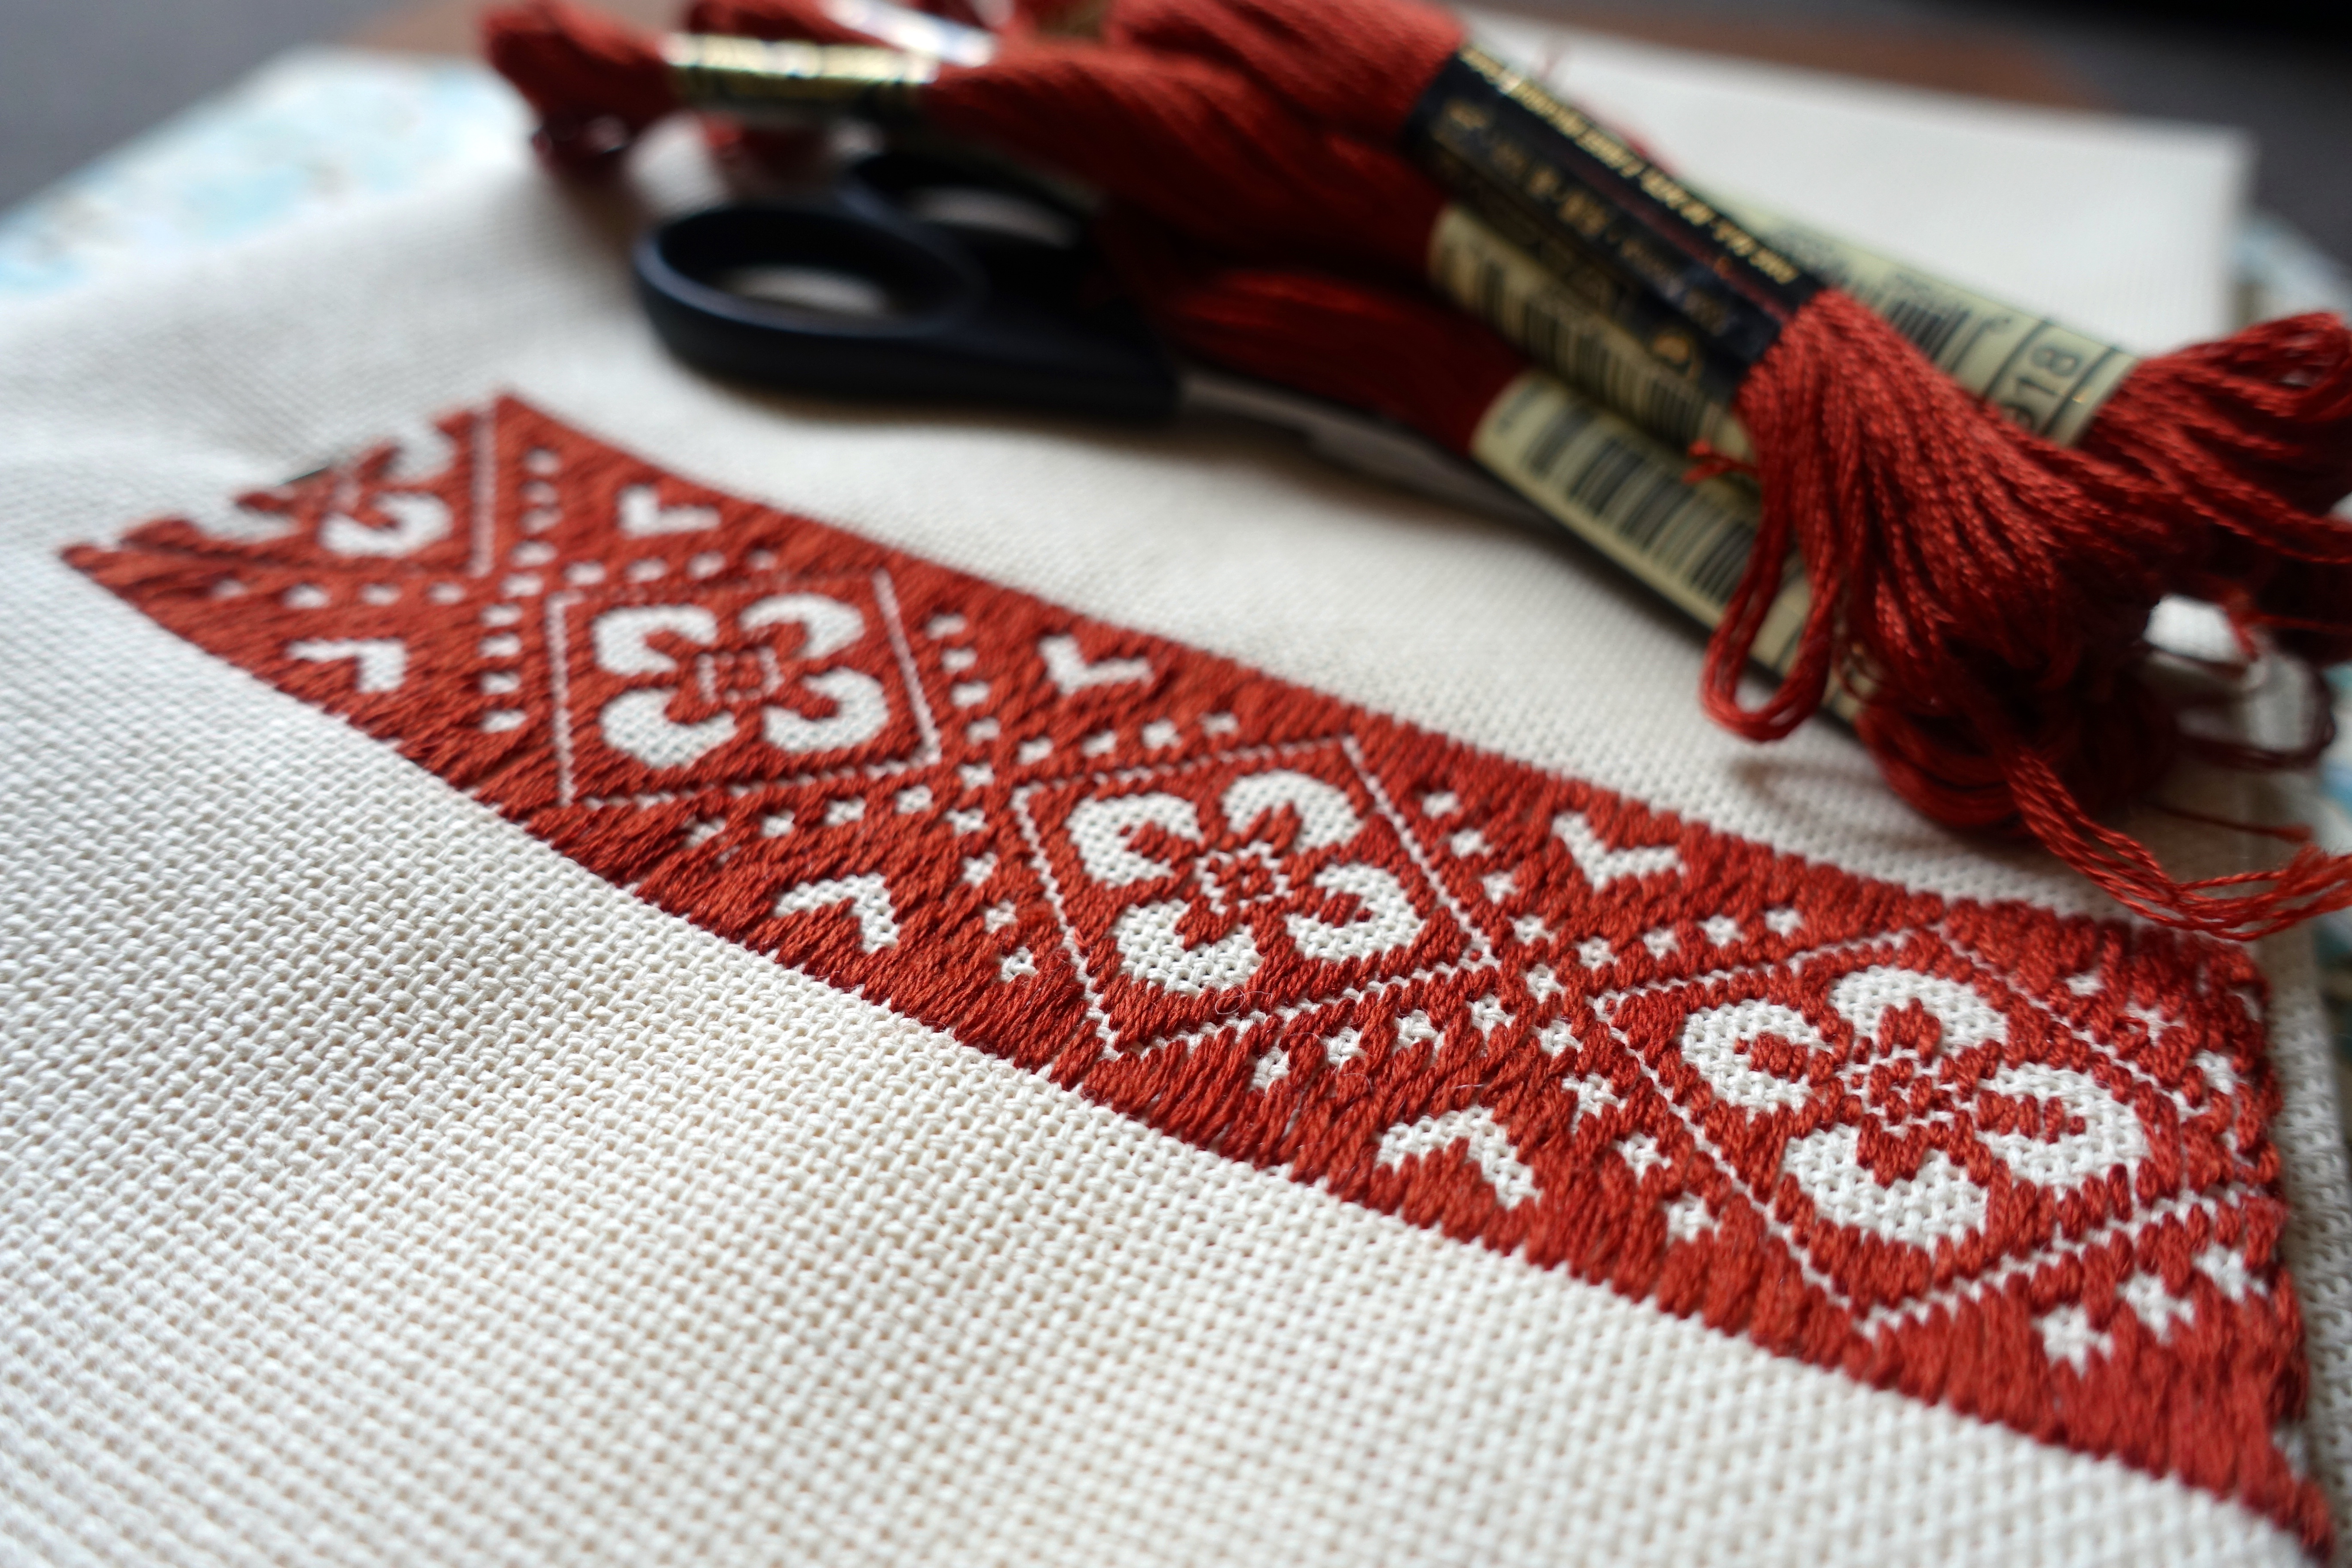
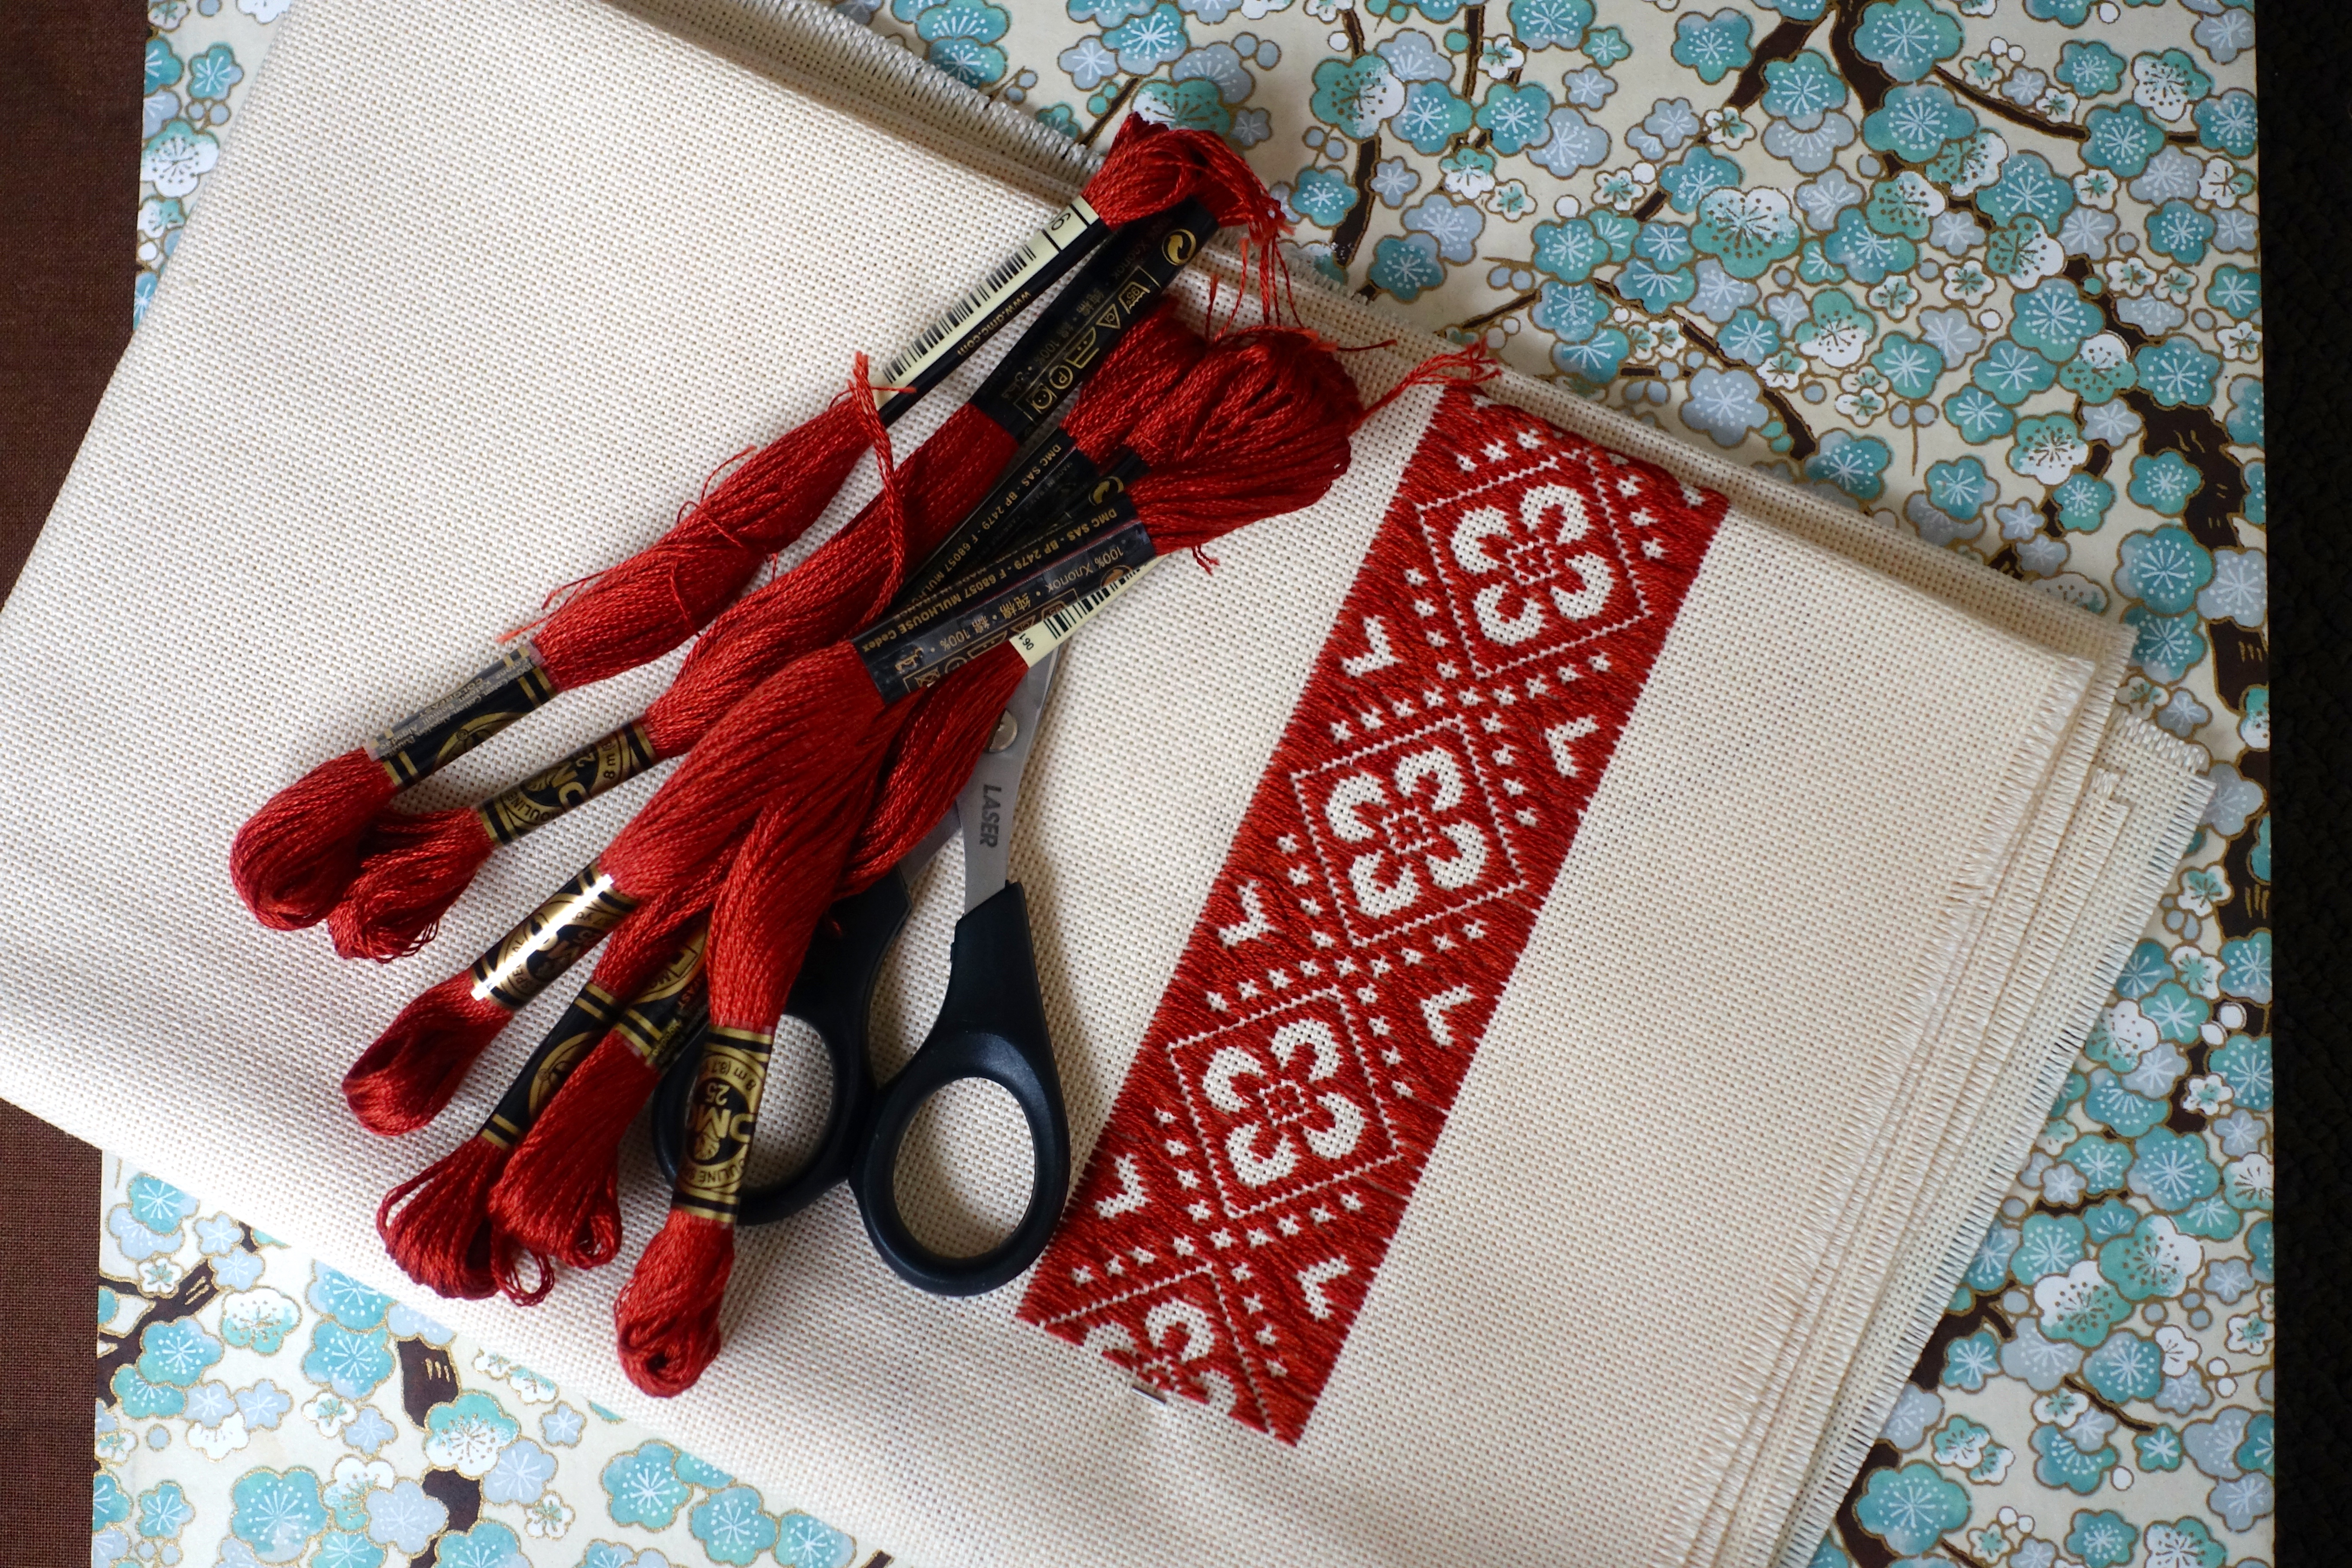
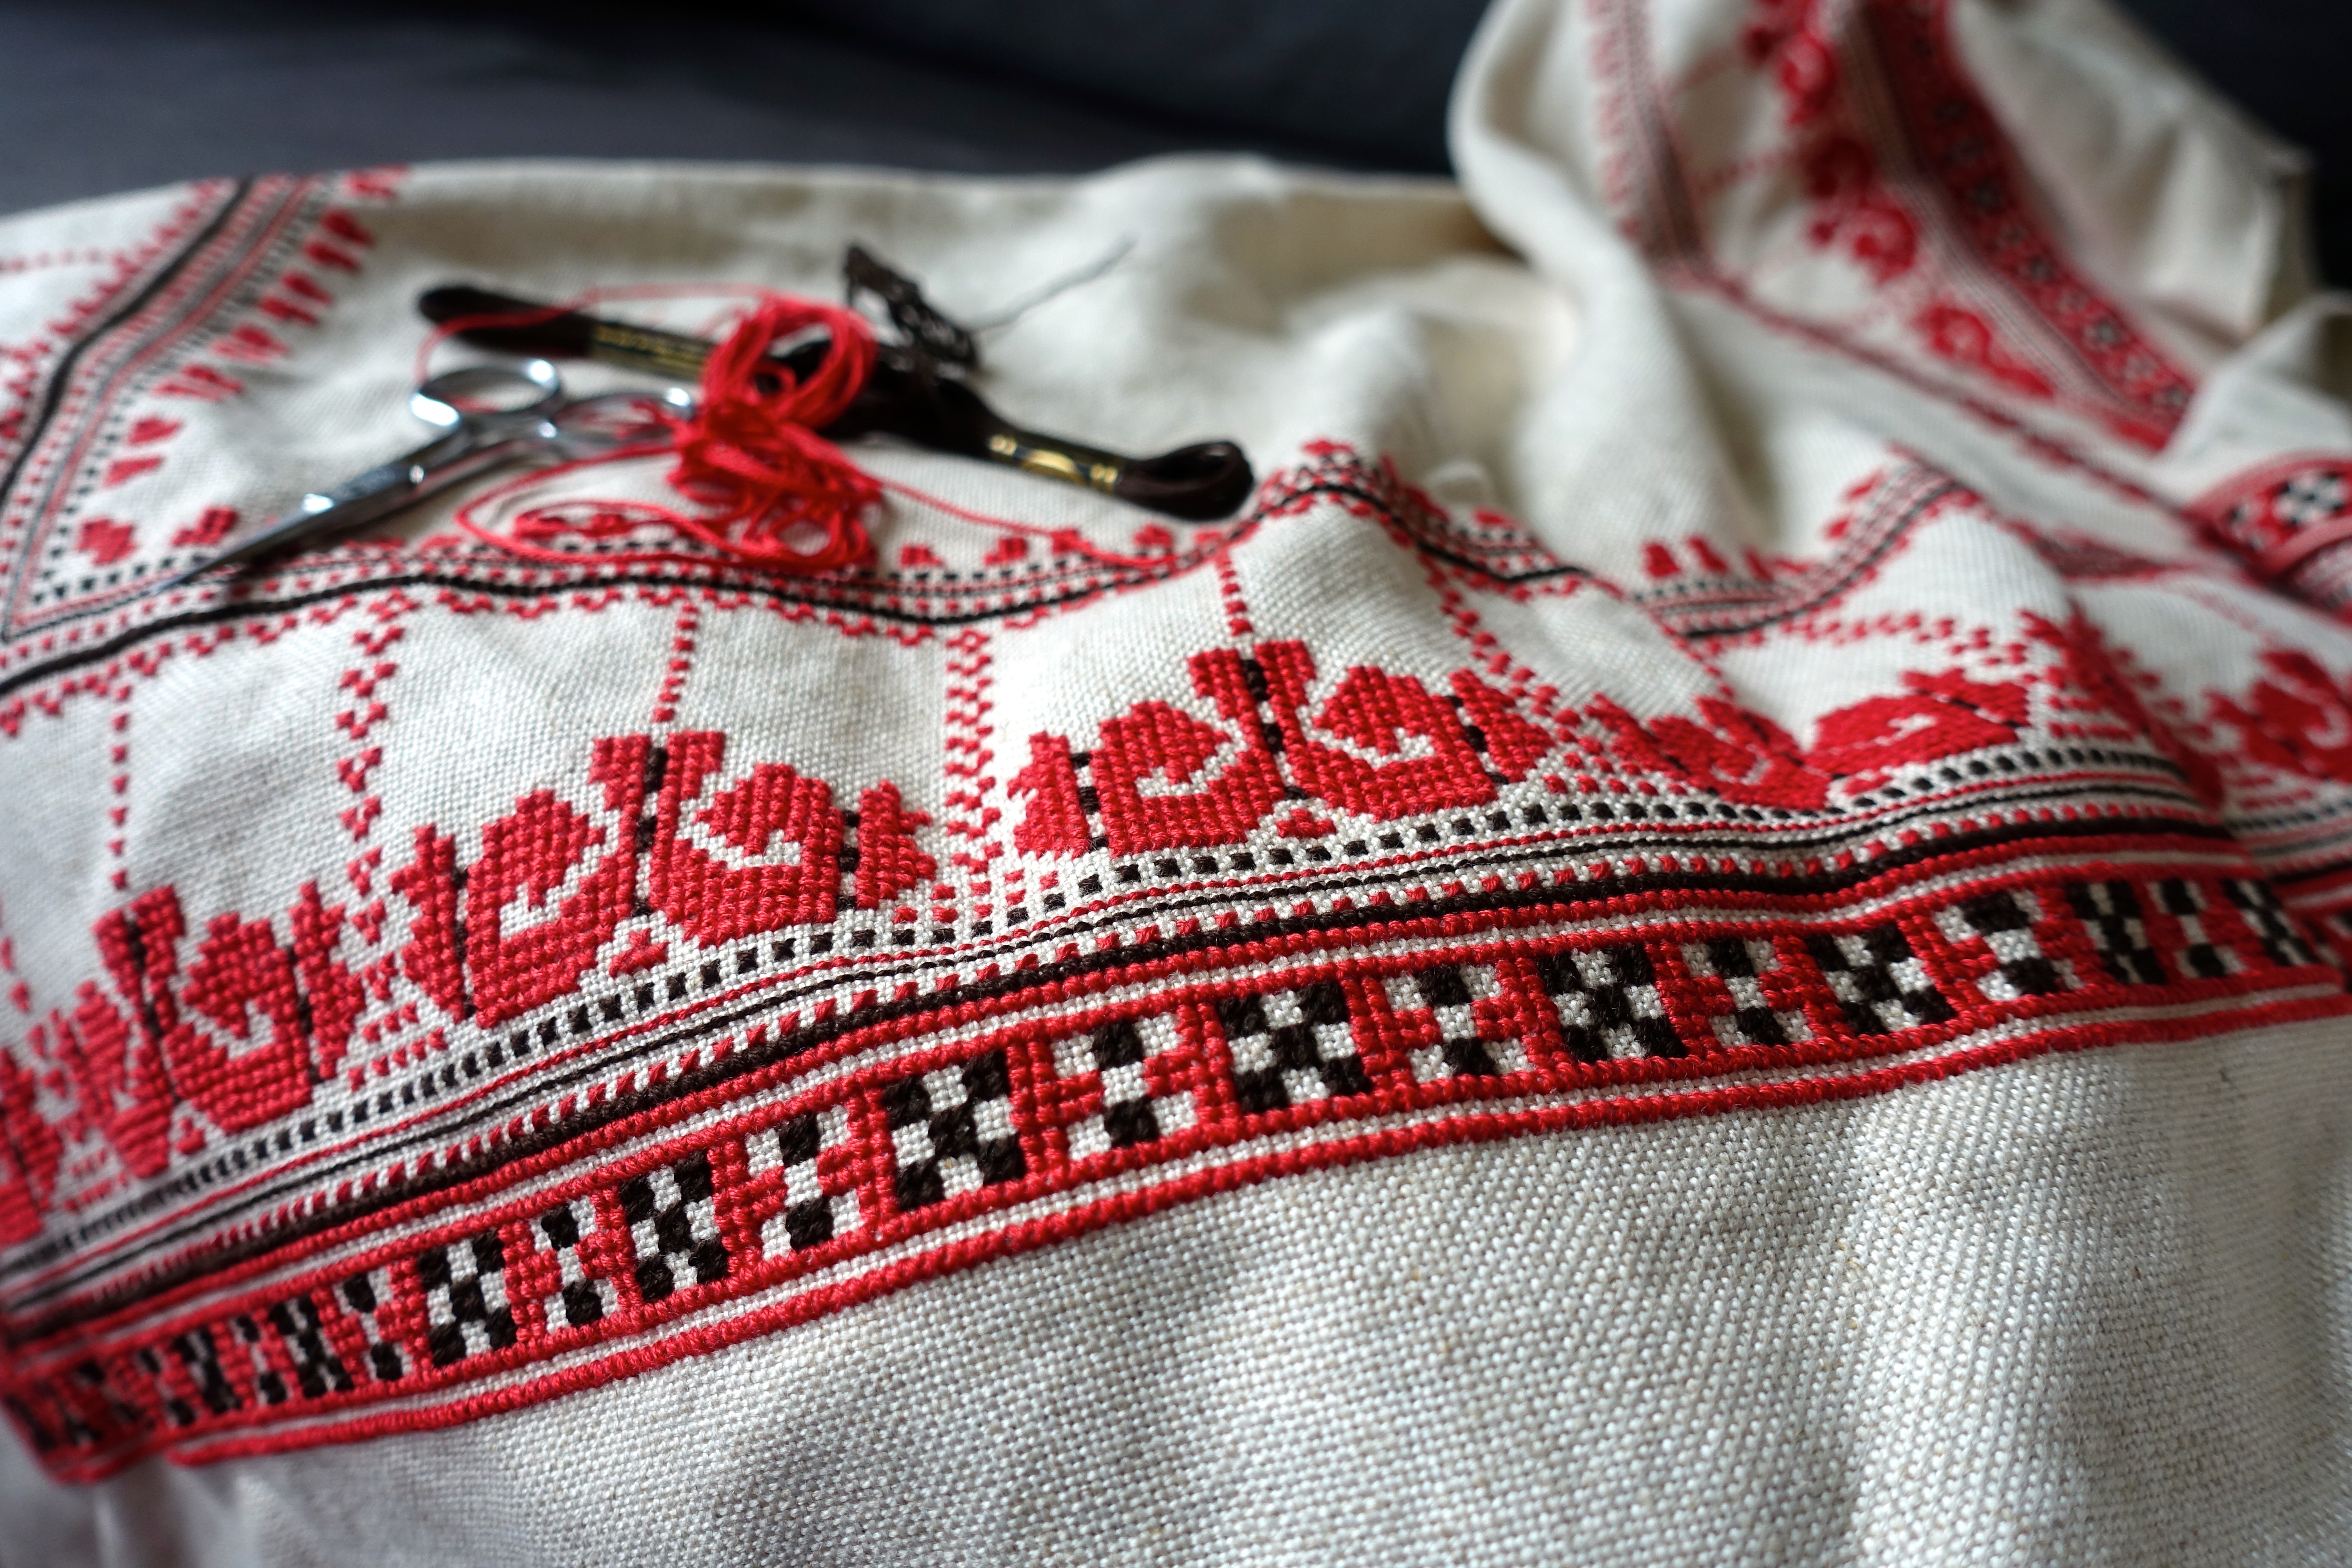
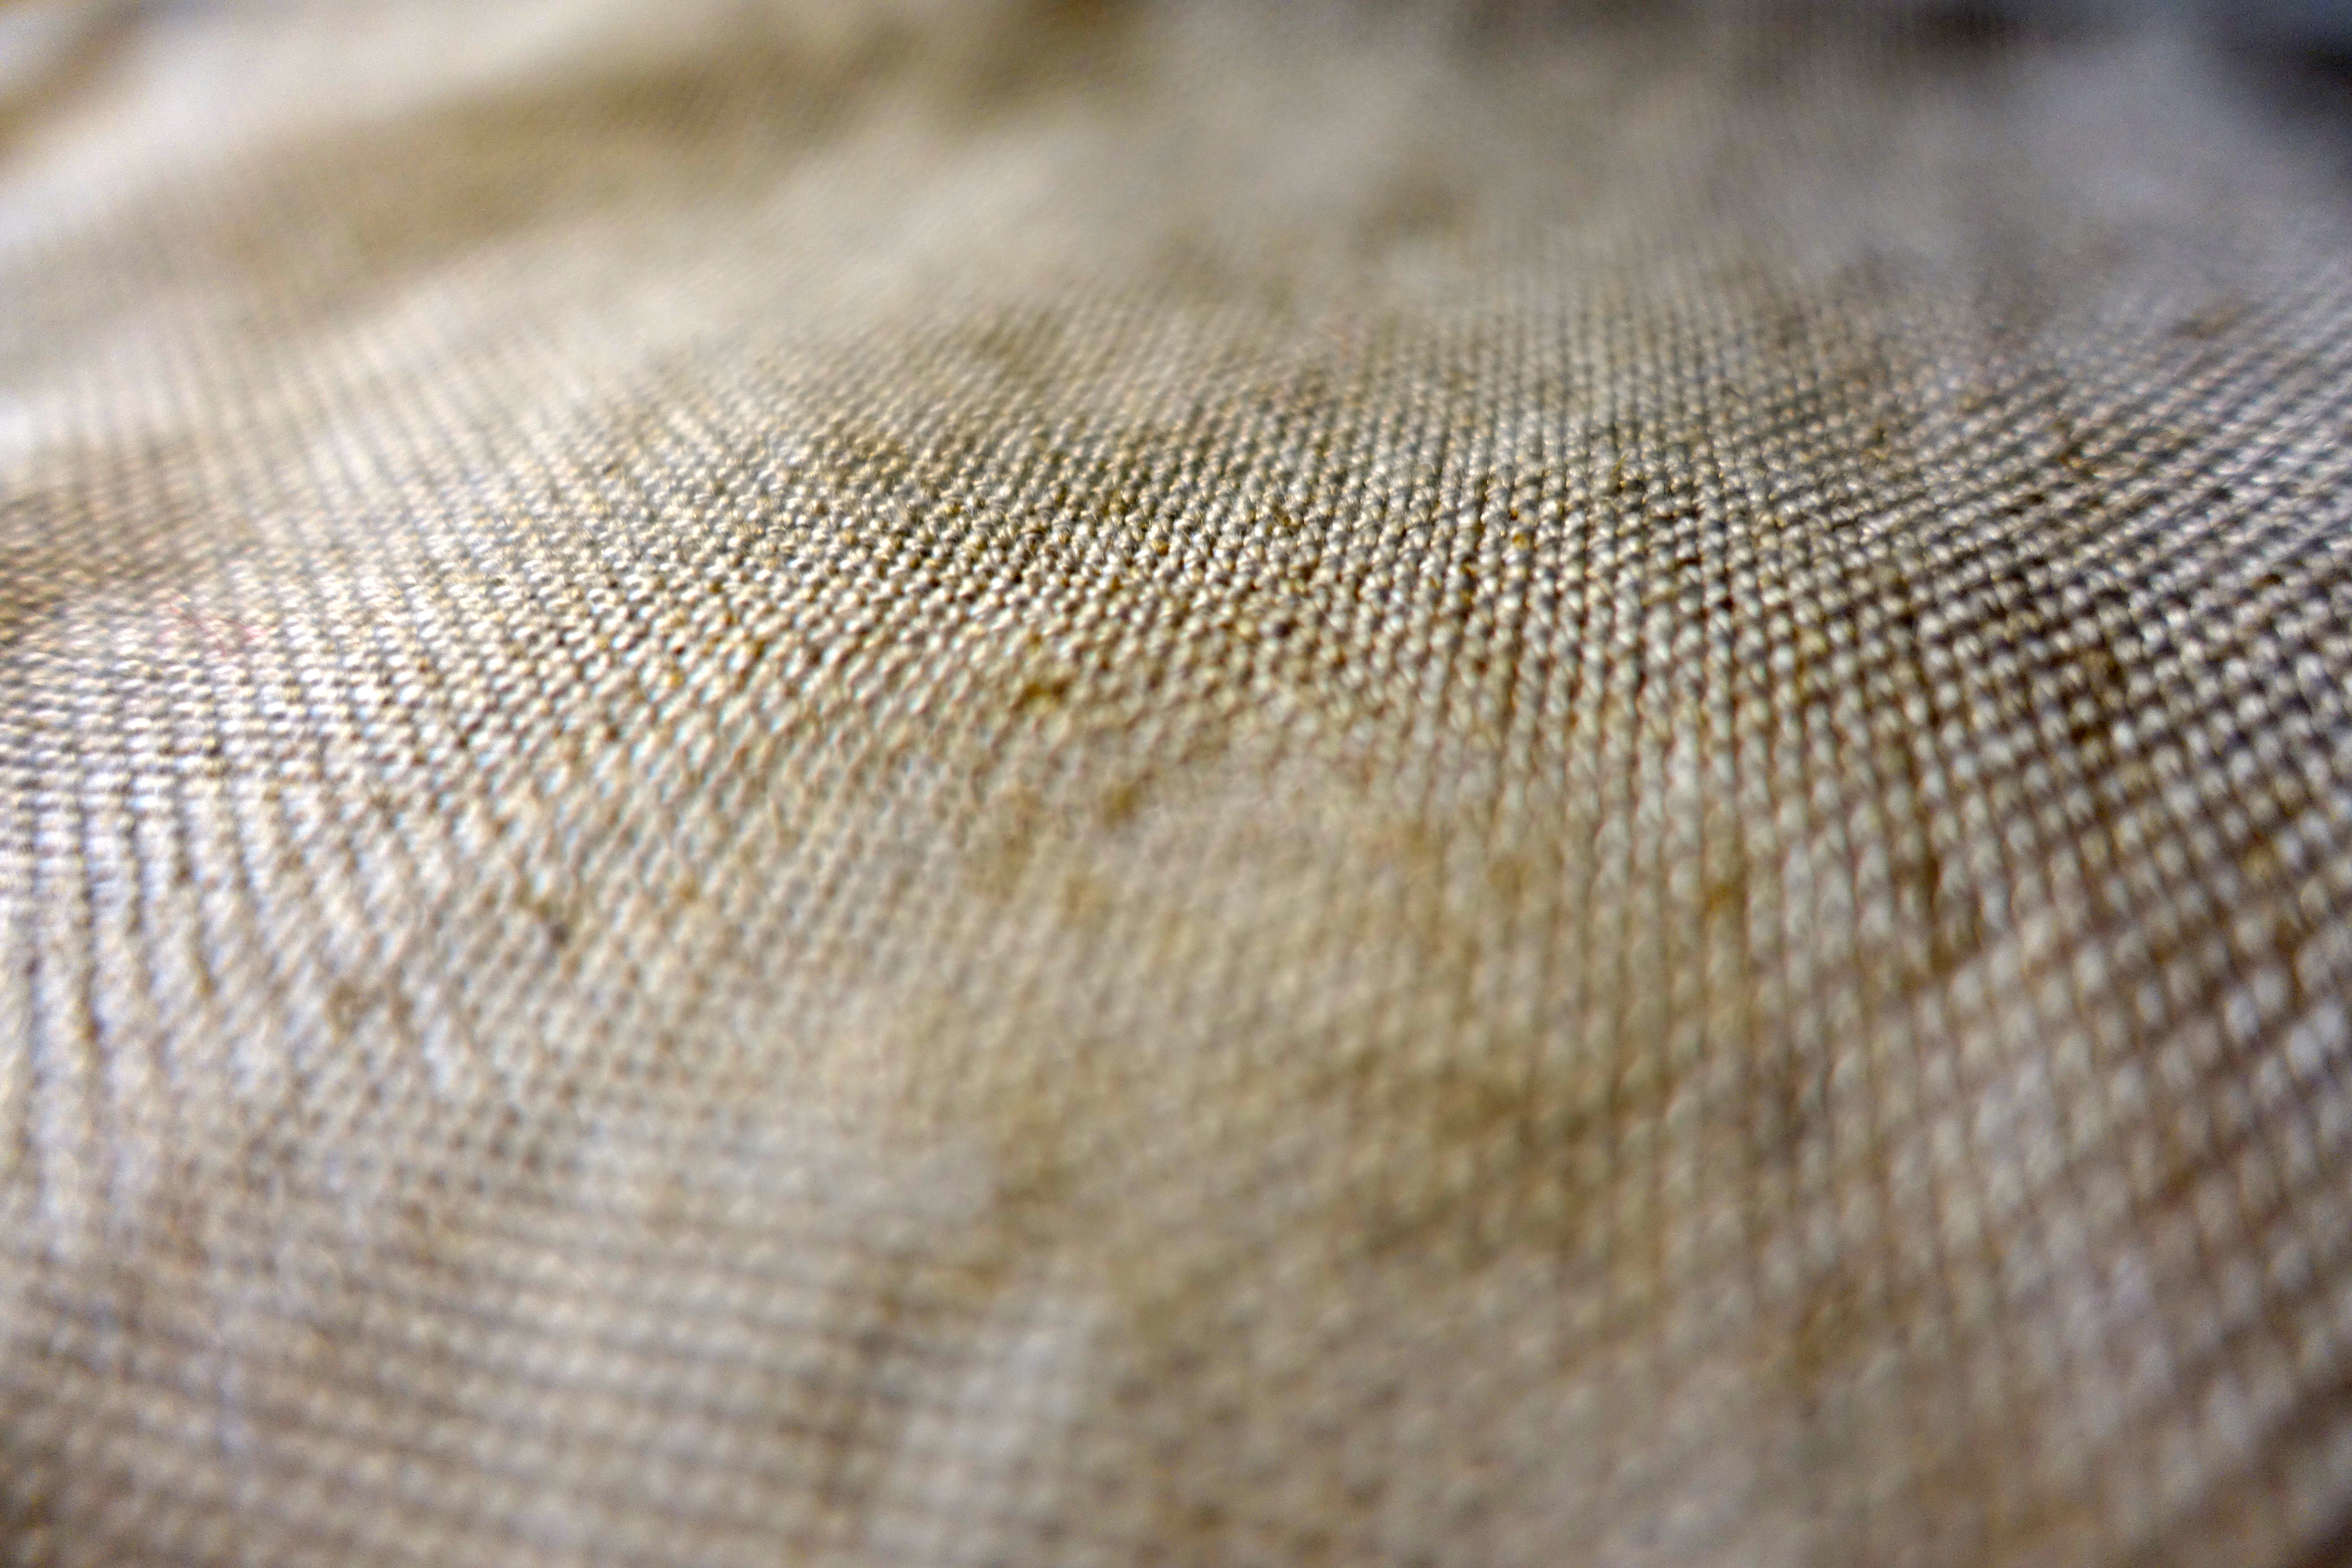
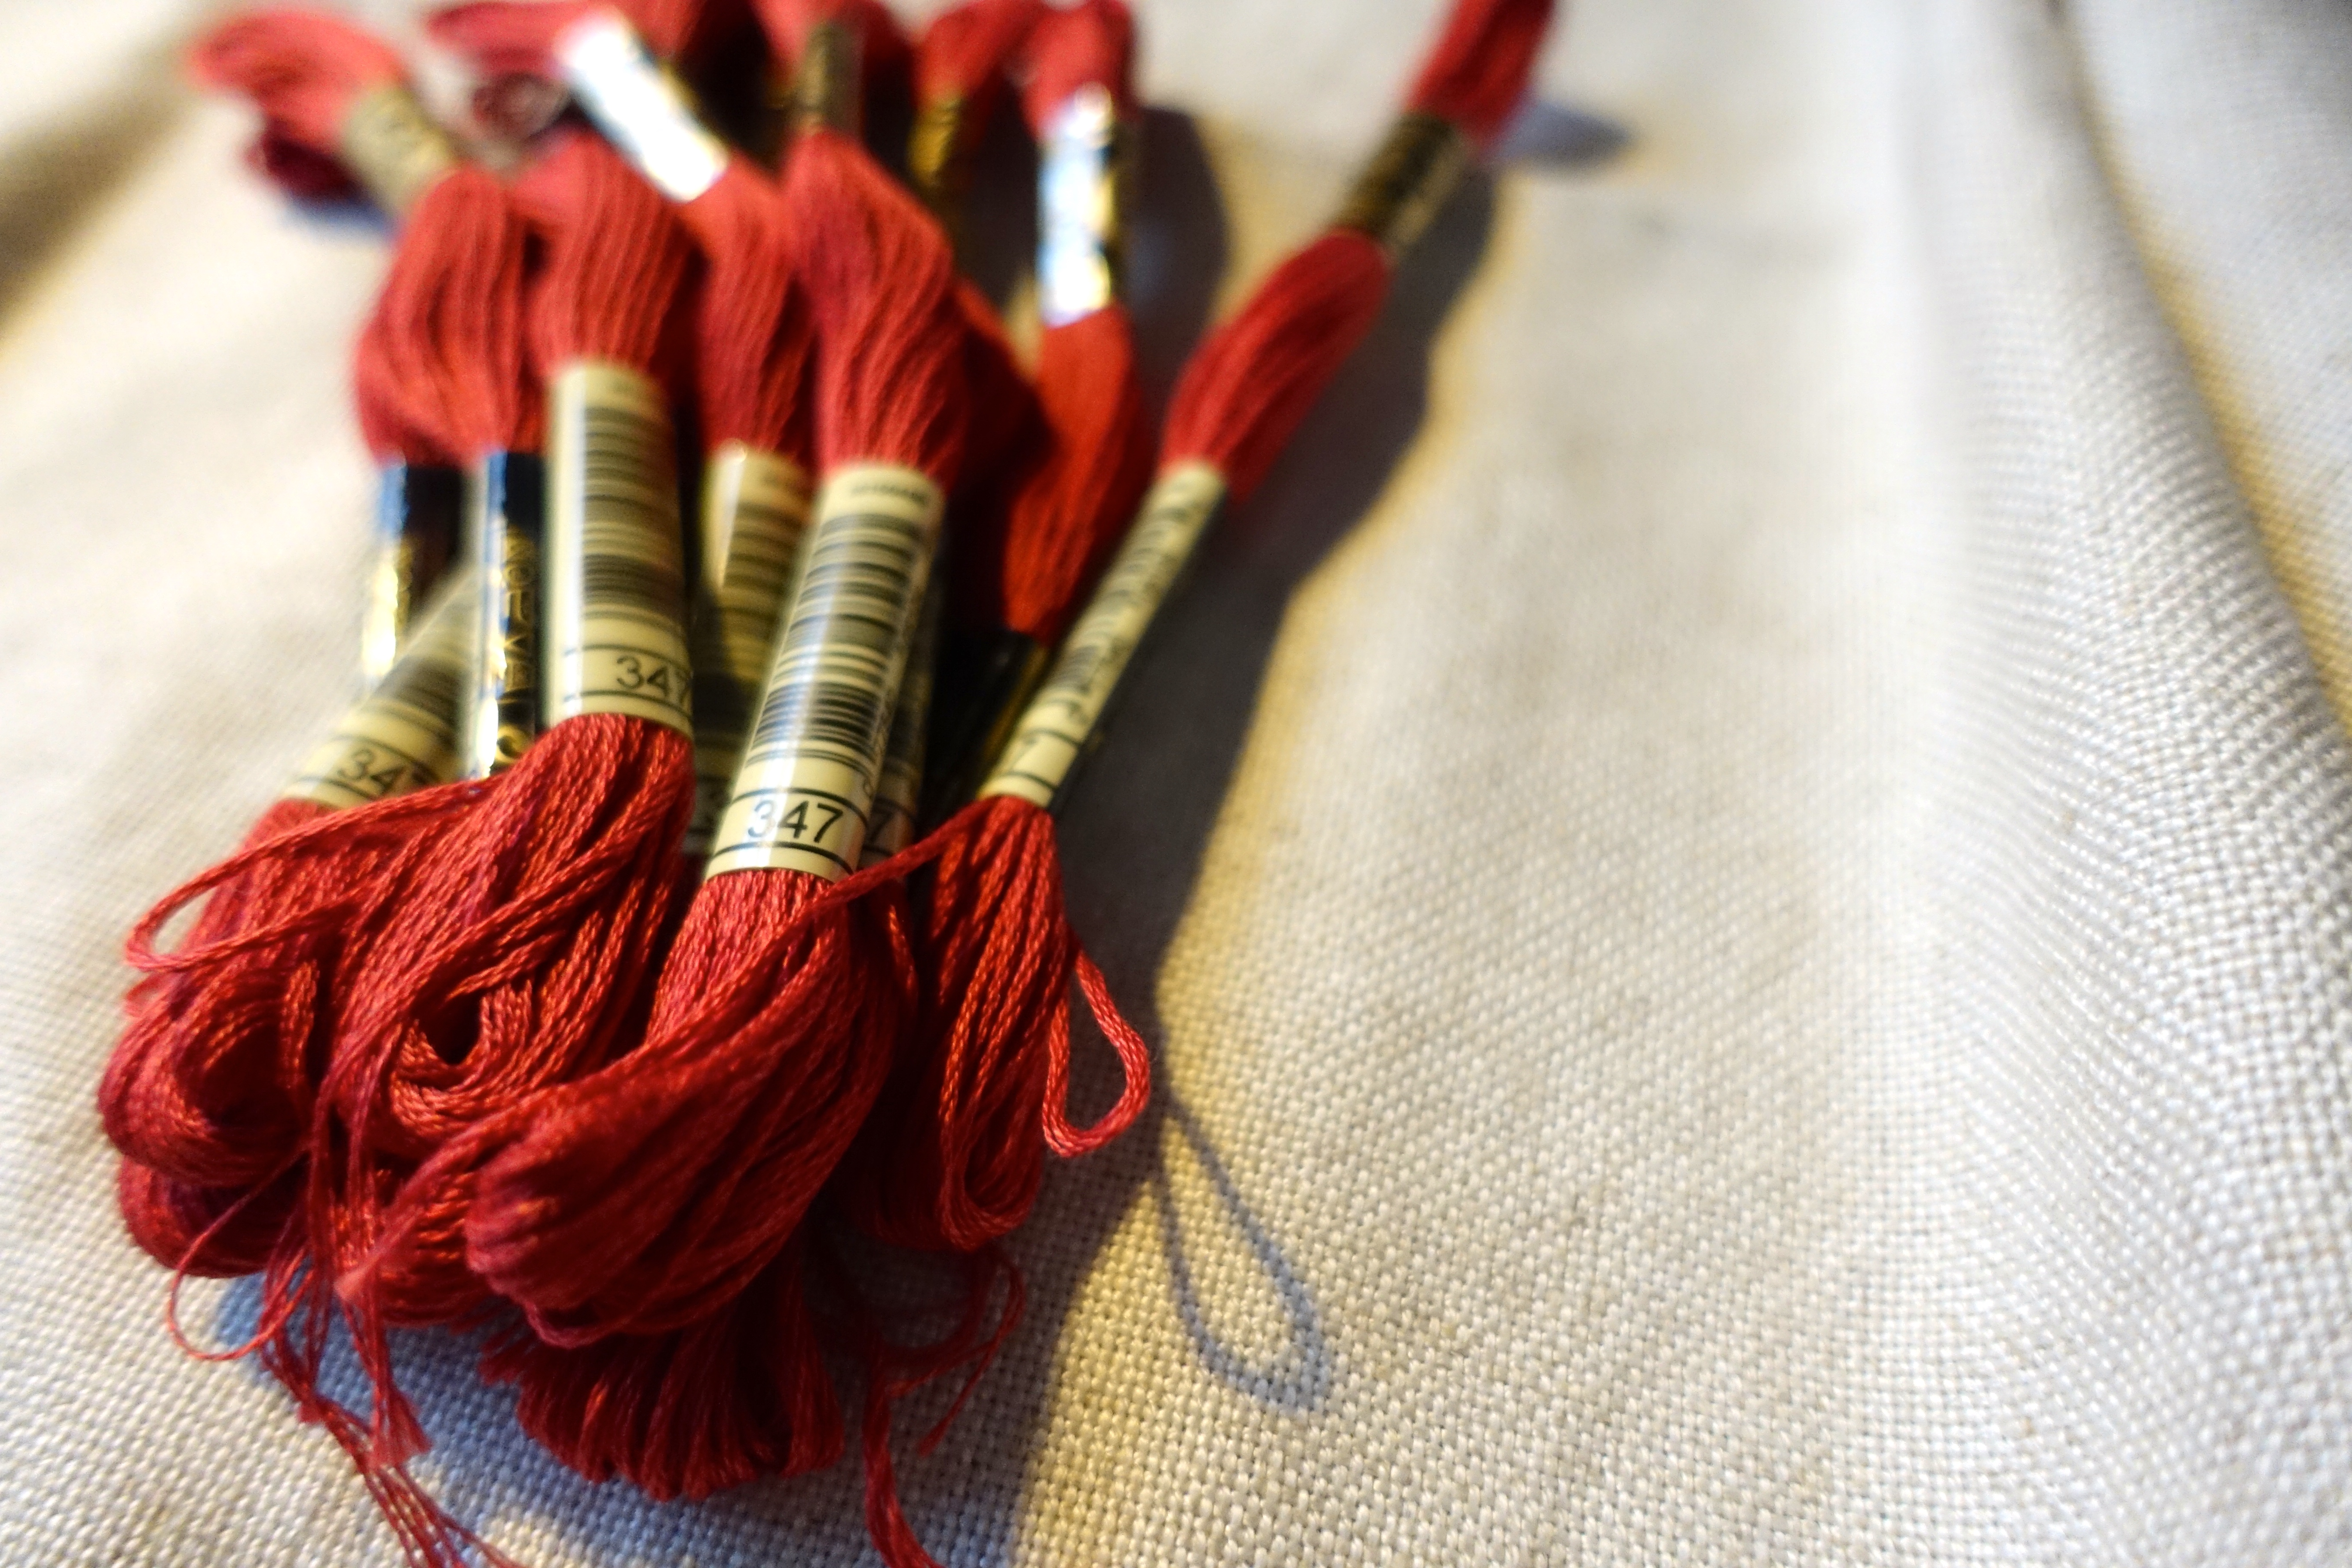
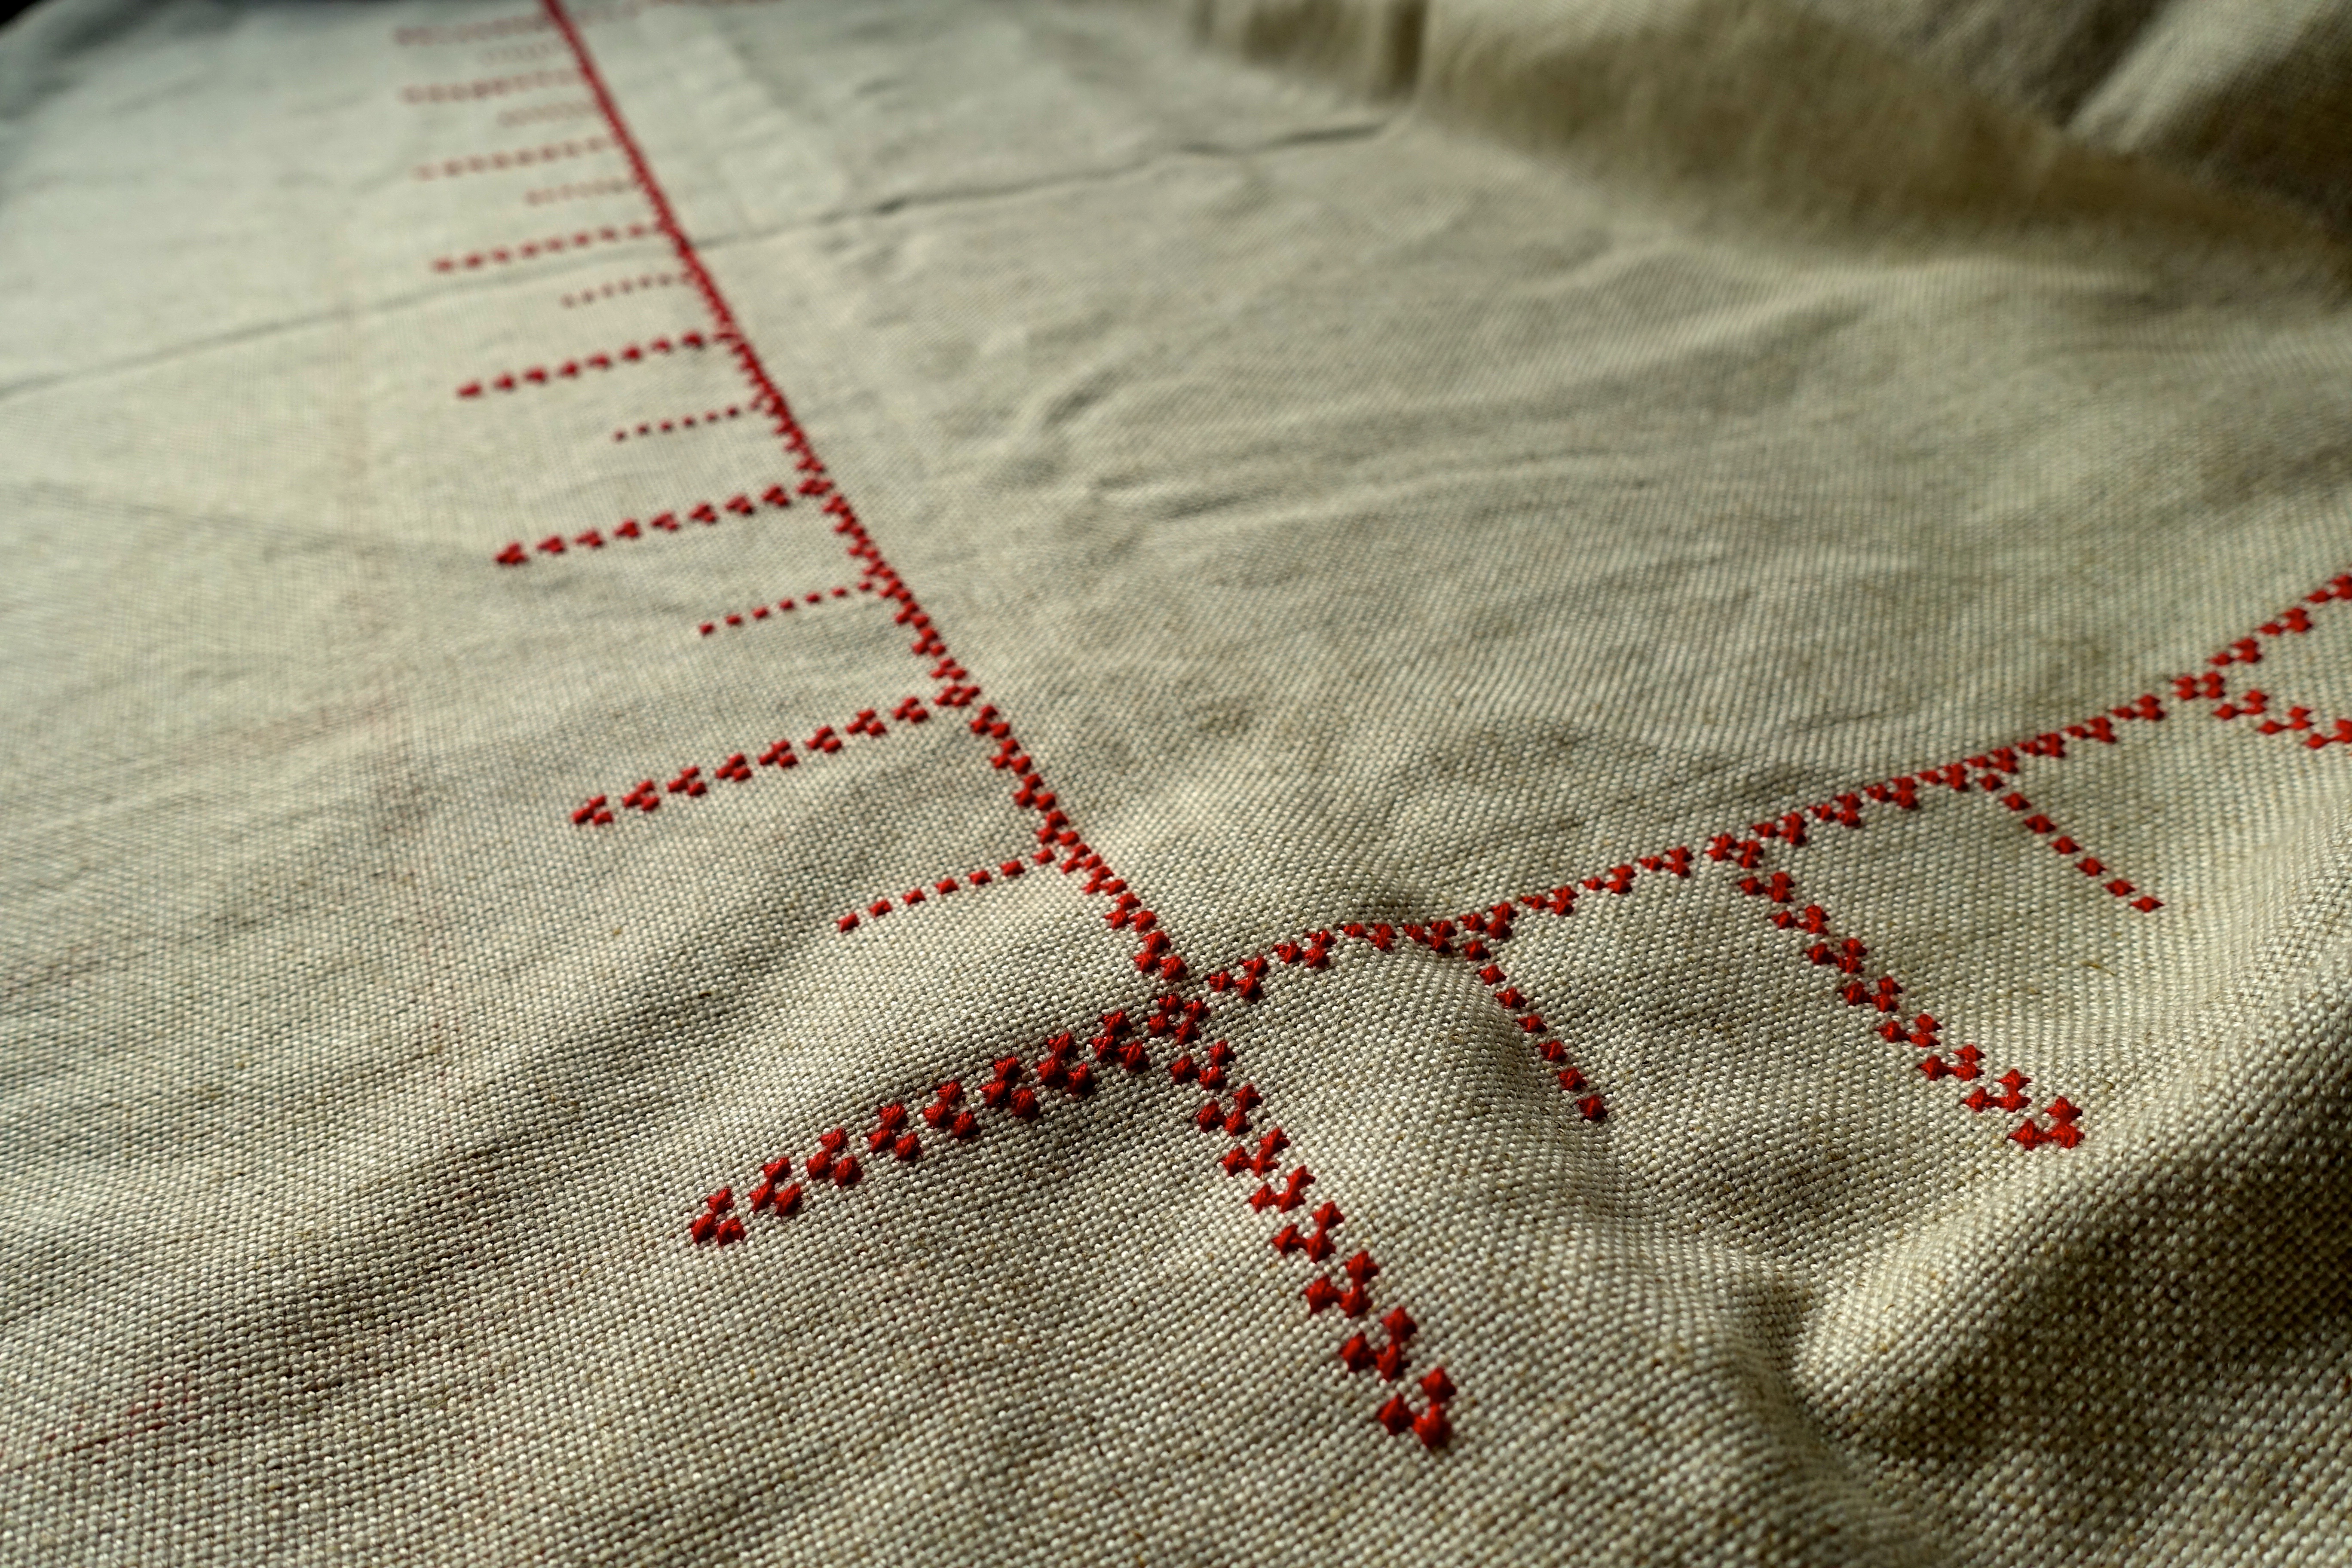
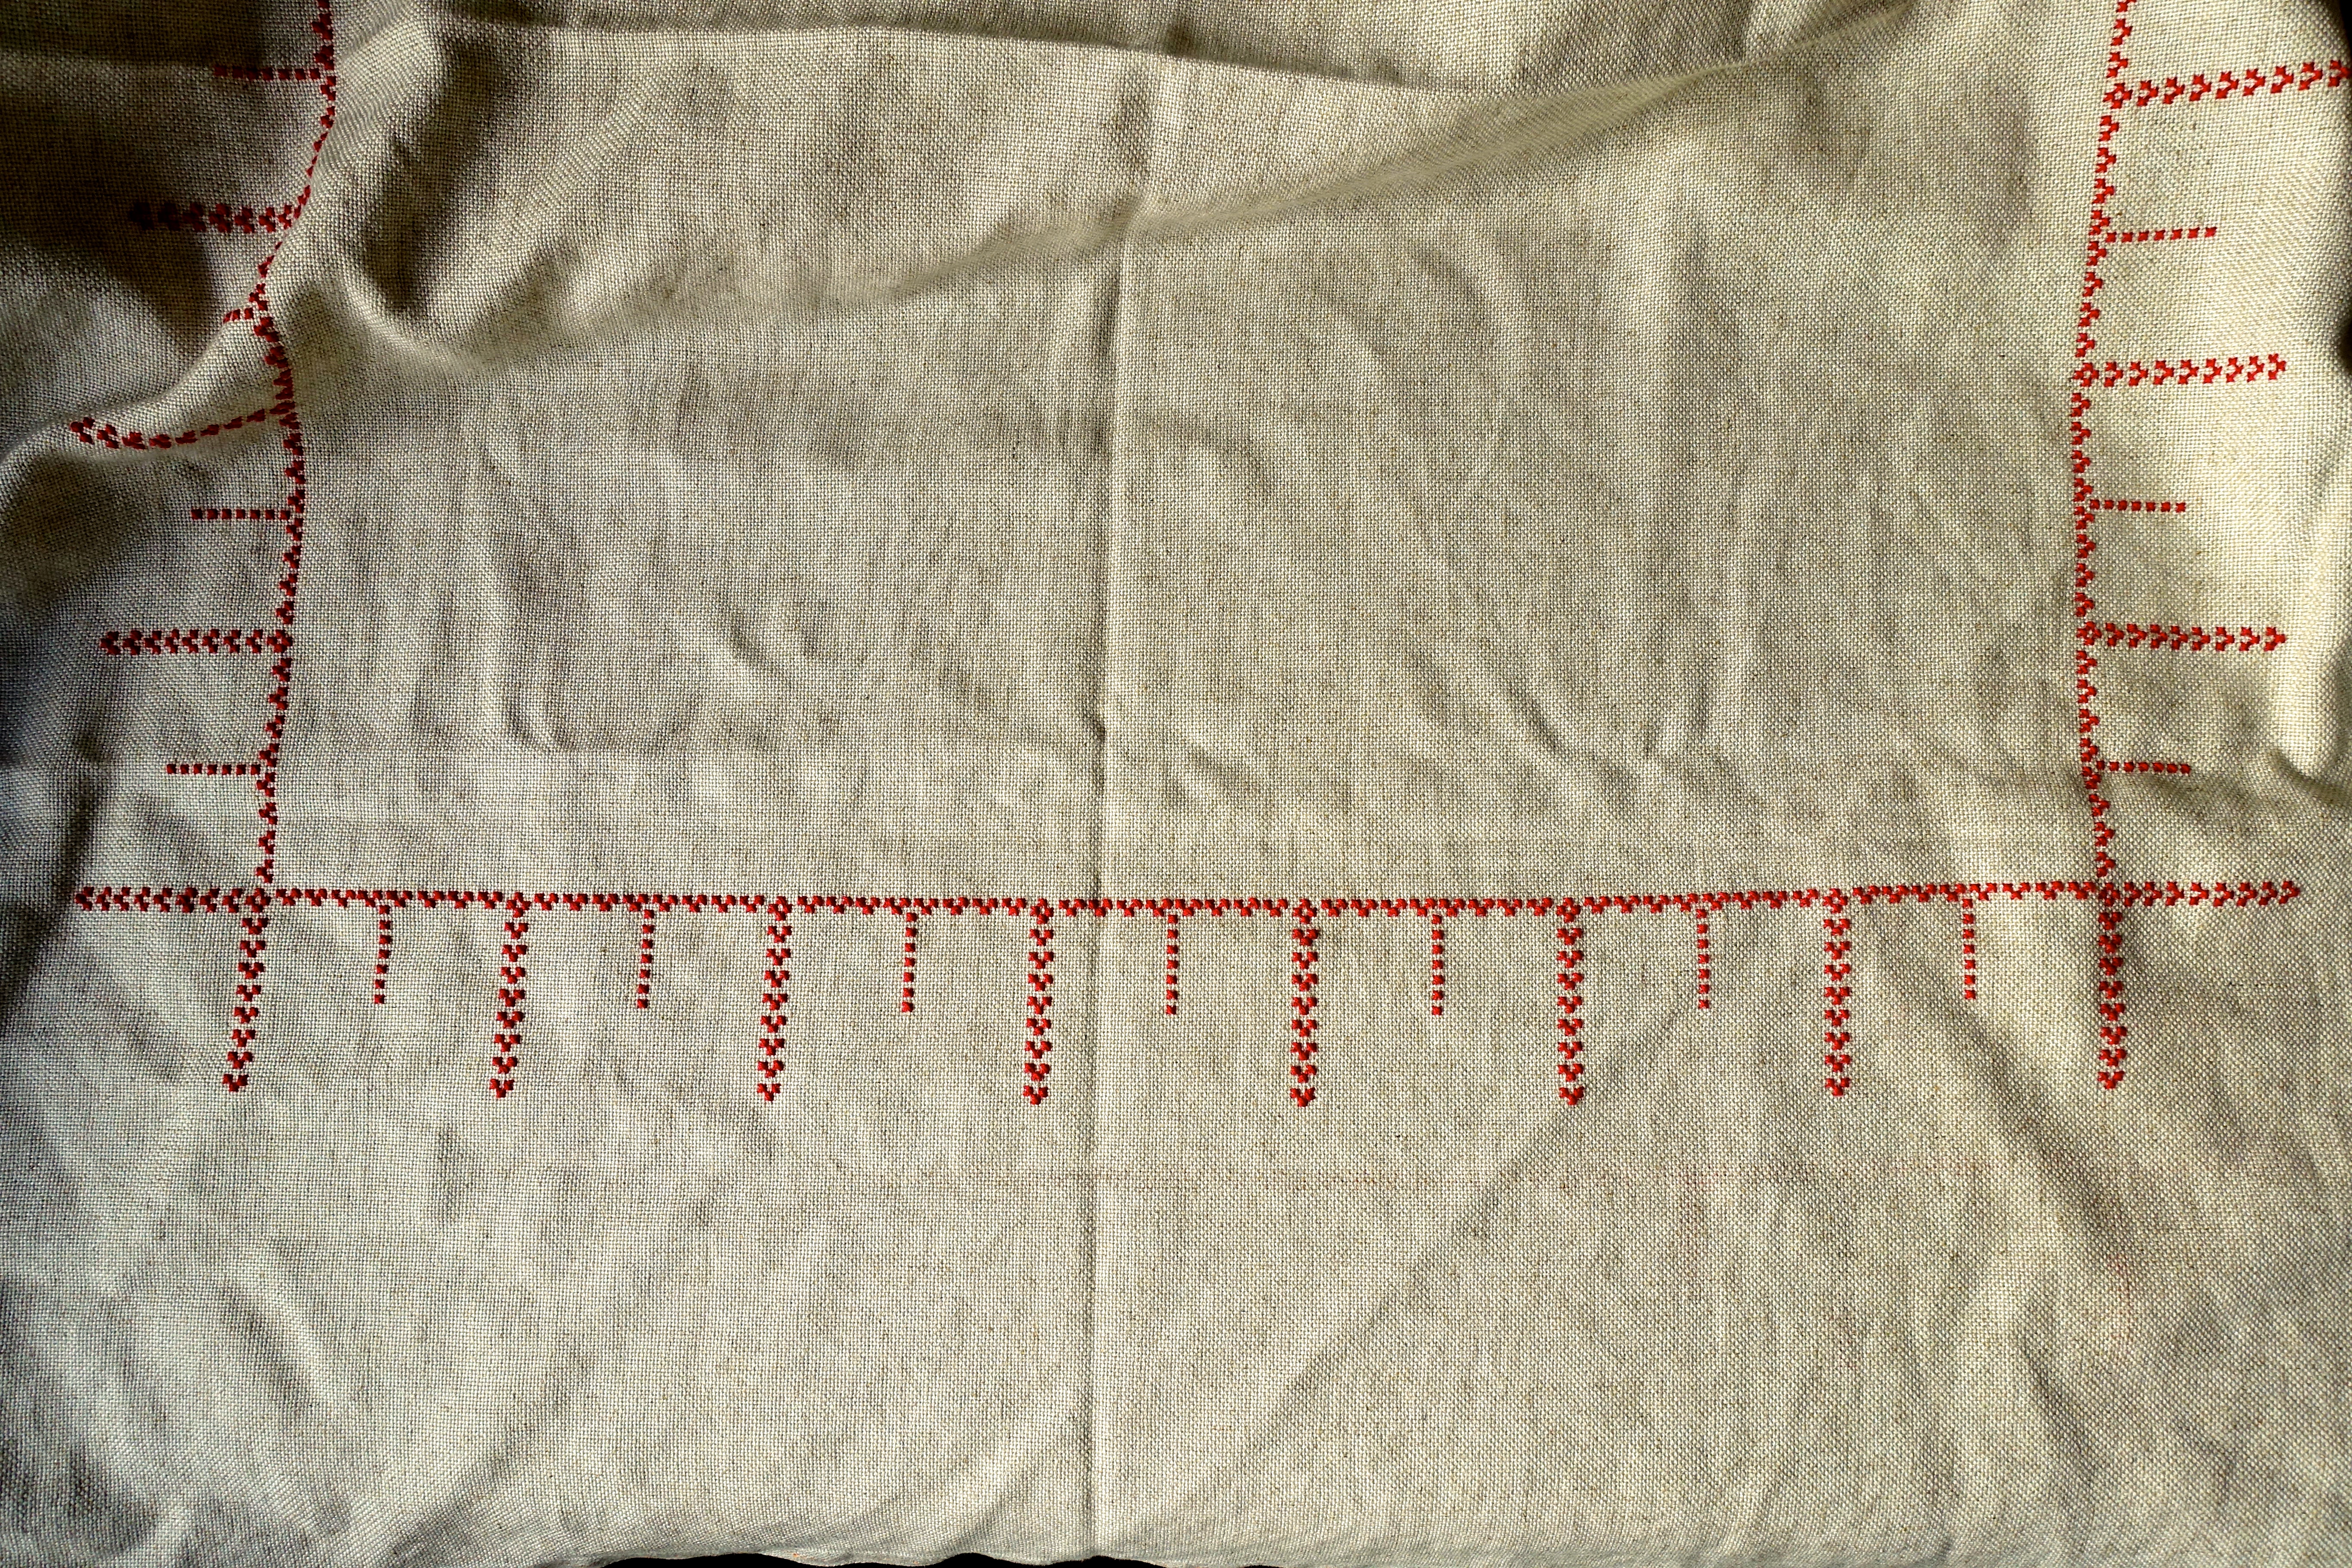
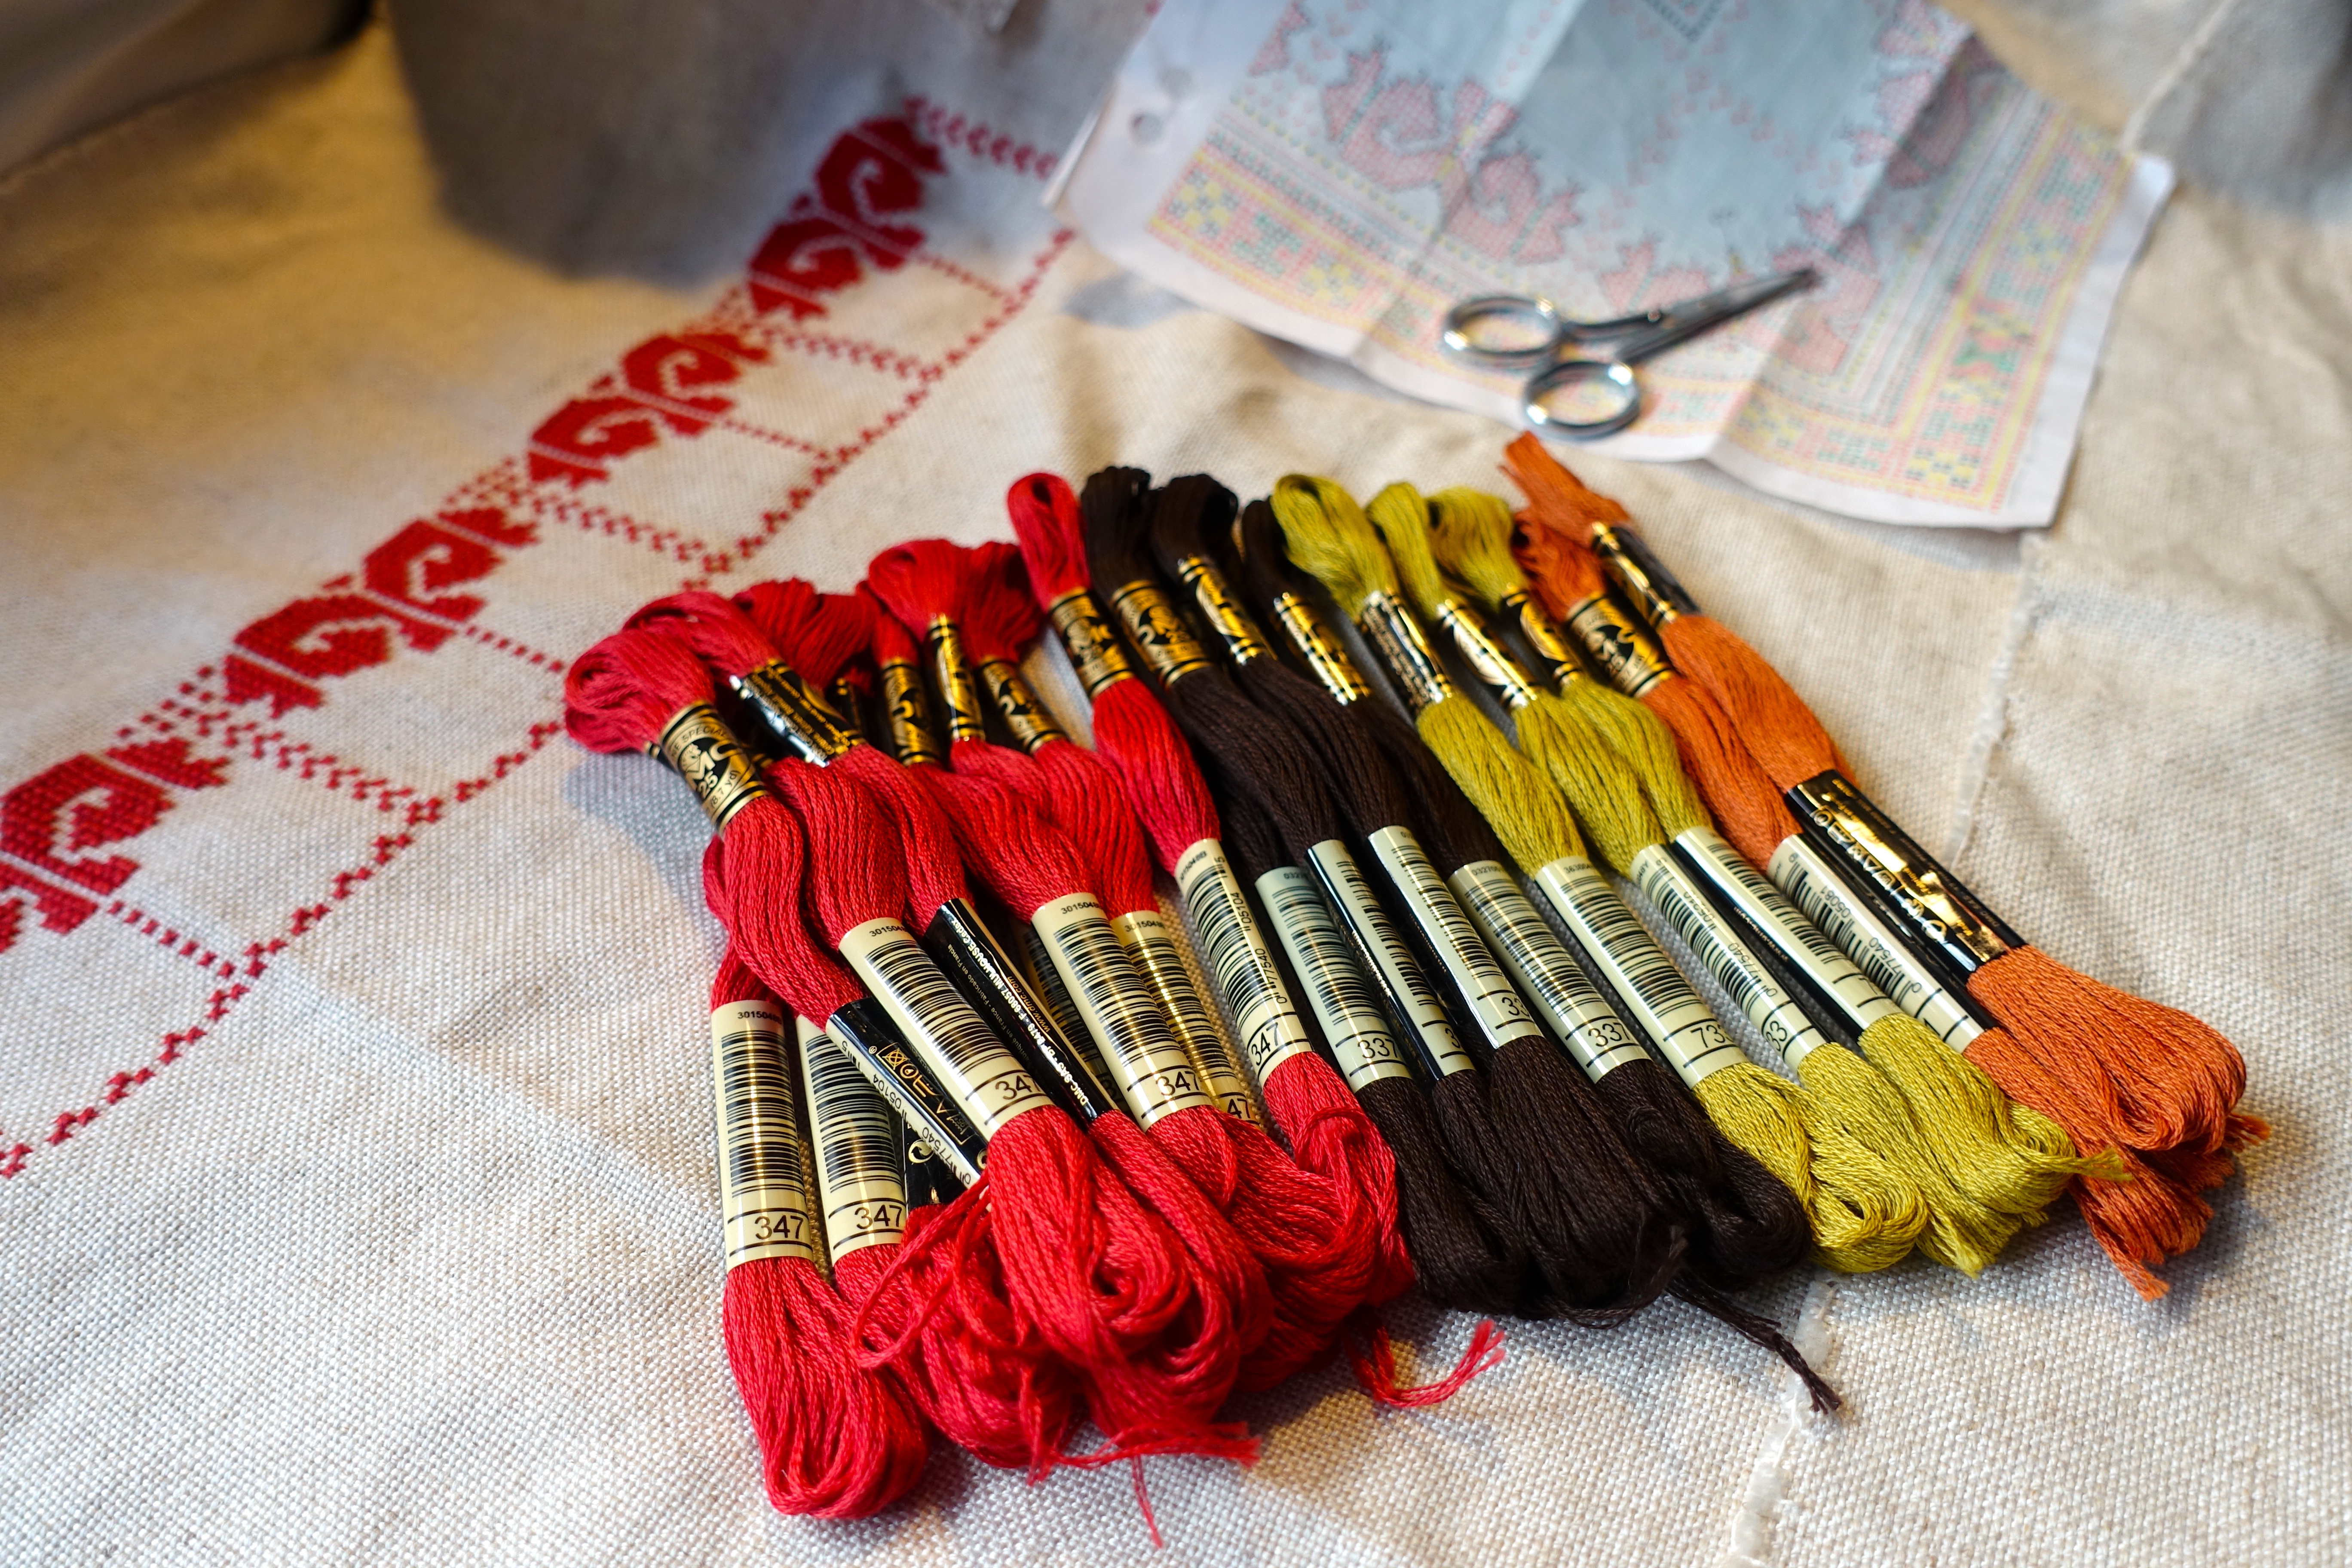
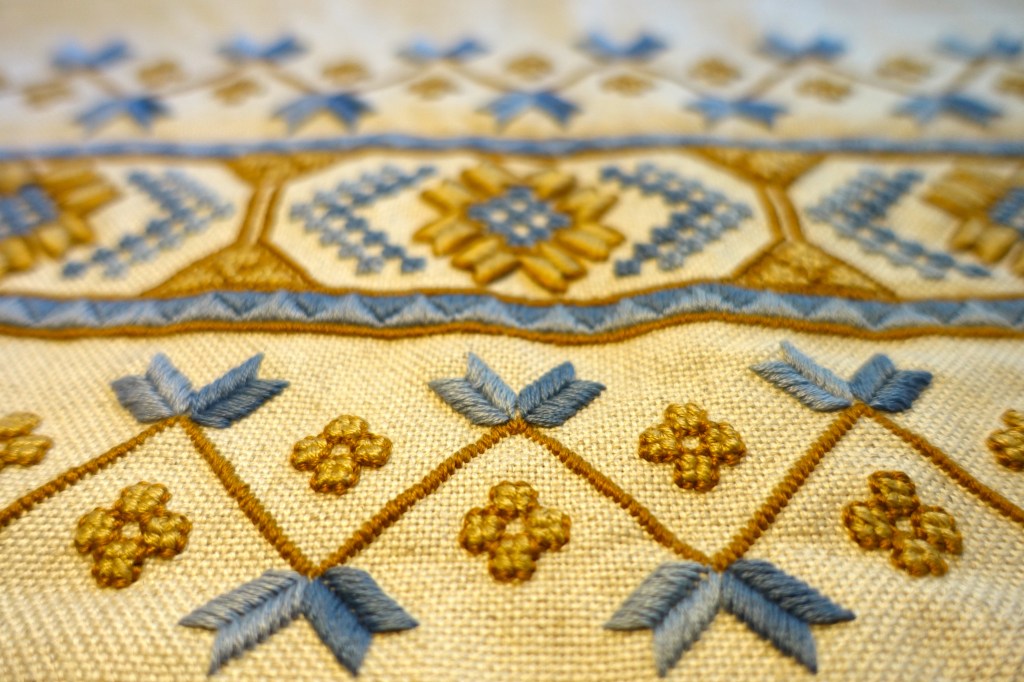
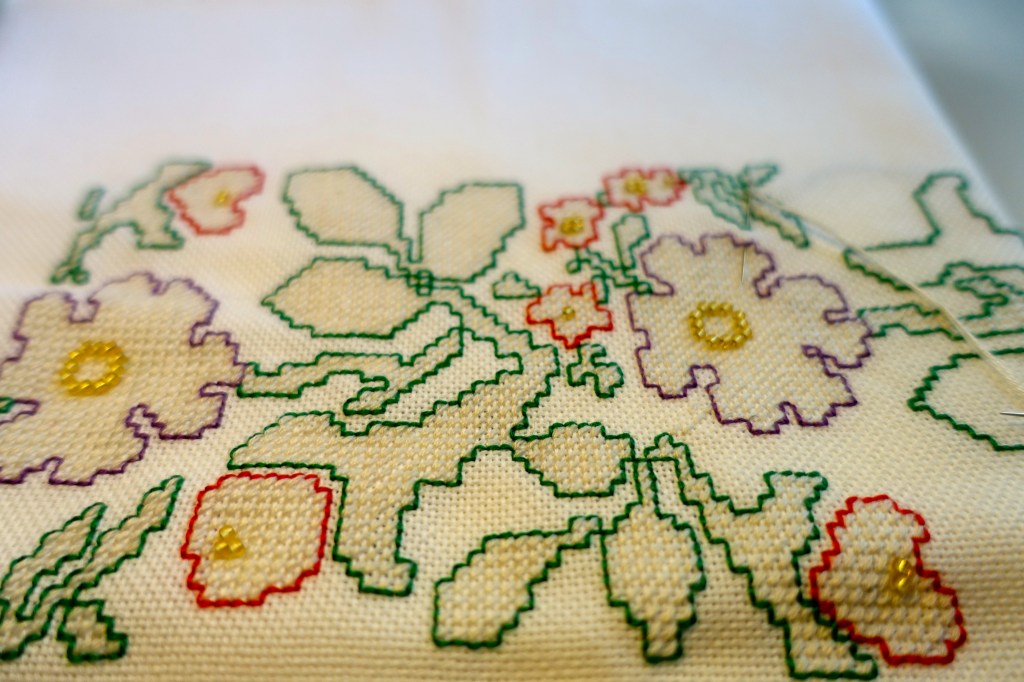
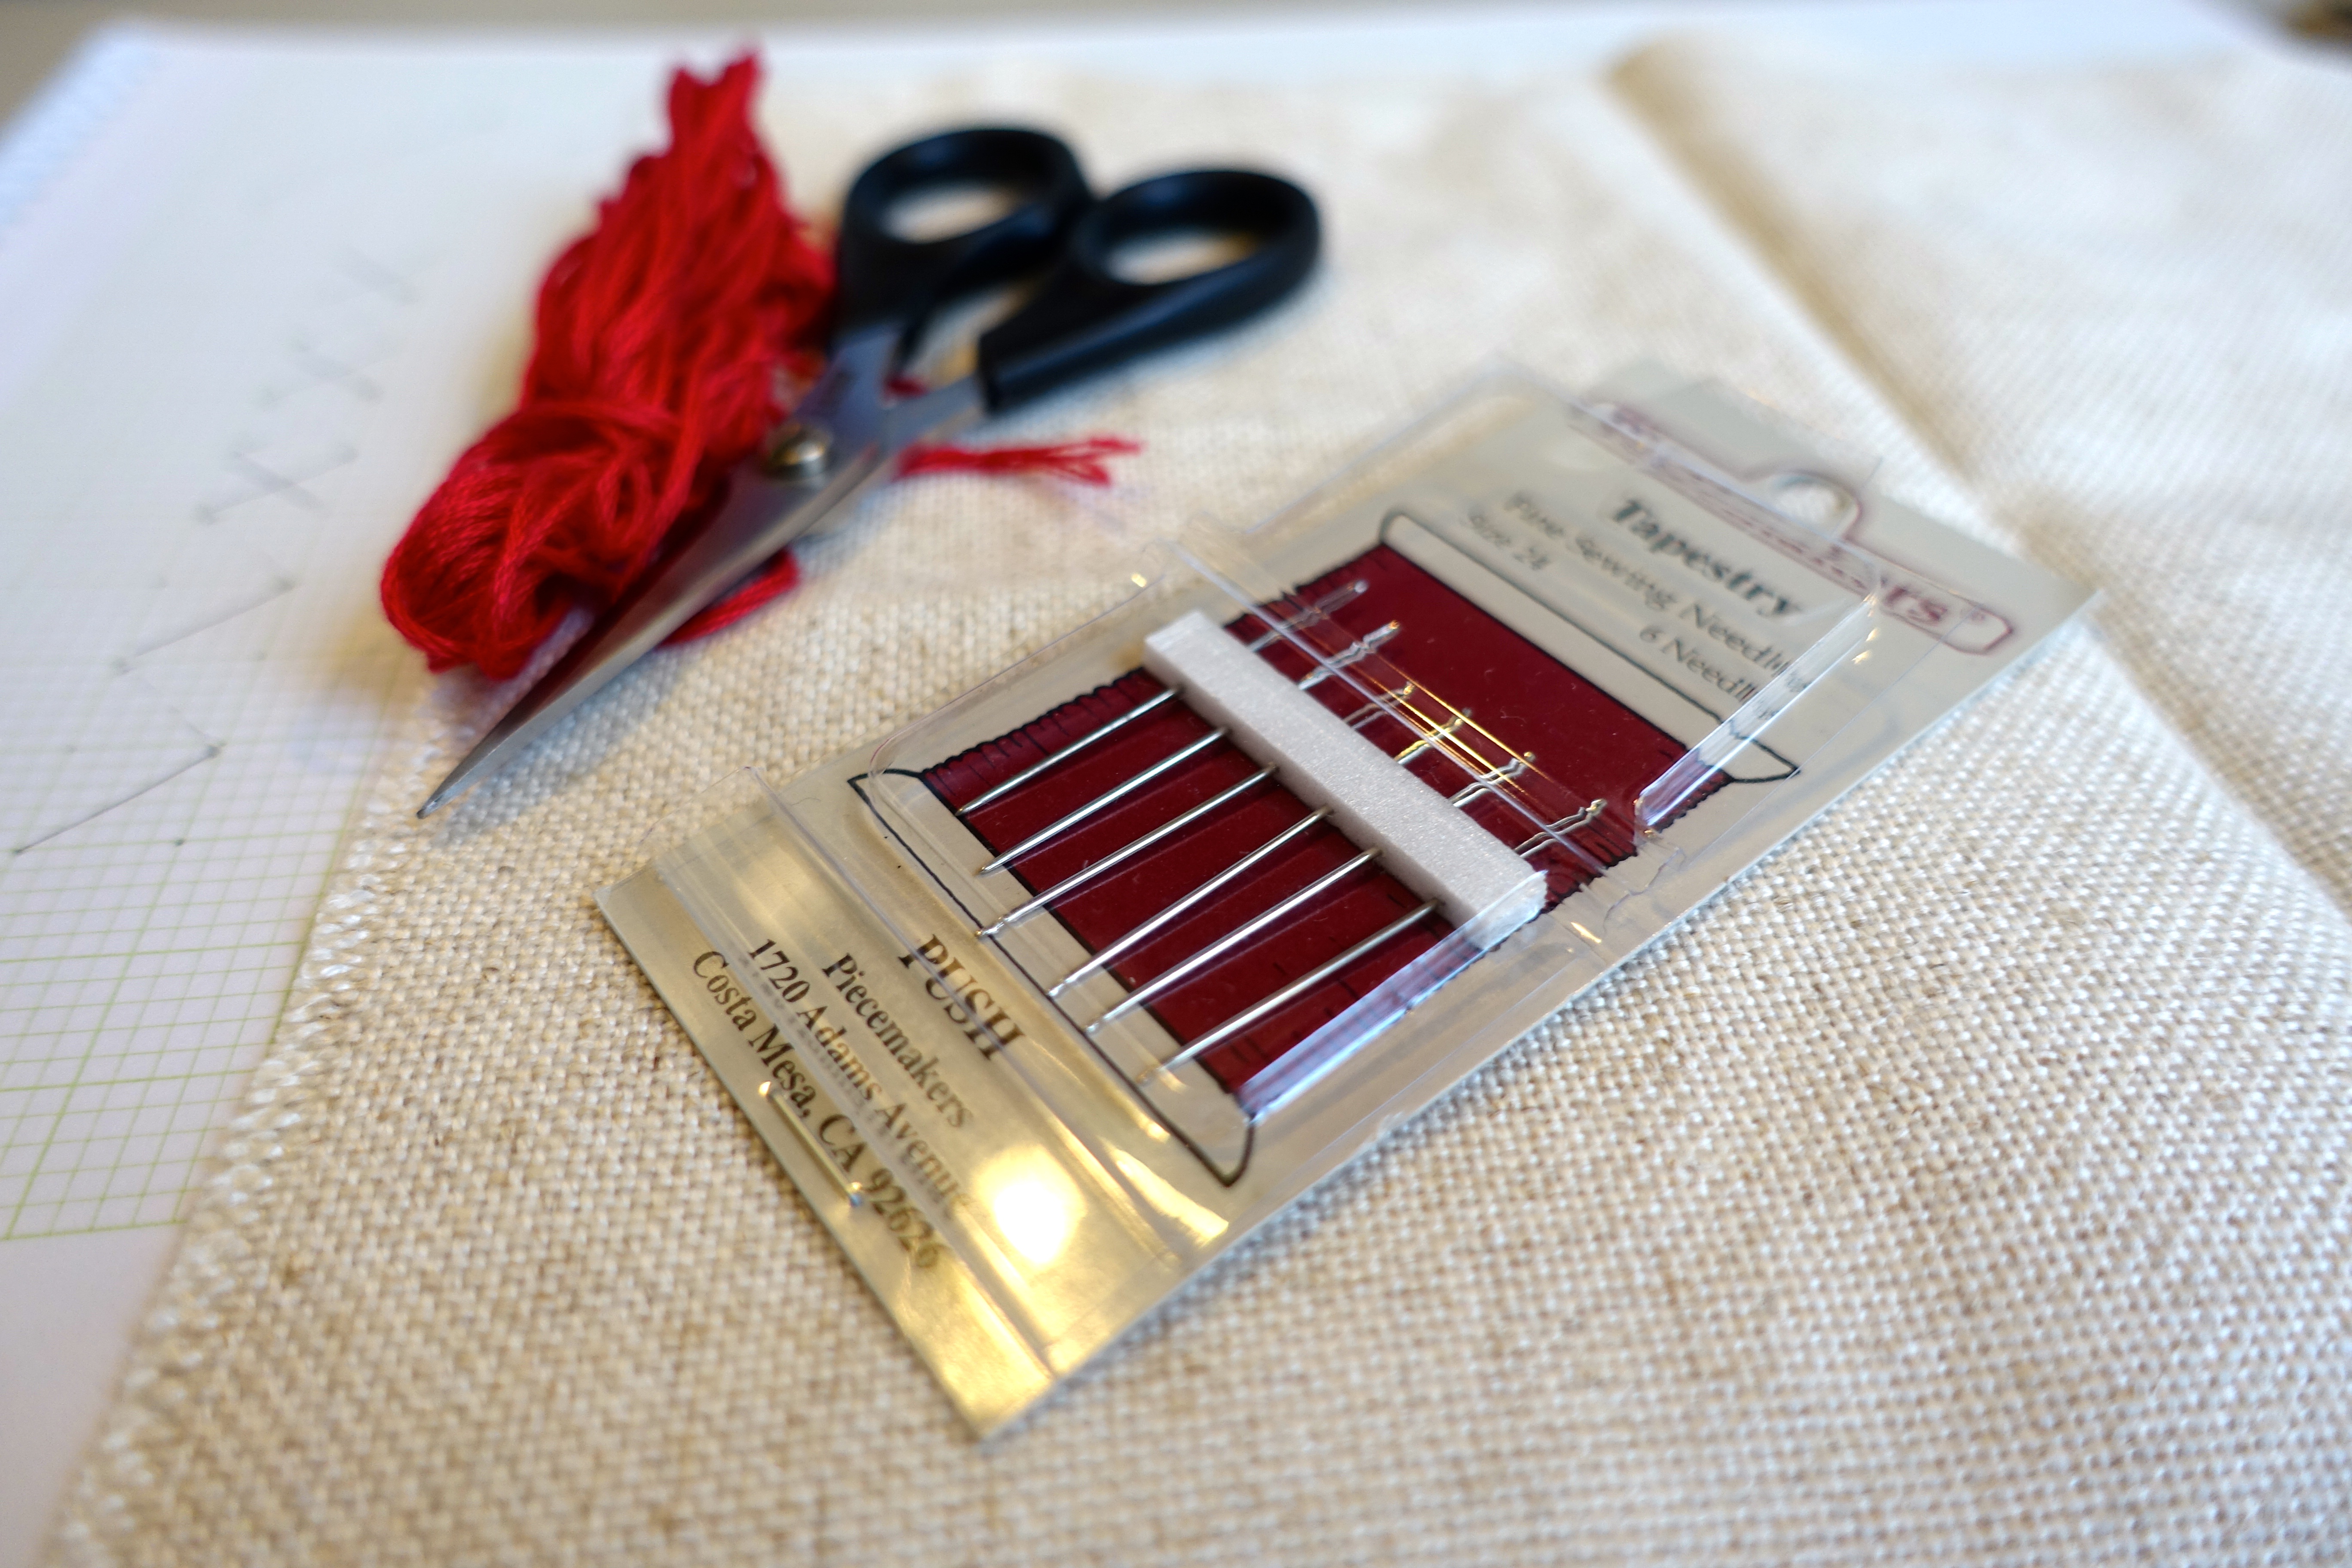
An off cut of Floba fabric, some cherry red cotton and some gold

Before I get going with photos and how tos, you might like to have a look at NO KNOTS! NO KNOTS! ~a how to post~, because part of what I’ll do here is a no knots technique to tucking thread ends, and The flip side, because the other part of what I’ll be discussing here is how to cross stitch and keep the flip side super tidy.

Apart from a tidy flip side and no knots, another “rule” I picked up somewhere along the way with regards to cross stitch is that all of the stitches be oriented the same way.  What I mean by this is that if your initial stitch goes bottom left to top right of the cross and the overlying stitch goes the other way, this needs to be uniform for the whole piece, the whole design.  Part of what I will be covering here, is how to achieve this without too much of a headache.

That has everything to do with whether you’re a lefty or a righty.

I’m right-handed and the pictures below in red thread pertain to righties.  The gold thread will show what lefties might do.

Embroidery is supposed to be fun and rhythmic and it is supposed to flow.  Making awkward angles with your hand or wrist to get your needle to certain places interrupts the rhythm and flow of embroidery.

Let me demonstrate with some photos.

If you’re right handed, you can easily push your needle through fabric oriented upwards, downwards or to the left:

However, it would be very awkward as a righty to try to push the needle through fabric towards the right.  Imagine my wrist in this photo:

DSC02422

This looks and feels awkward.

On the other hand, if you’re a lefty, you can easily push your needle through fabric oriented upwards, downwards or to the right:

However, you can imagine it would be very awkward for a lefty to try to push the needle through fabric towards the left.

So, we’ll be learning to cross stitch so that we have a tidy flip side, no knots, the threads forming the crosses oriented in the same direction and in such a way that we don’t need to make awkward angles with our hands and wrists.

Before we start stitching, a quick note about splitting stranded cotton.  I’ve not yet carried on too much about “coverage” (but it’s coming).  Coverage refers to the thickness of the embroidery, which is a result of the thickness of the embroidery thread in relationship to to fineness of the fabric.  For a 25 count fabric, a very comfortable way to use DMC stranded cotton is to use three strands at a time (of six strands).

DSC02417

6 strands of DMC stranded embroidery cotton.

DSC02418

It is separated into two lots of 3 strands and 3 strands used at a time.

The first step is to cross stitch in a direct line, either vertically or horizontally.  Always form a stretch of half crosses and then complete them by coming back the same way.  Unless a cross is on its own, it never gets stitched completely – neighbouring crosses are stitched in a row of halves and then a returing row of halves.

For a righty, making a row of vertical crosses looks like this:

IMG_20190927_0001

There is a tail end of thread, which we will tuck under the back side of stitches when we have some stitches available.  The half crosses are formed from bottom left to top right (solid line) and the needle makes a horizontal movement to the left on the flip side (dotted line) to come through in the bottom left of the next cross.  To change direction, come back the other way and complete the next half of each cross, the needle still passes horizontally to the left under the fabric, but rather than emerging at what would be the bottom left of the next cross up, it is now in the top left of the same cross and the next stitch brings the thread down to the bottom right.  And so on.

So, it would look like this:

DSC02427

Here there are 3 strands of cotton threaded and at a starting point in the fabric.  Note my thread tale that I’m holding to the side with fingers fo my left hand, for tucking under later when I have some stitches available.

IMG_20190927_0003

First stitch – capturing 2 threads of the fabric with each stitch, I put my needle into what would be the top right of the cross and then pass it horizontally under the fabric to for the bottom left of the next cross.

IMG_20190927_0005

By repeating this over, I have a row of half crosses on the front side and a row of horizontal stitches on the flip side, as in the above photo.  Here you can tuck your thread end under the existing first 3 or 4 stitches and trim it as in NO KNOTS! NO KNOTS! ~a how to post~.

IMG_20190927_0006

Here is my vertical row of half crosses all oriented in the same direction.  I’m in the process of turning around at the top to come back the other way.  Notice my thread is now exiting the fabric in what is the top left of the existing cross.

IMG_20190927_0007

When I pull through my needle, the next stitch will form the second half of the cross stitch and I’ll be away, coming back down the row.  My needle is still making horizontal stitches on the flip side in a left-ward direction.

IMG_20190927_0008

Here is a completed vertical row of crosses.

Stitching crosses in a horizontal direction for a righty goes from the left to the right.

IMG_20190927_0001

Remember that the first half cross needs to be oriented in the same direction as when we went vertically, so begins in its bottom left and goes towards its top right.  The needle makes vertical downward stitches on the flip side.

IMG_20190927_0009

My first stitch with the needle pushing through the fabric in the downwards direction.

IMG_20190927_0010

Here is a horizontal row of half crosses completed and I’m changing direction, much like at the top of the vertical row.  You can see the needle still making stitches by pushing through the fabric in a downward direction.

IMG_20190927_0011

We have arrived back at the end of the row with a completed row of horizontal cross stitches for a righty.

Now for the lefties out there.

A vertical row of stitches would look like the following:

IMG_20190927_0001

The thread begins in the bottom right and makes its way to the top left of the half cross (solid line) with the needle being pushed through the fabric in a rightwards direction to form a horizontal stitch on the flip side (dotted line).

IMG_20190927_0012
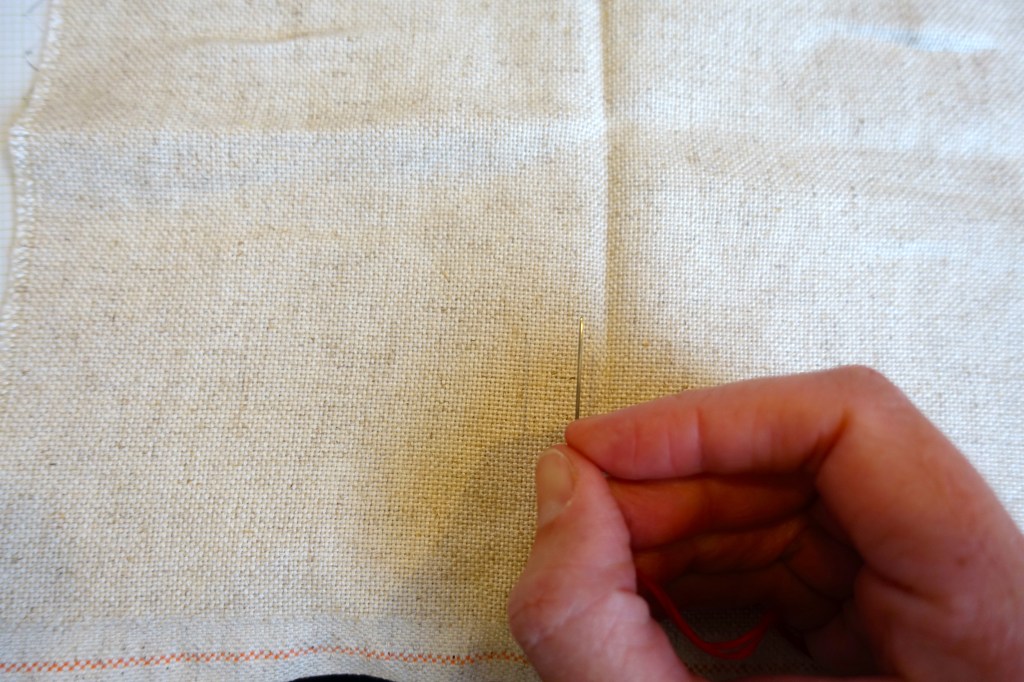
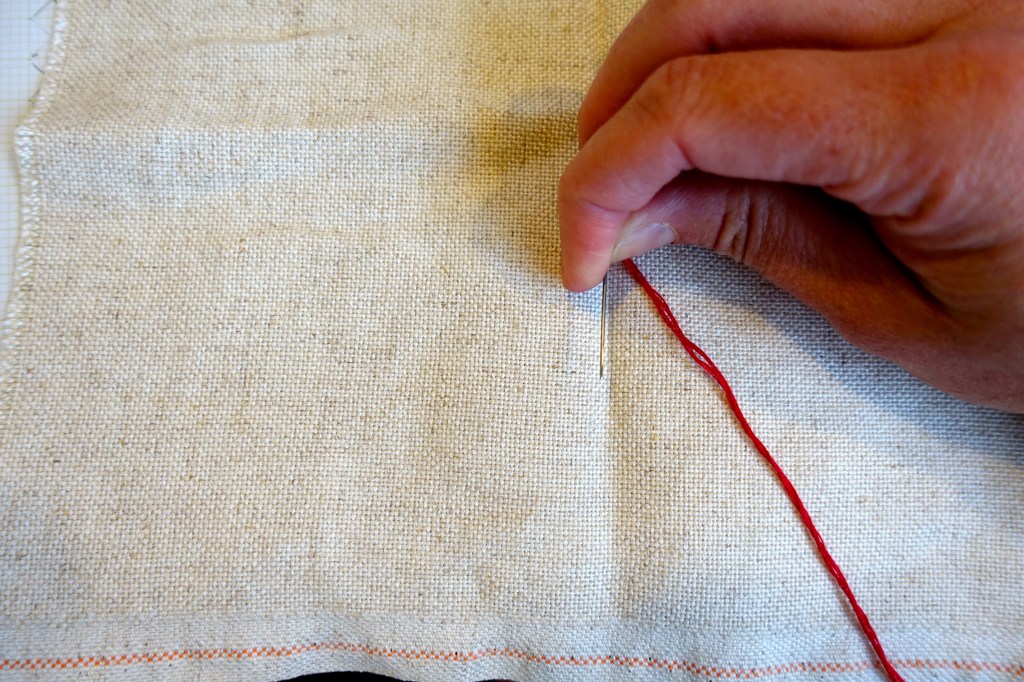
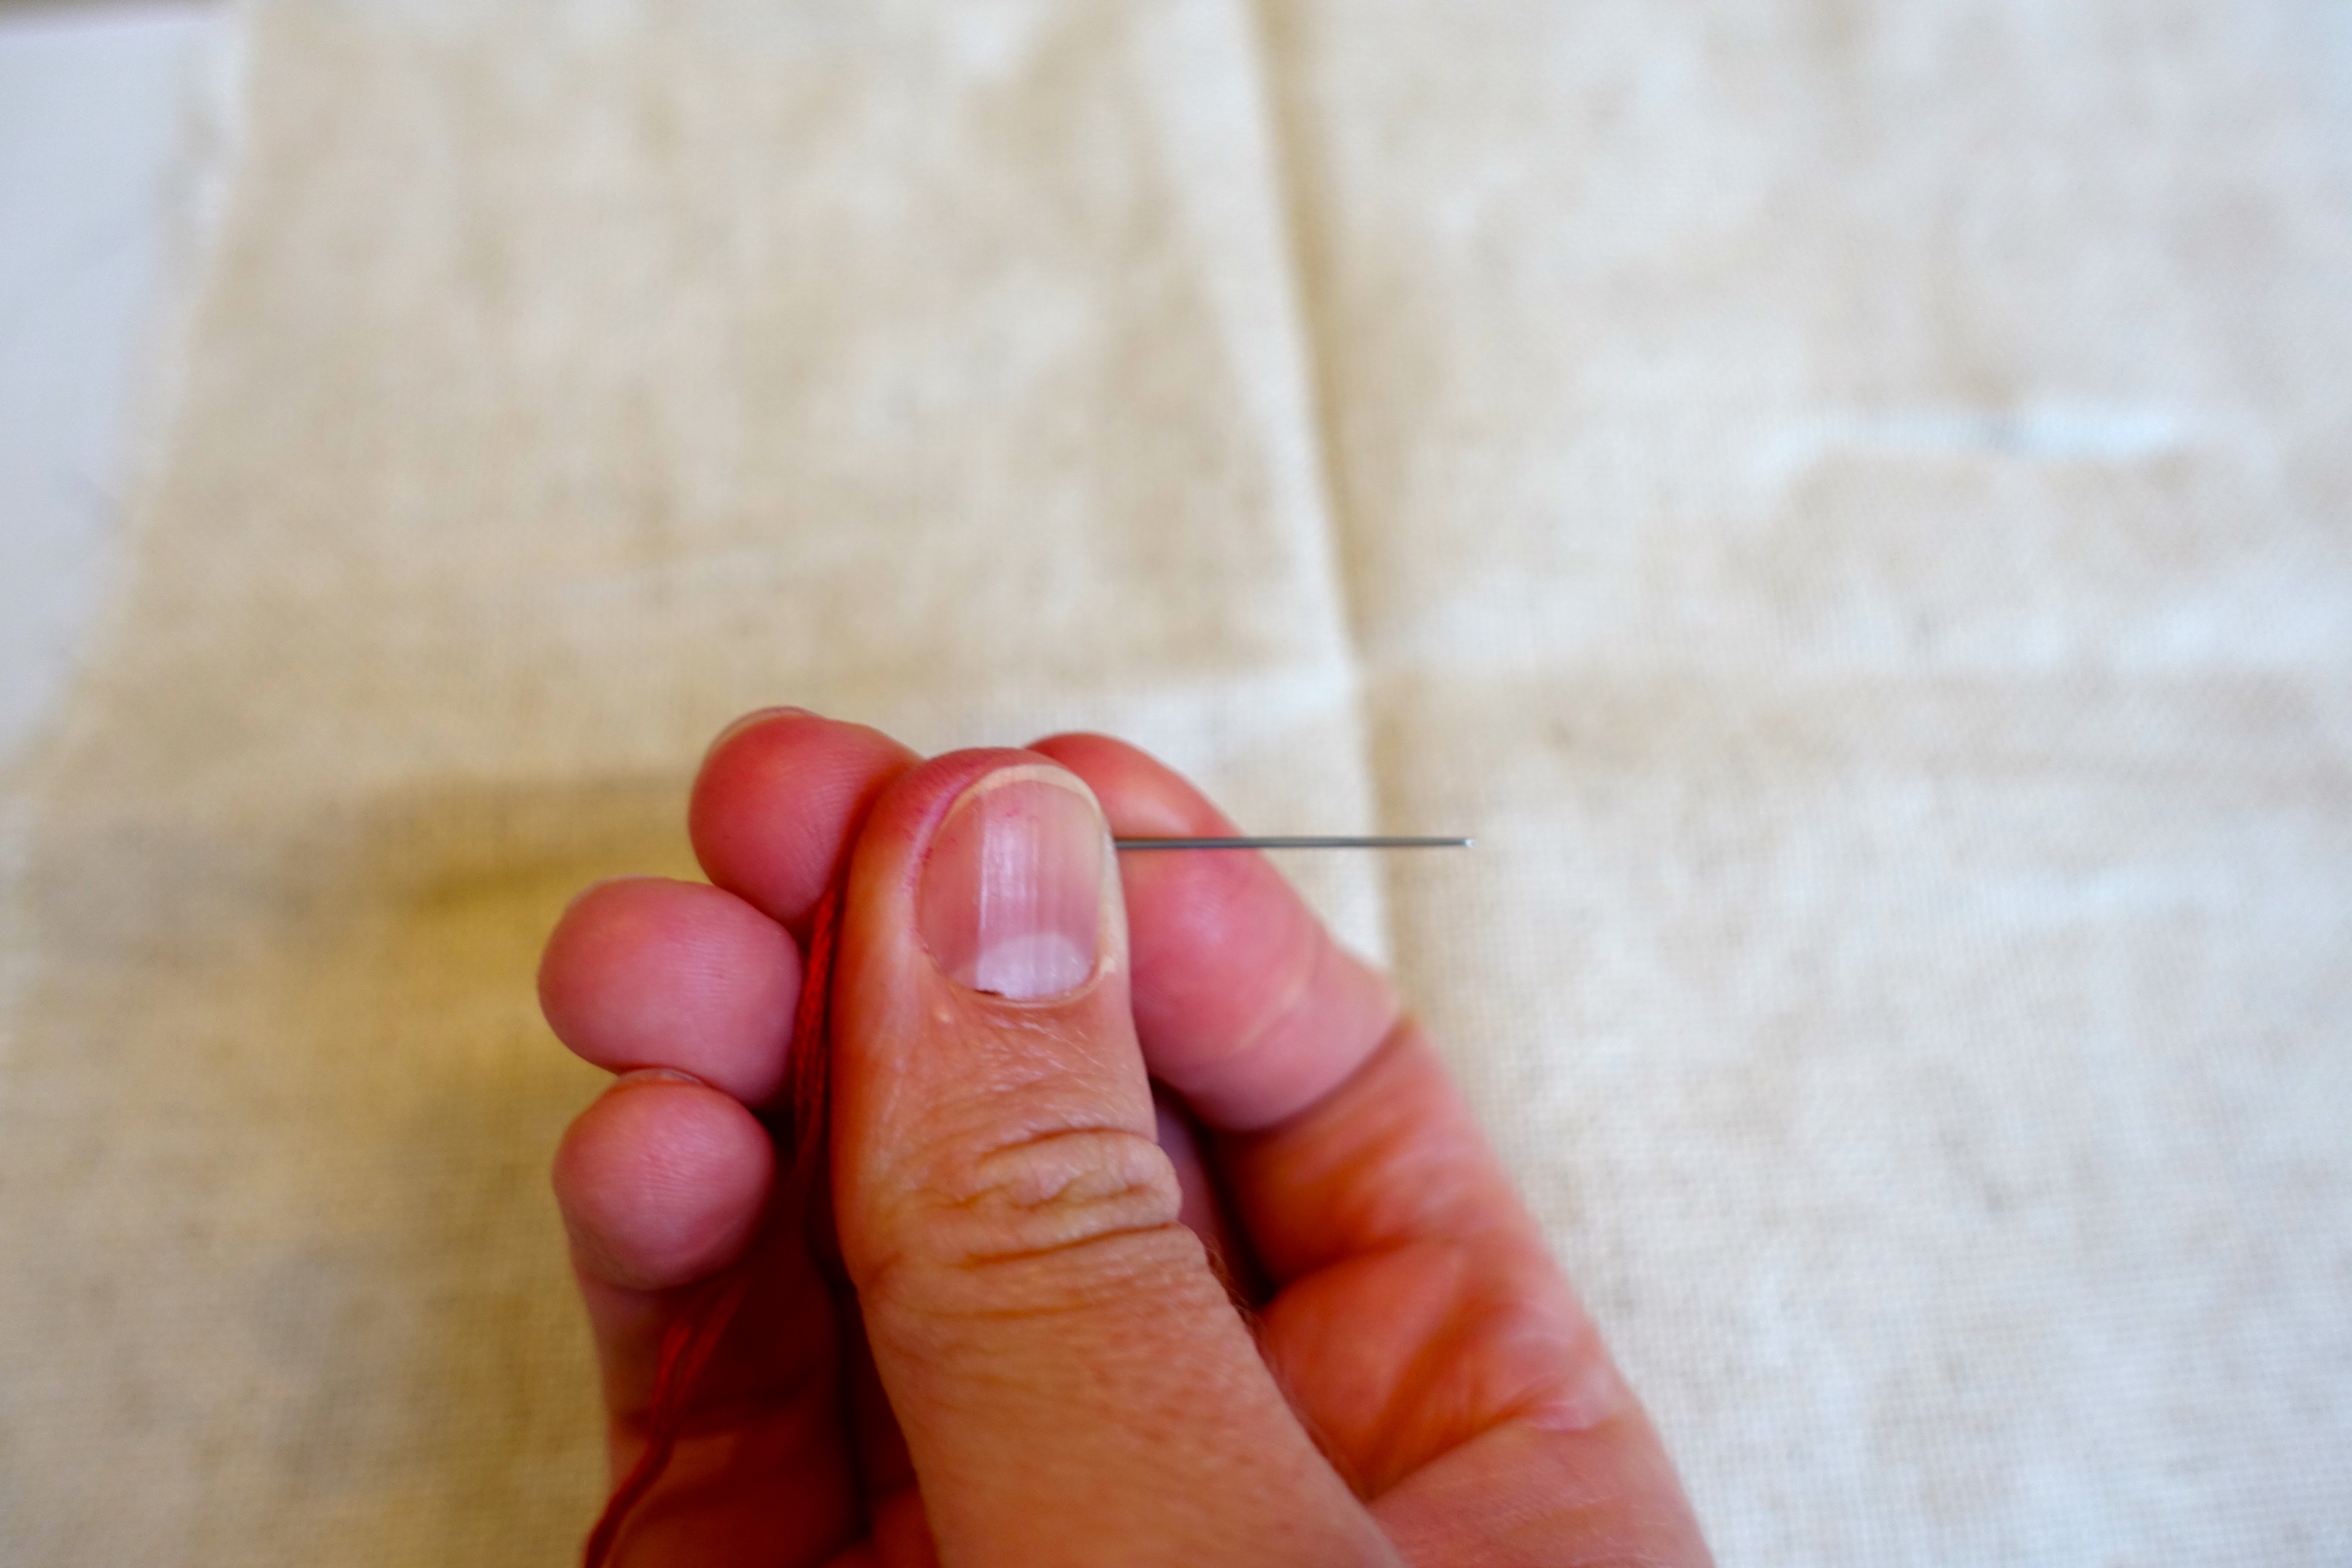
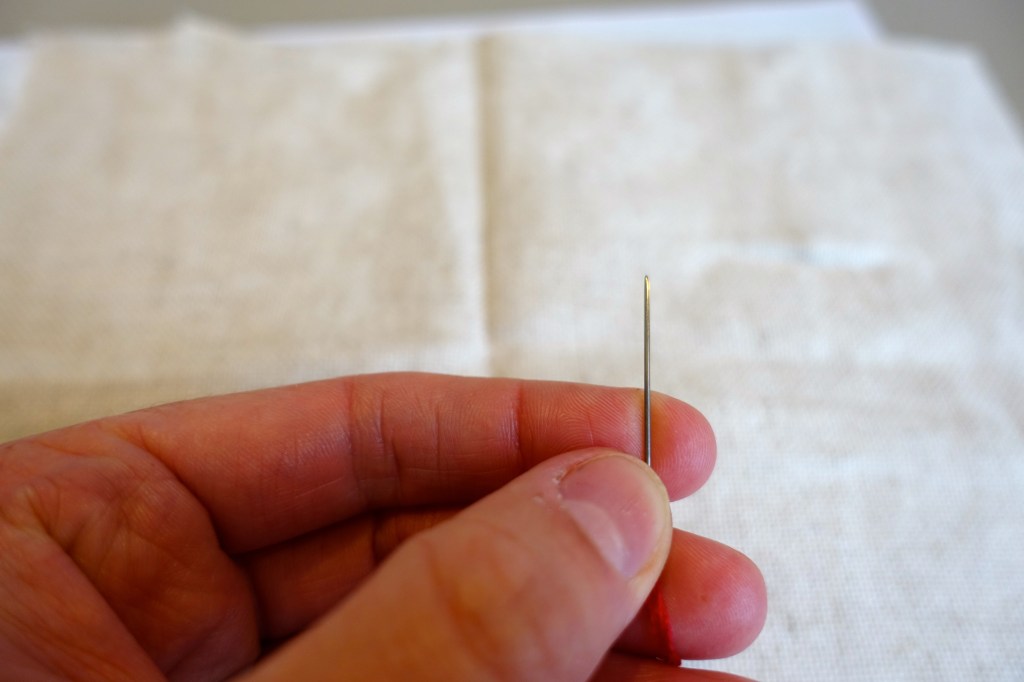
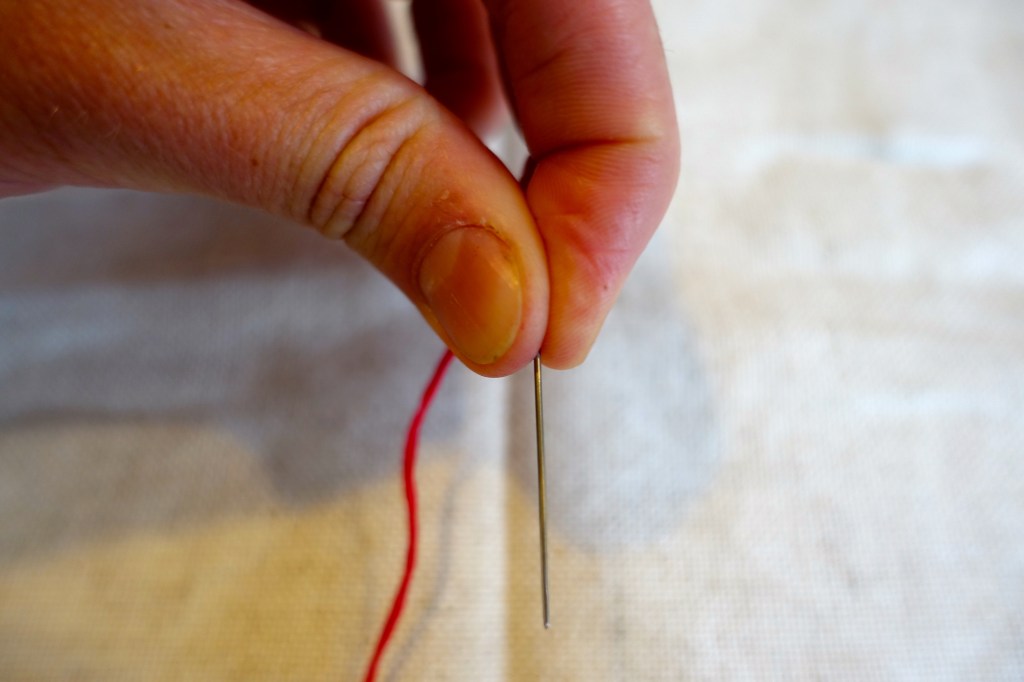
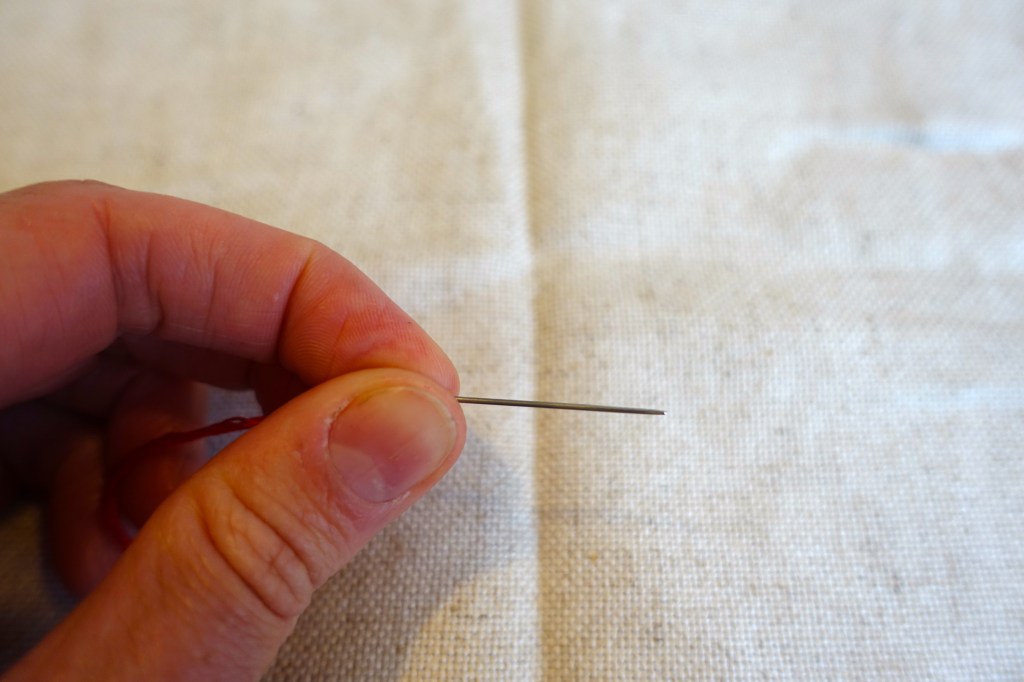
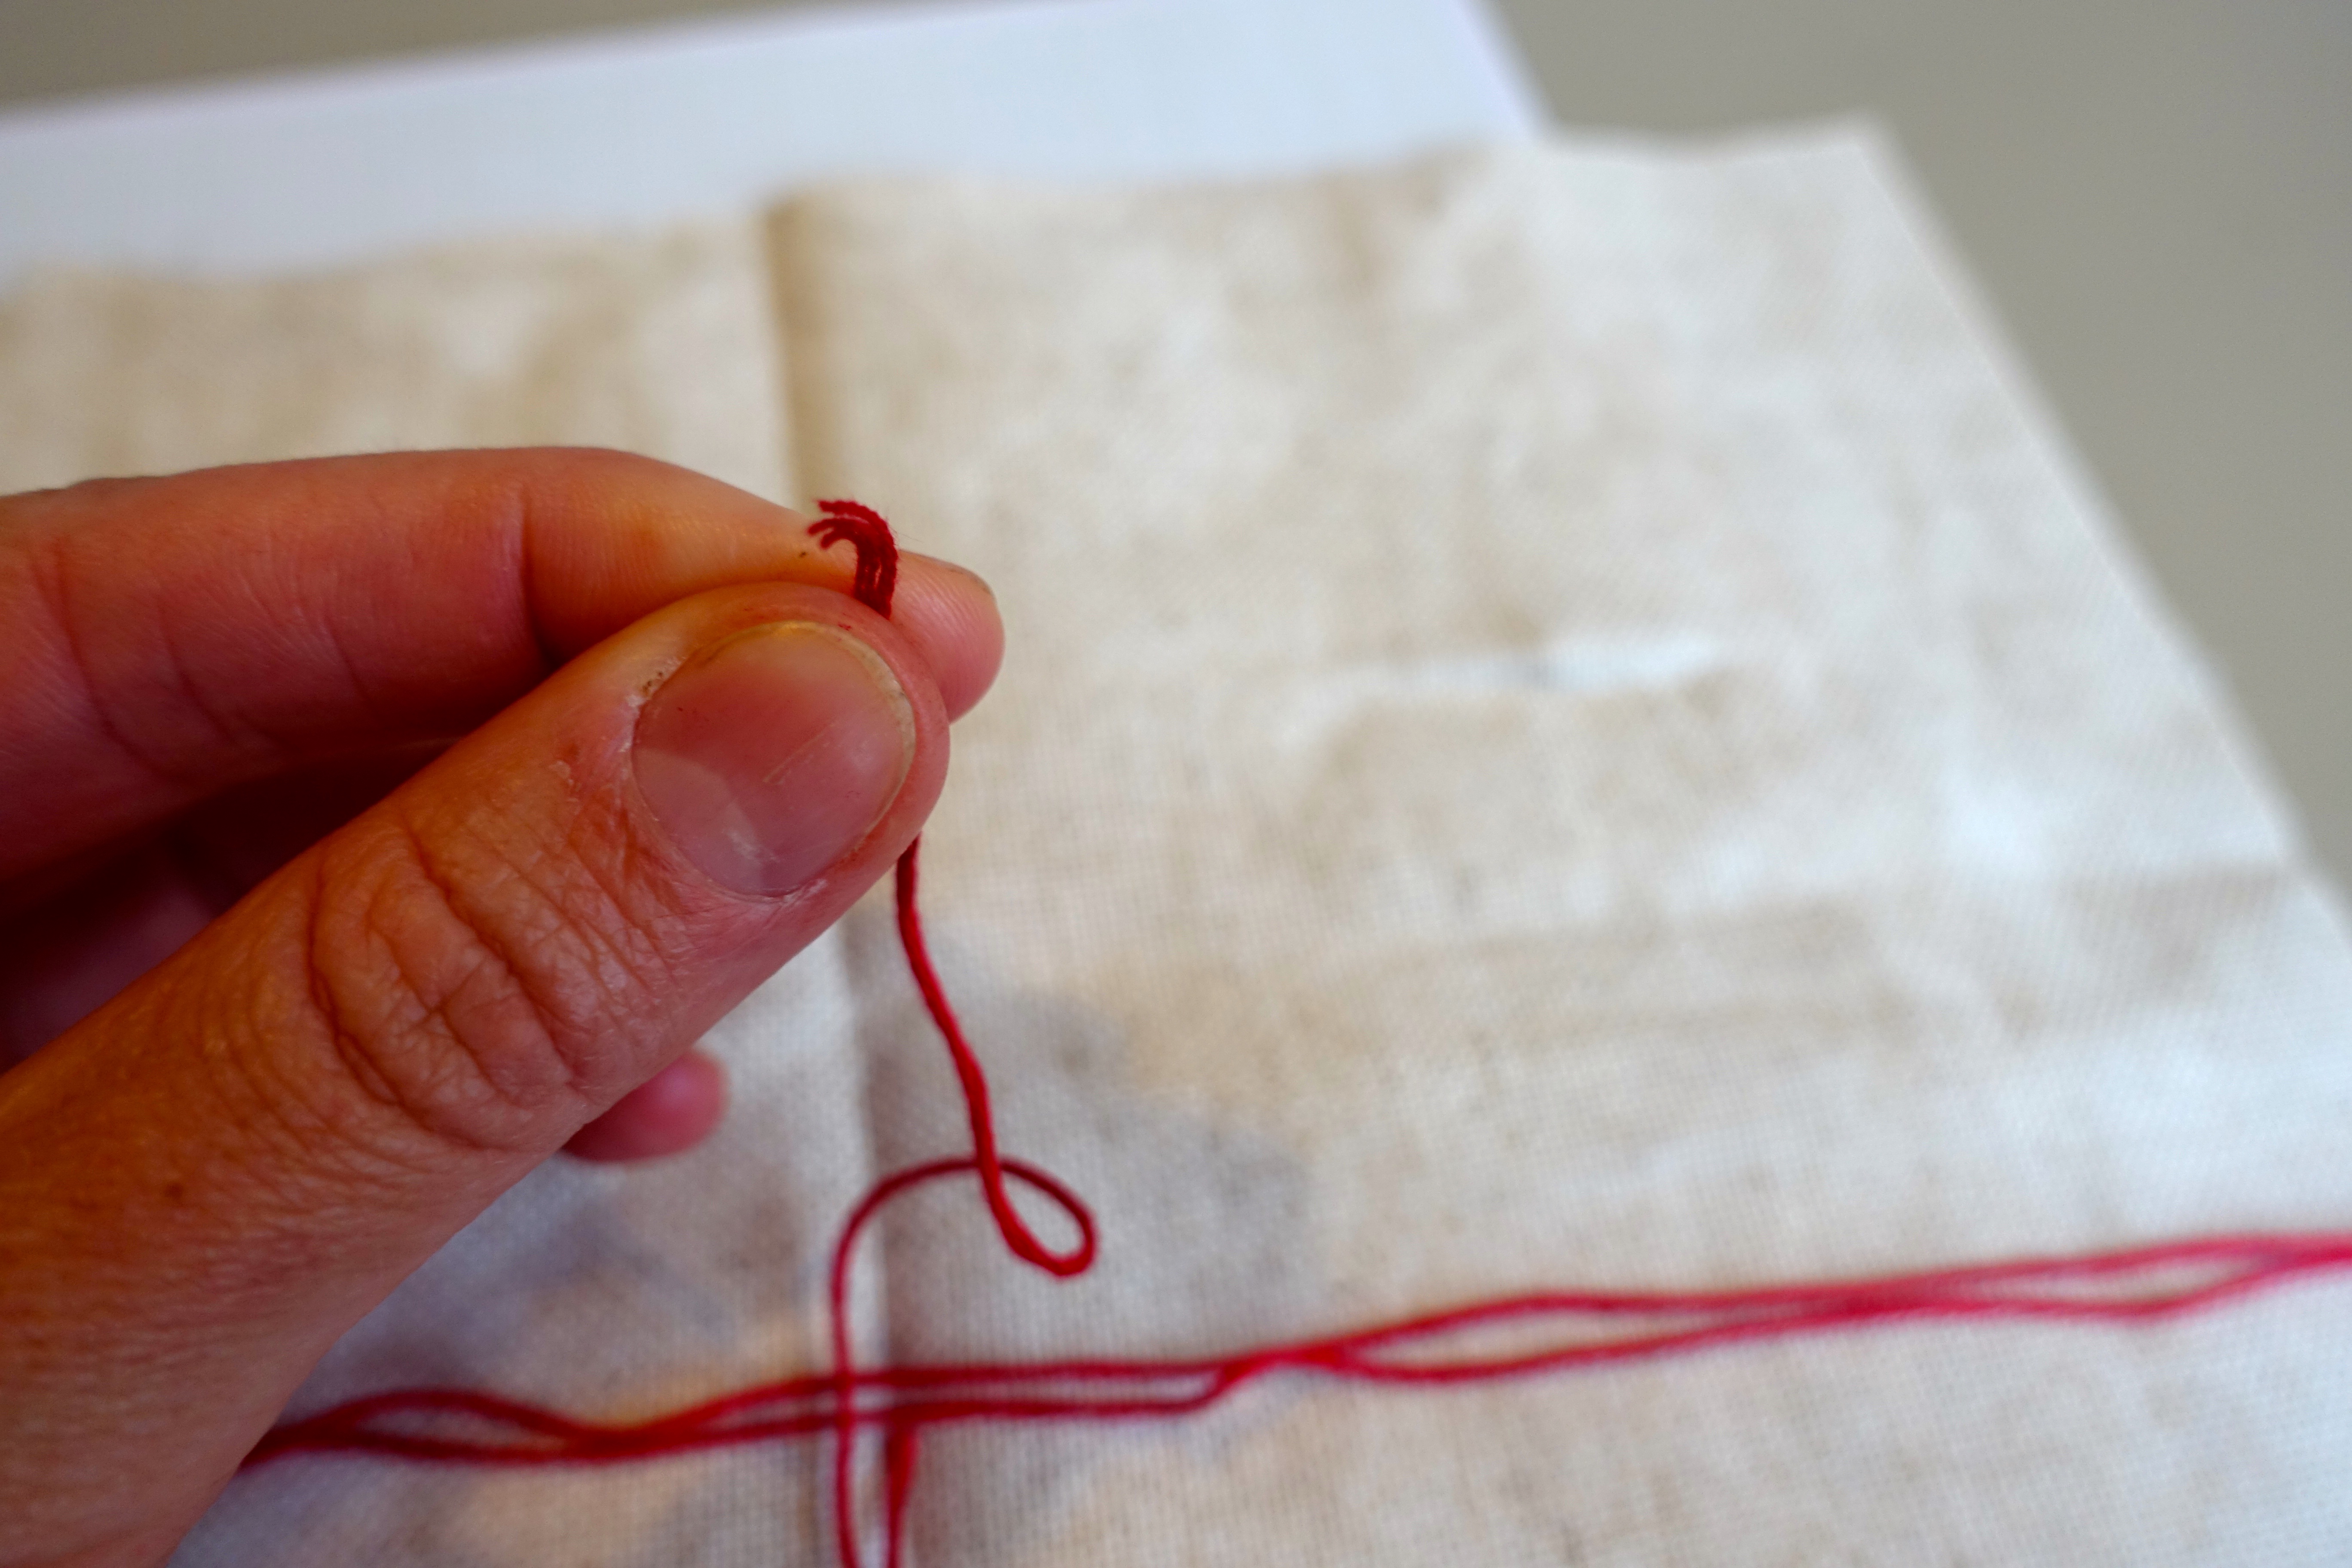
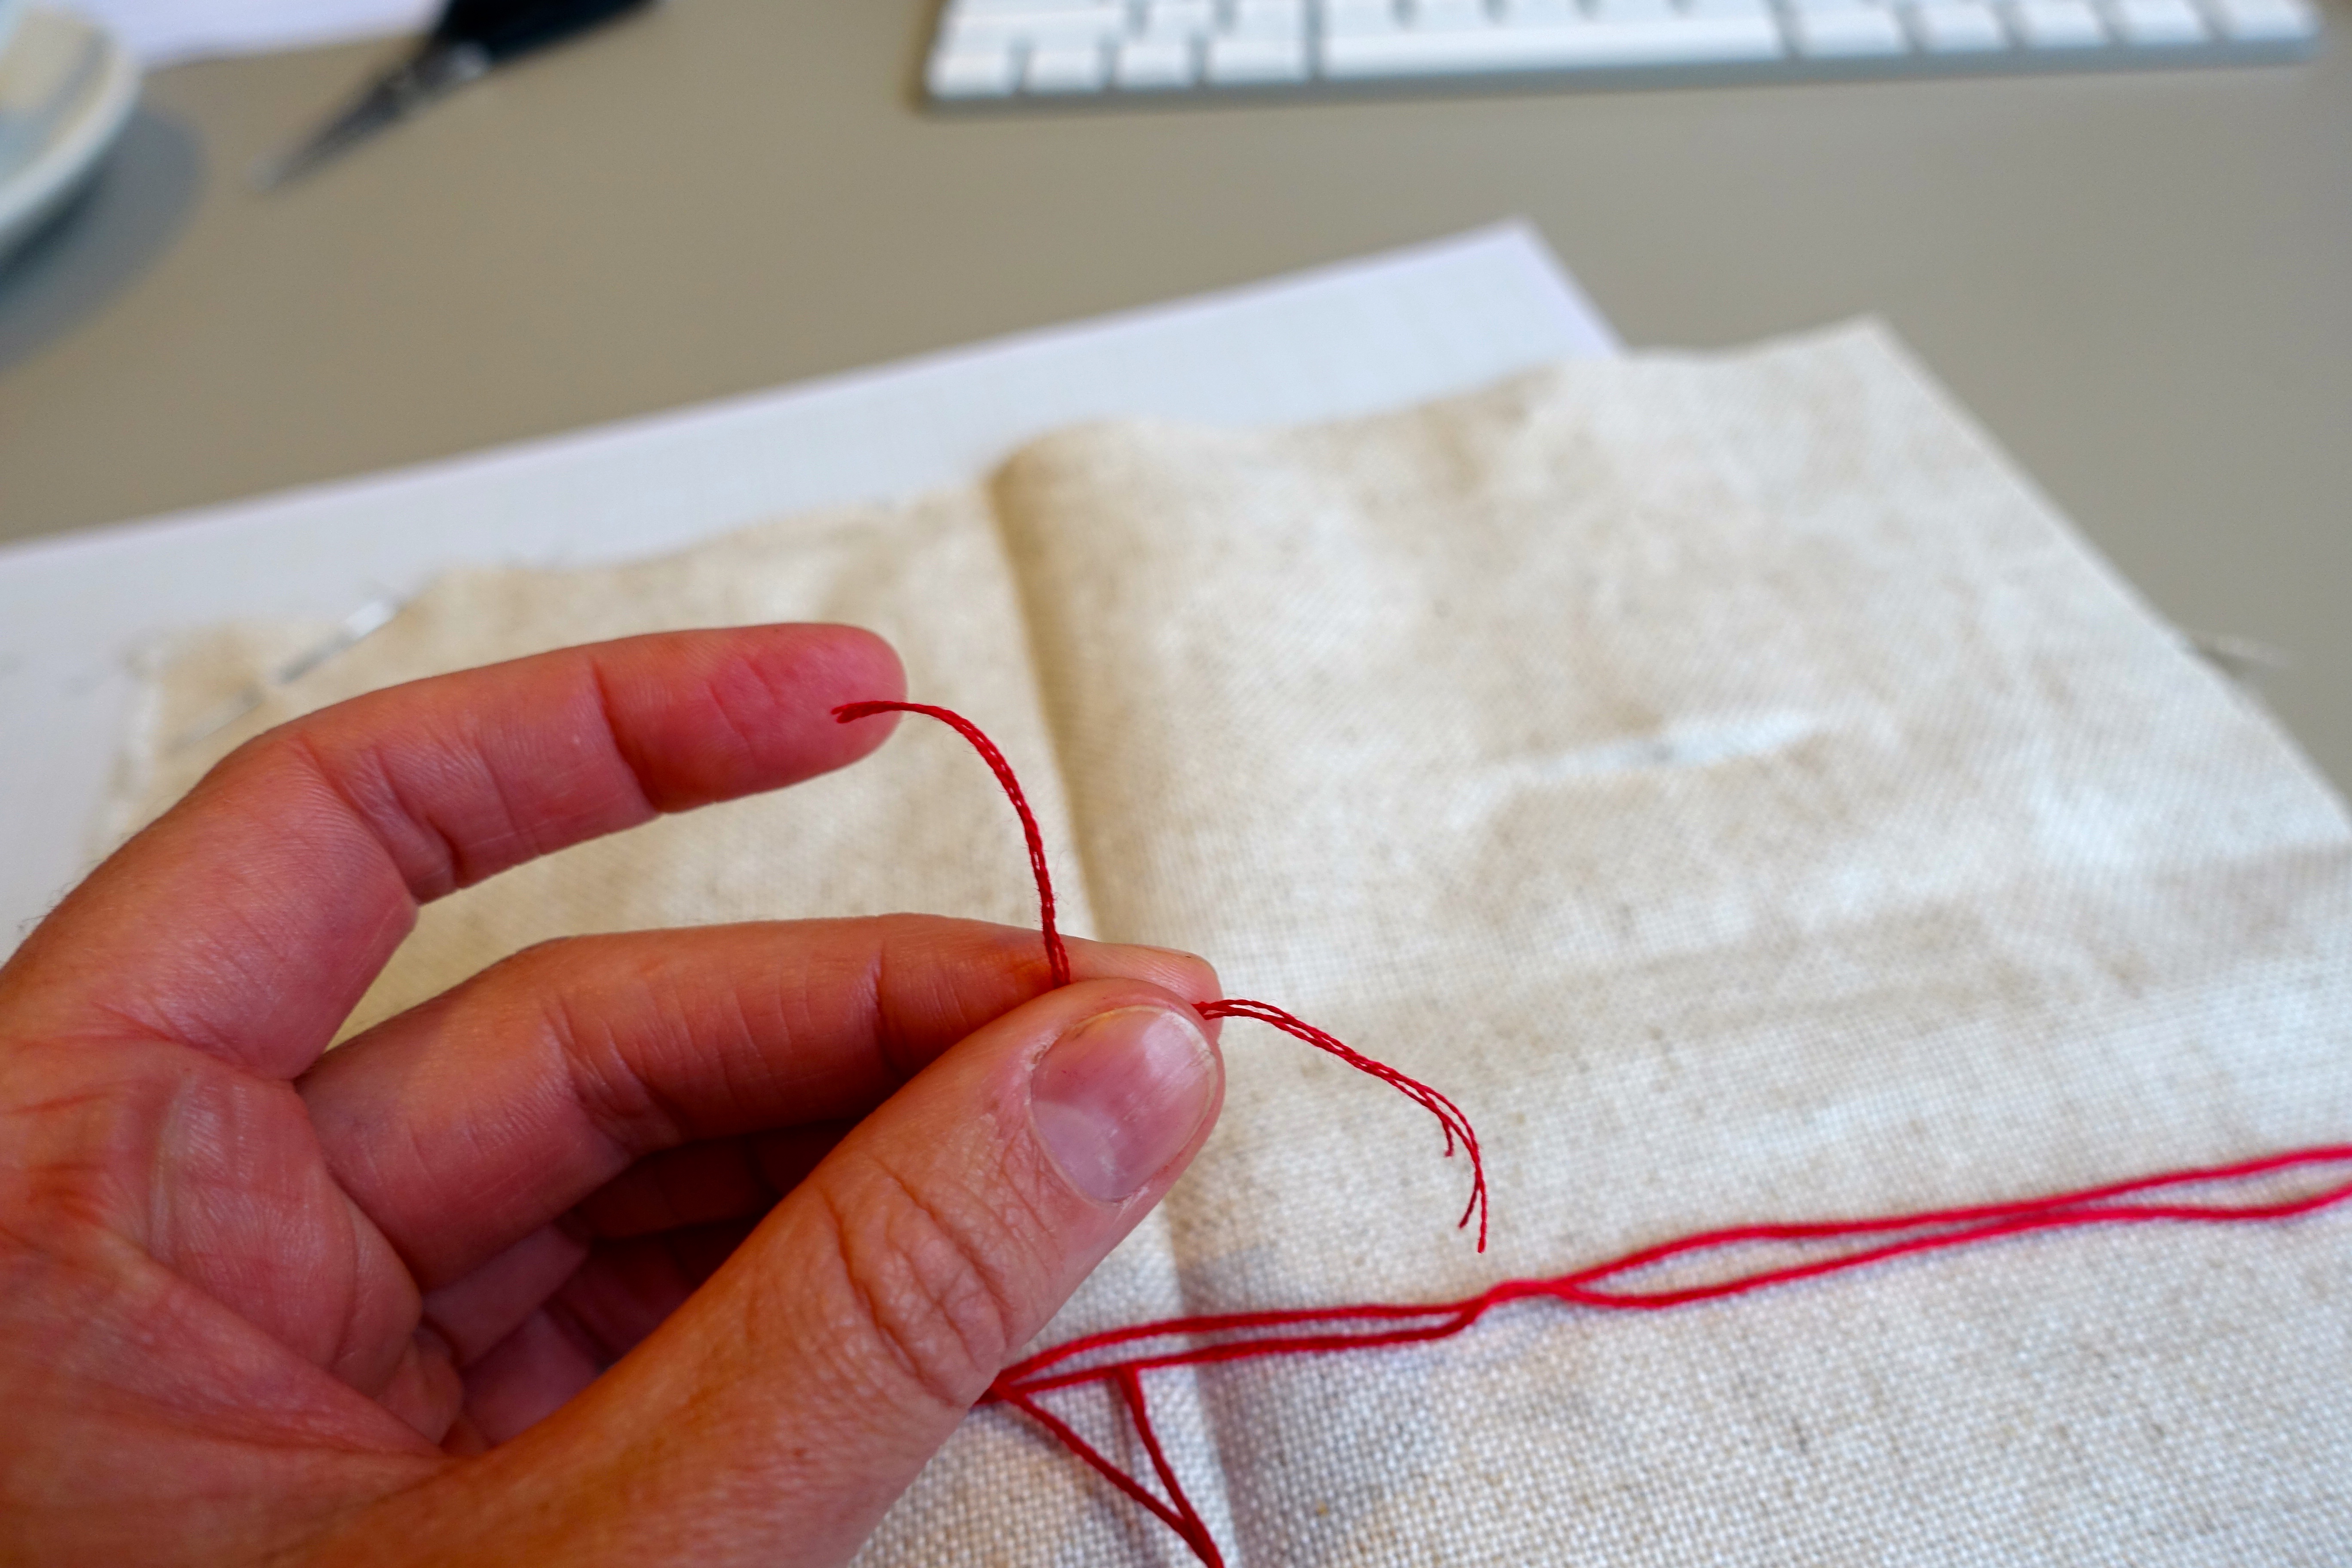
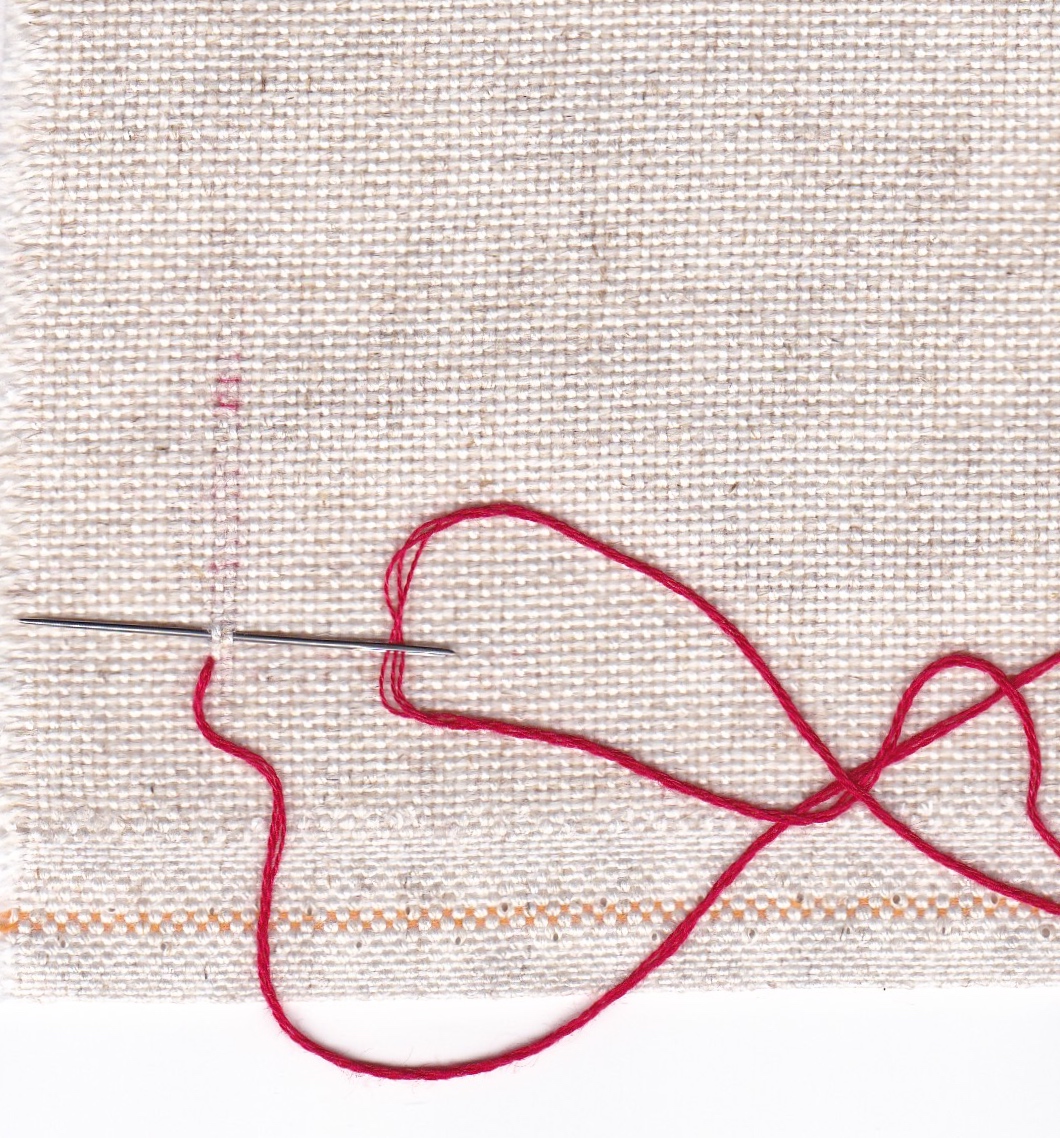
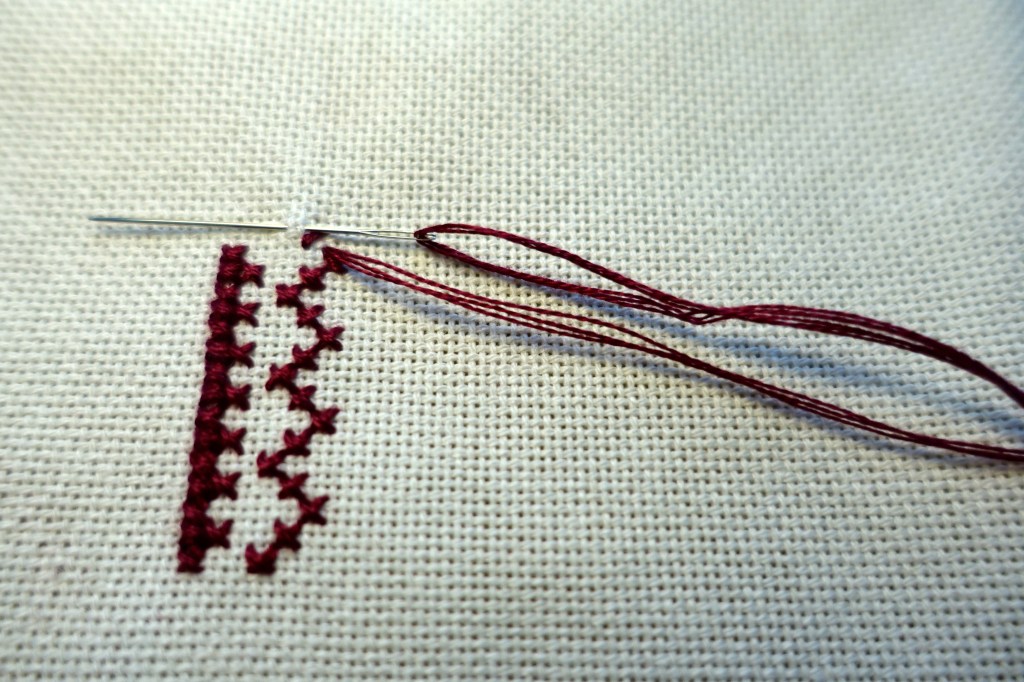
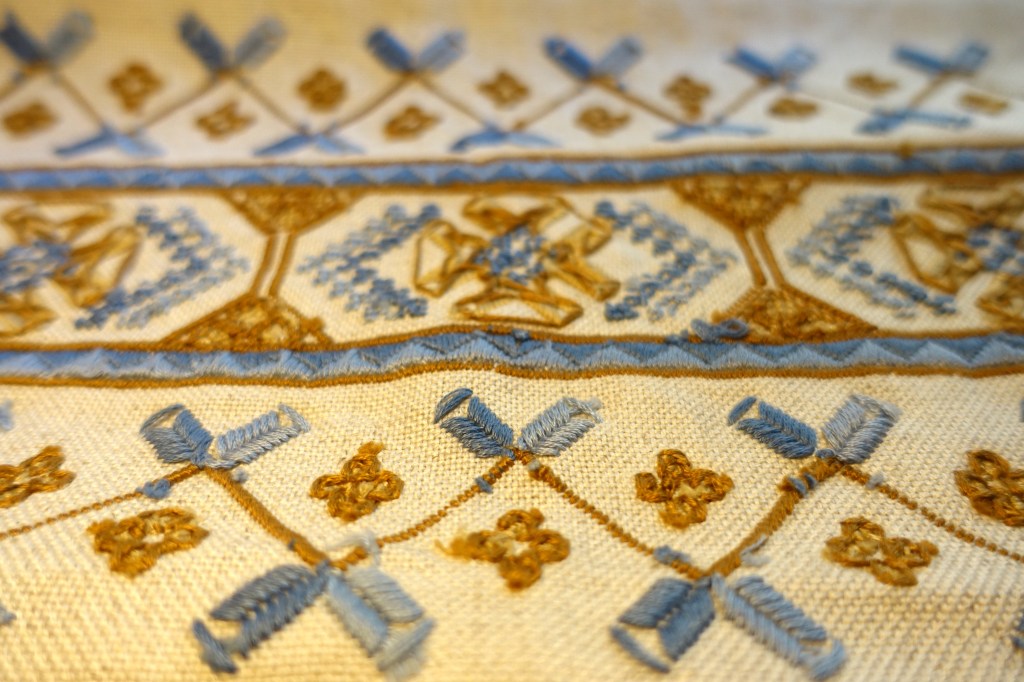
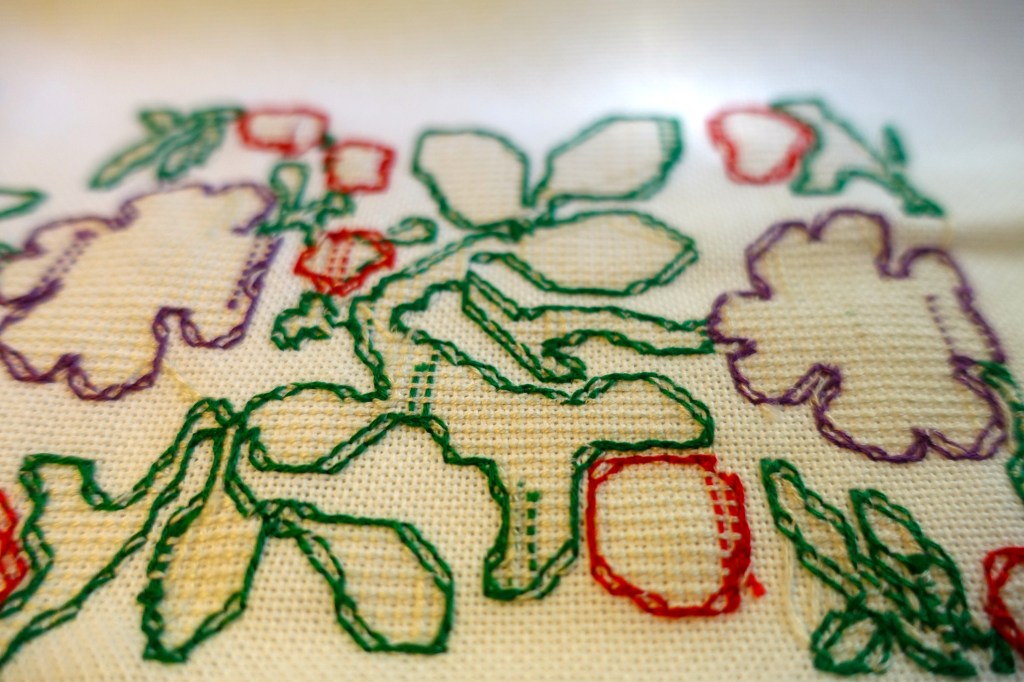
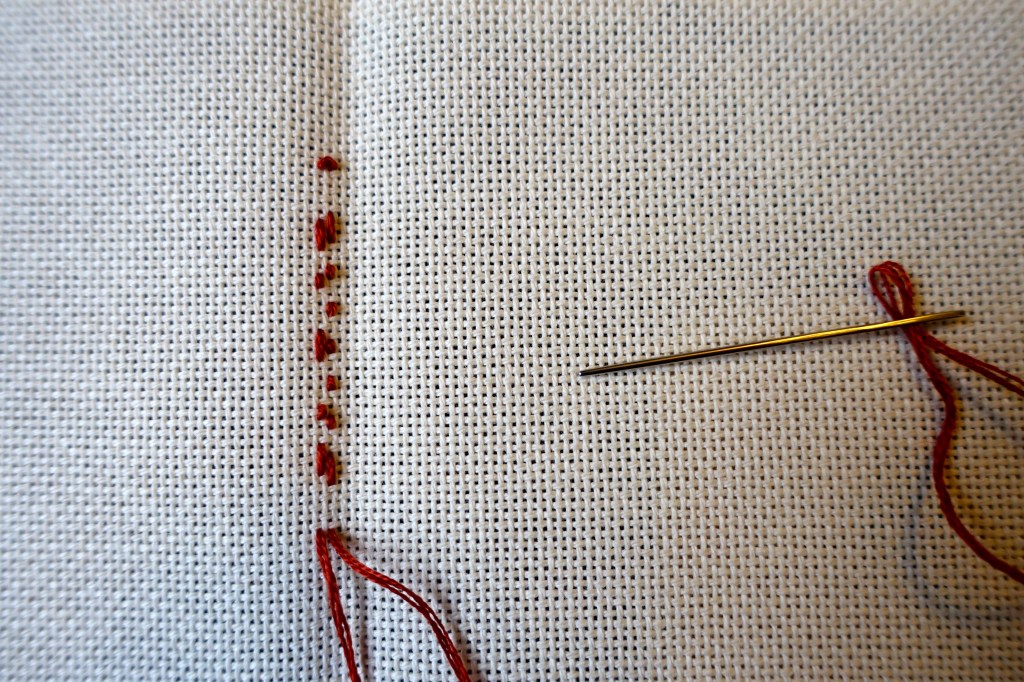
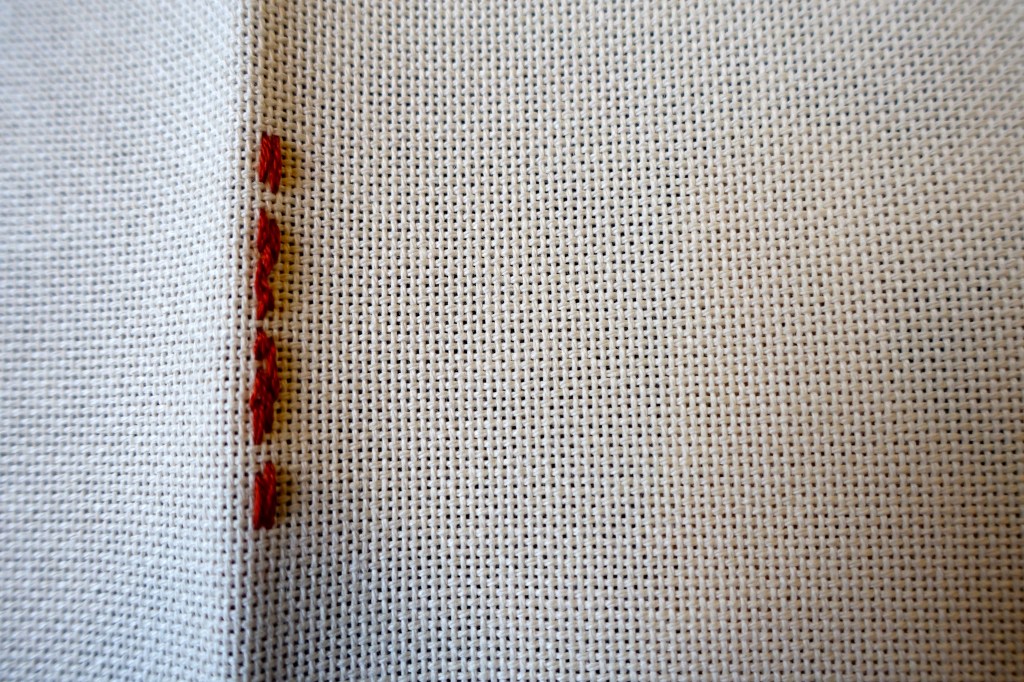
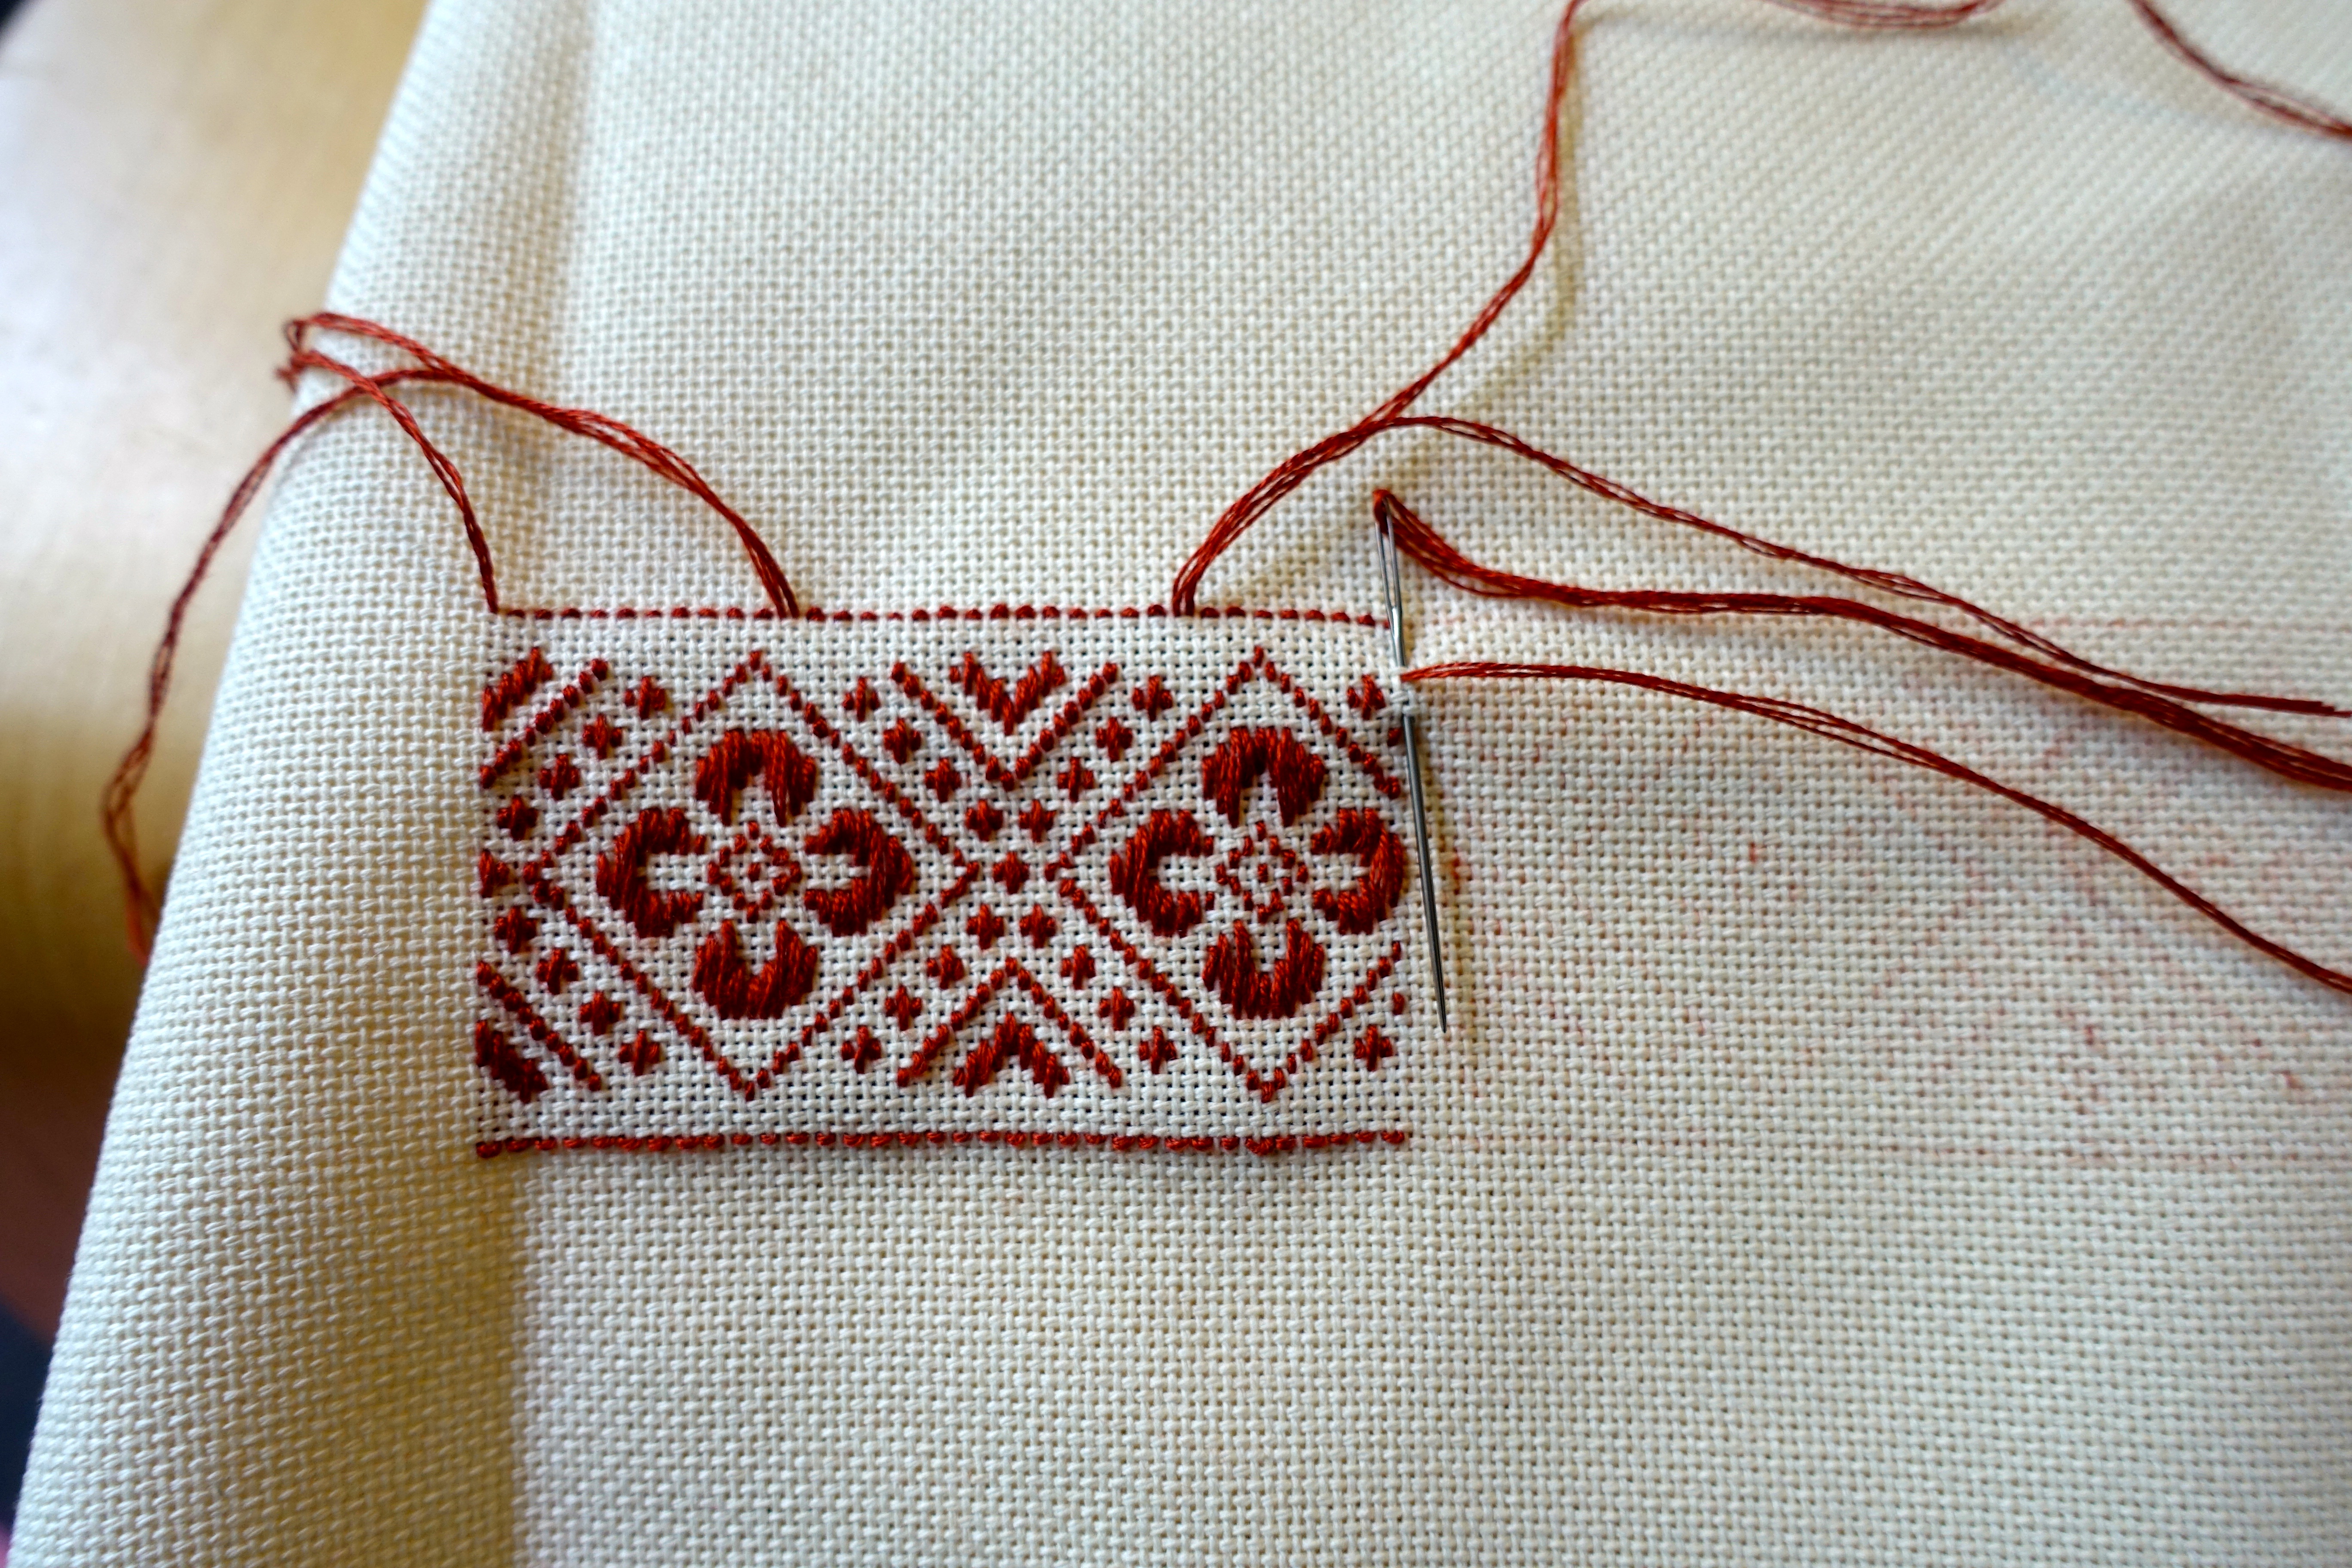
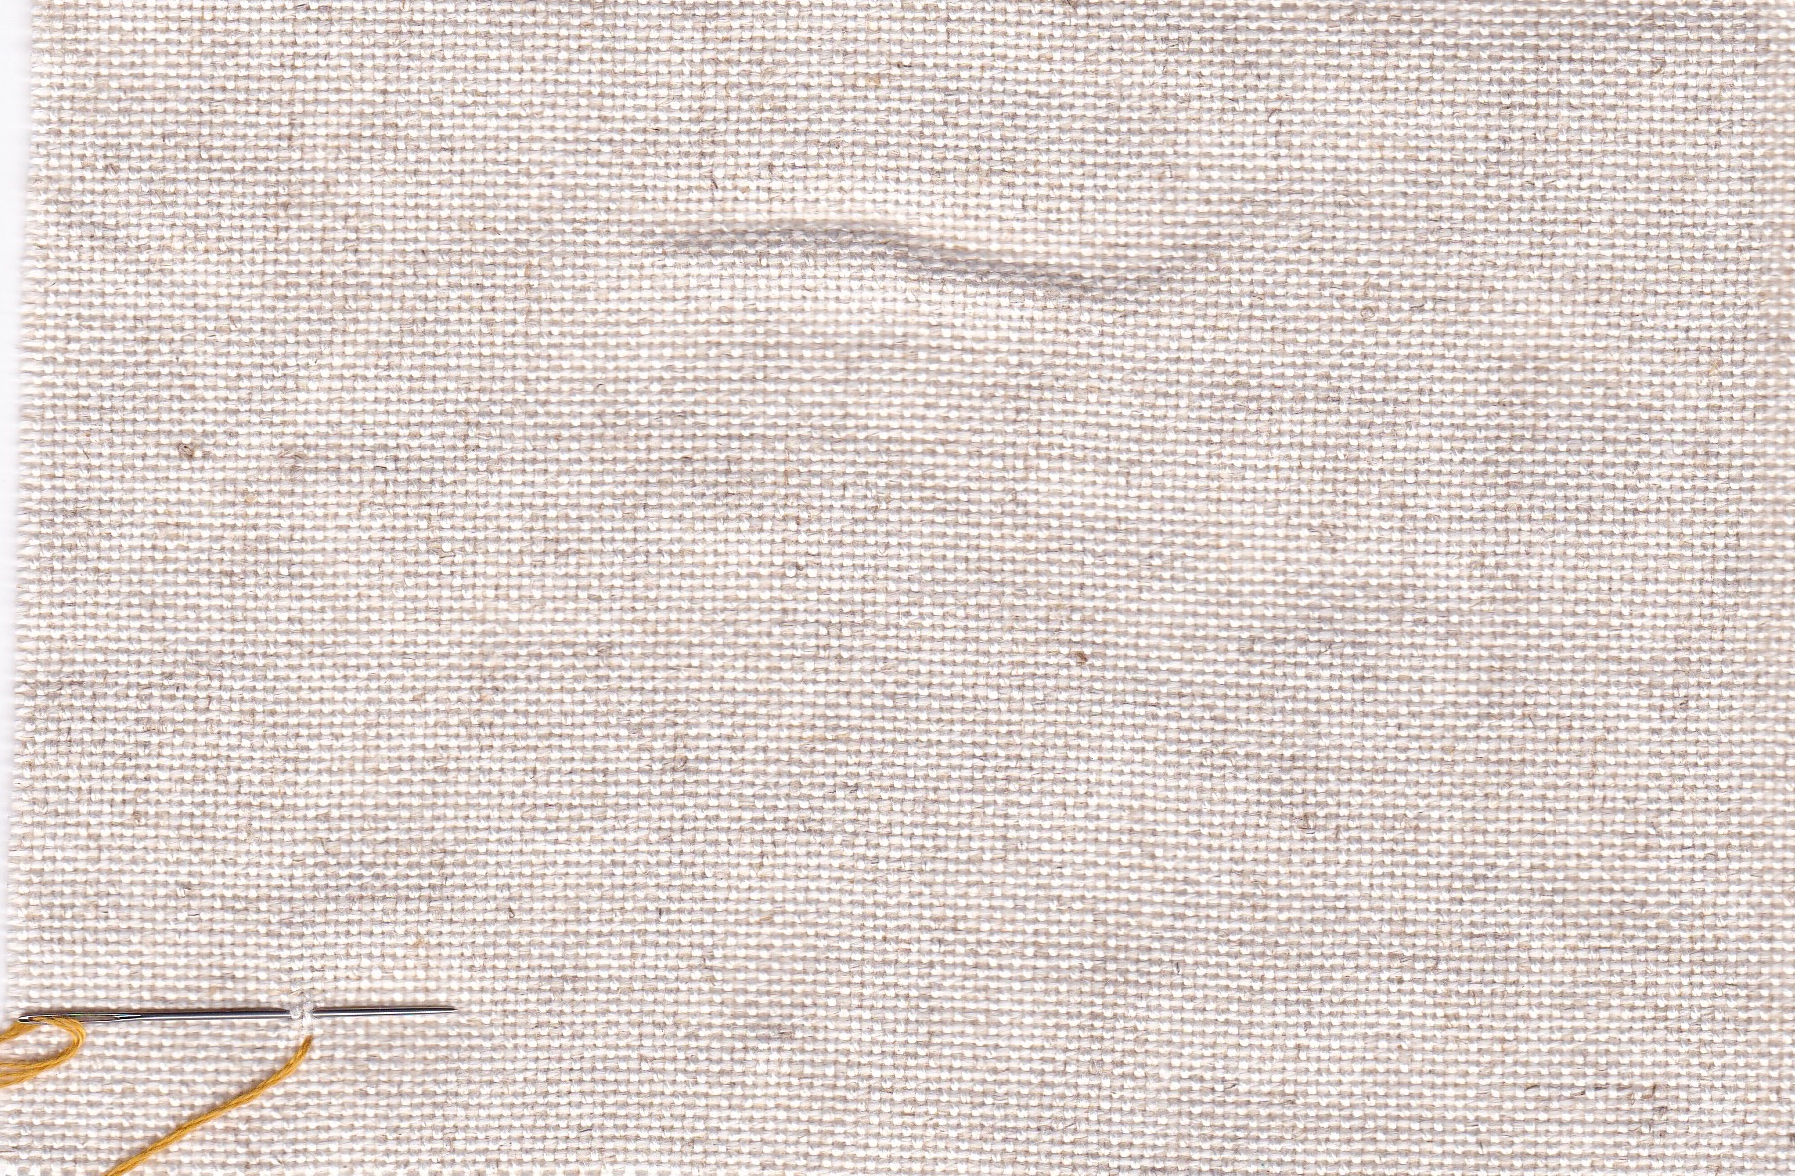
The initial stitch is being made here.

IMG_20190927_0013

Here we are at the top of a completed row of half stitches and have changed direction to come back down.  I’m about to complete the very top cross and my needle is still going through the fabric in a rightwards direction.

IMG_20190927_0014

Nearing the end, all the crosses are becoming completed.

To embroider a horizontal row of crosses, the row begins from the right and moves left, with the needle again making a downward movement through the fabric and forming vertical stitches on the flip side.

IMG_20190927_0001

In needle and thread, it appears like this:

IMG_20190927_0015

You can imagine that the flip side is a series of parallel vertical stitches.

IMG_20190927_0016

Turn to come the other way and you’re on your way to completing a vertical row of stitches.

The next thing to do is to repeat and repeat again until this feels more flowing and natural and your pull, the tension you give to each stitch, becomes more uniform.

The next post will be on stitching horizontally or vertically for every second cross.  Looking forward to the end of that post where there will be a little pattern that can and has been used to practice these two techniques and make a bookmark.

See you soon!

~oOo~

The Evolution of Beauty 1

There is a special way in which a piece of embroidery in the working takes on a evolved beauty as it progresses.  One can start with the backbones of a design or a particular element.  As colour or detail are added, there is a genuine maturation of a design as it approaches its fullness.  Seeing the change to a piece as each progressive element of a design is added is one of the things that gives me real pleasure in embroidery.

Here I would like to share such a progressive development of a beautiful and majestic embroidered piece, from start to completion.  The piece on which I’m working currently is a servetka, and quite a large one.

It begins with an idea, usually with a design that has caught my eye, which I would like to see actualised, or otherwise with a fabric I want to decorate, or with a colour I want to celebrate.  In this case, it was something of all three.

There is a fabric on which I have worked before and which I really love.

Floba. A 25 count cotton/viscose blend. Very evenly woven, dense yet soft, a pleasure of a fabric on which to work and at which to look.

A red colour I adore is a little faded, a little pink, a little vintage.

I’ve discoursed on reds. I love this 347 tomato, DMC stranded cotton.

And a design of which I’ve long thought, found in a book called Invincible Spirit, Art and Poetry of Ukrainian Women Political Prisoners in the USSR INSPIRATIONS.

It is graphed out, as per my usual habit.

IMG_20190825_0001

And embroidery begins.

DSC02387
DSC02388

So far, it looks quite unexciting, but the size and scale can be appreciated.  This looks straightforward, but I actually made a lot of mistakes inserting a diamond of crosses in amongst the teeth periodically.

DSC02392

Adding these strange, exotic flower-like shapes was substantial.

DSC02393
DSC02394

Here, they are completed.  There is some form, a major element in the design is added, but the composition itself is looking still a little plain and unexciting.

The next step will be to begin adding some detail to these exotic poppies and that means choosing additional colours.  The design, like many Ukrainian designs, uses a combination of red, black, yellow and green, a well-used combination.  I was really conflicted about the use of black on this particular piece.  When I’ve laid down black cross-stitch in the past, it has sometimes looked heavy and abrupt.  And here I have such a soft flecked fabric colour and slightly faded, gentle red.  Black didn’t sit with me at all.

I’ve seen embroideries in people’s homes, my Baba’s embroideries included, on a grey/brown fabric, looking very vintage in oranges and browns… so why not a very dark brown as an alternative to black?  I pulled out from my drawers the darkest brown available from the thread range, after which it made no sense to use a pure green or definitive yellow, or any yellow at all.

So after some fiddling and shuffling of colours I settled on a golden, pale green and coppery orange.

DMC stranded cotton 347, 3371 (dark brown), 733 (golden green) and 301 (copper).

I’ve embarked on the trimmings and details that will made this design spectacular.  I look forward to seeing it evolve and sharing more of its detail and beauty as it comes along.

~oOo~

The Flip Side

There is a great emphasis in Ukrainian embroidery on having a very tidy reverse side.  This is part of the no knots caper, and was also taught to me by my Baba Zina.  Along with knots, one also does not want loose threads on the reverse side or long bits of thread navigating from the end of one stitch here to embark on another stitch over there.

How does one achieve this?  No knots is one factor, of course.  Additionally, navigation.  The needle makes the shortest possible transition from the end point of one stitch to the start point of another.  If needing to travel to another spot, the thread in use is tucked under existing stitches, or, if they aren’t there, is finished off and started again.  There is no random through and through here.  It all comes down to technique and that really means organization, being aware of what is going to happen with the needle and thread next.

This is no exaggeration!  Any embroidery displayed will be quickly flipped up at the corner by someone in the know, and a discerning eye will be cast over the reverse side.  I often think that the more it resembles the front, the more the raised eyebrows of approval rather than disappointment.

My Baba taught me cross stitch.  We started by making straight horizontal or vertical rows of stitches.  We then progressed to stitching every second cross.  The final thing she tried to teach me was to embroider in little zig zags, zubchyky, literally meaning “little teeth”, which I did not understand at the time.

So my earliest starts in embroidery will have looked something like this, however with longer rows of the same.

I don’t remember how old I was when the penny dropped around making diagonals out of cross stitch, but suddenly zubchyky became clear.  There is a way – a way to make diagonals and keep reverse side stitches short and embroidery neat.

This particular fussiness extends to other embroidery techniques, but I think is actually its most difficult in cross stitch, which has often lead me to muse that other techniques in Ukrainian embroidery should be taught first.

In any case, the flip side is important.  Anyone could pass a needle through up and through down.  The technique lies in the organization that brings about a tidy reverse side and is really at the core of what one learns when one learns Ukrainian embroidery.

~oOo~