No Knots! No Knots! ~a how to post~

I am pretty sure it was my Baba who taught me that there are to be no knots in one’s embroidery.

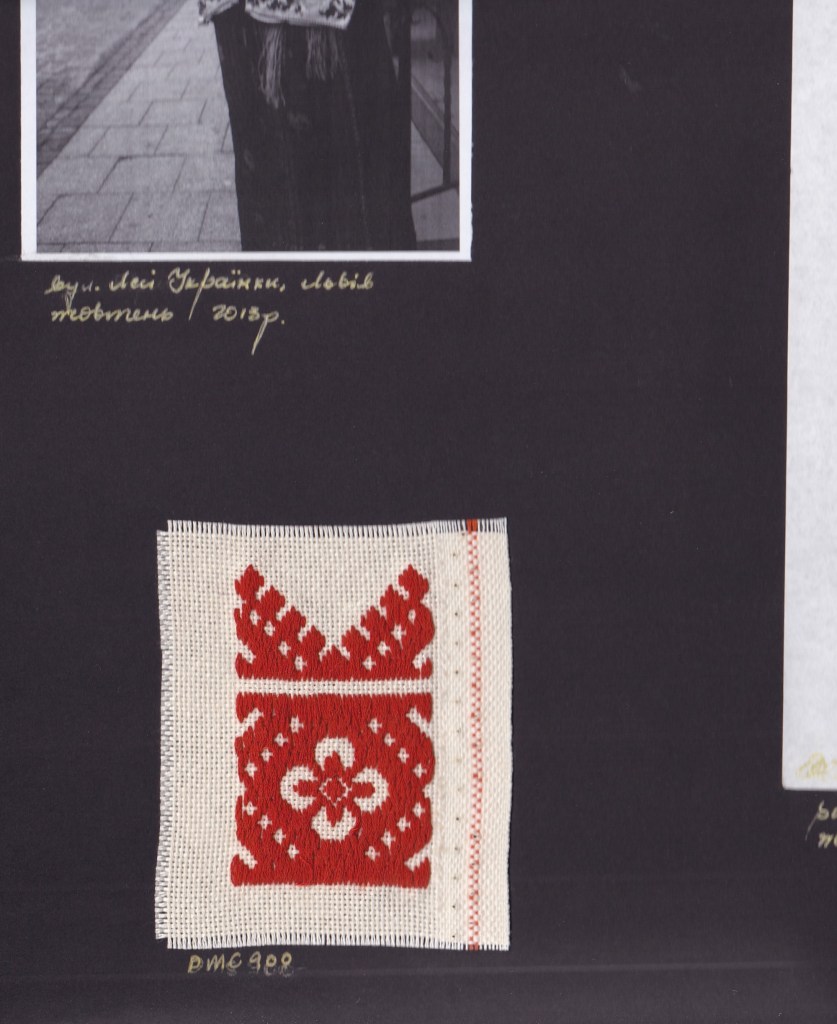
As a slight aside, and I will come back to no knots in Uki embroidery, this reminds me of a visit to the National Museum of Ukrainian Decorative Folk Art in Kyiv https://www.mundm.kiev.ua/INDEX_EN.HTM.  This museum is housed within the grounds of the Kyiv-Pechersk Monastery.  Photos are allowed.  Of course, I stood out as a blatant foreigner and attracted the attention of an attendant, much friendlier than those who policed museums in Kyiv in my first visits to UA as a teen and in my early 20s.  She struck up a conversation and heard my Ukrainian and by doing very little, I had earned myself a fairly comprehensive guided tour of several rooms of the museum, including that to Ukrainian national dress through the ages.

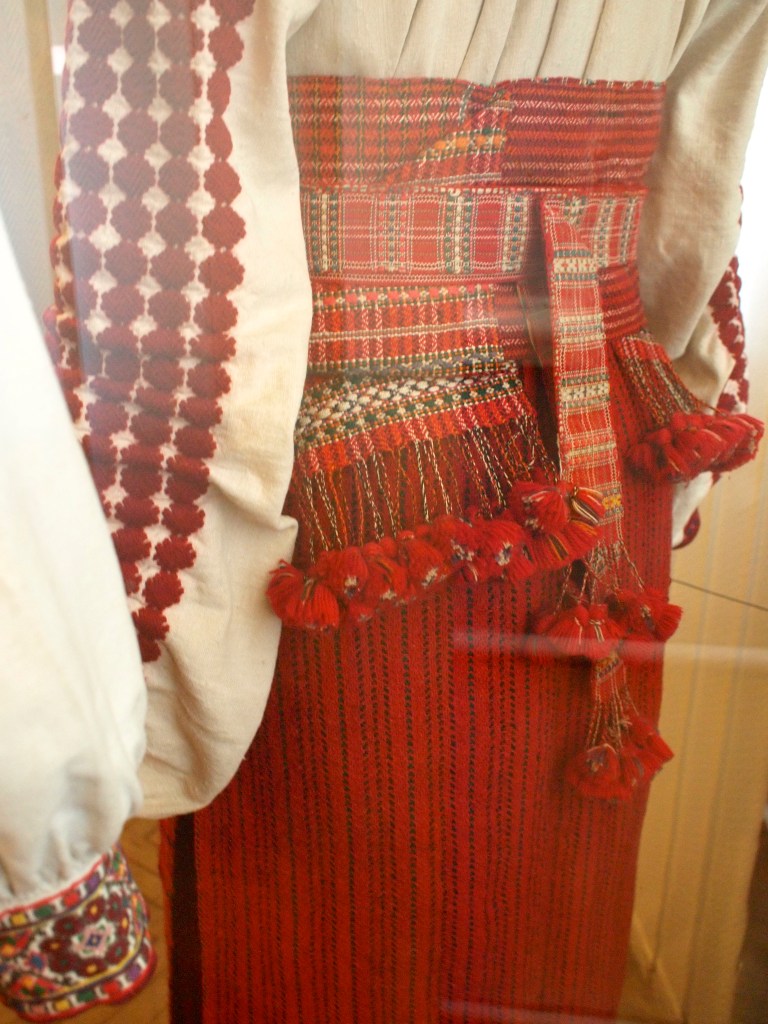
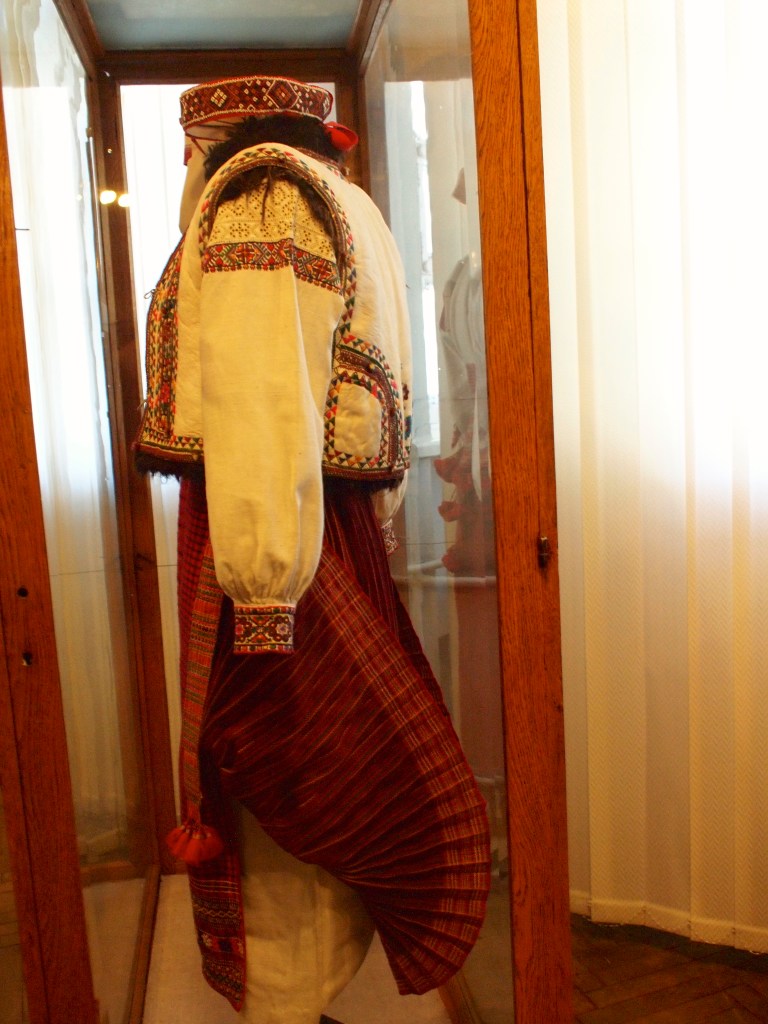
I learned from this lovely lady the care with which Ukrainian women have always dressed.  She told me that one could tell by looking at a woman’s dress her age range, marital status, economic status, area of residence.  Headwear was always worn, even if as simple as a ribbon for a young girl.  Necklaces of beads and coins were important and parents tried hard to purchase as many beads and coins as they could for their daughters.  Embroidered shirts covered the body from neck to wrist and ankle and embroidery was key at these edges to protect the body.  Layers were added over the shirt with complex skirts, vests, jackets.  Ukrainian women didn’t wear their clothes, the clothes were carried by the woman.  How elegant!  Pleats were carefully arranged whilst a woman stood on a stool so family members or friends could walk around her, checking the details.  Sashes were “folded” and arranged, but not tied.  Tie up a sash and you’ll tie your own fate.

Perhaps this superstition extends to Ukrainian embroidery?

I have seen different methods of fixing threads in embroidery in books but thought I would share with you my preferred method.

A lesson done in blue.

dsc01578

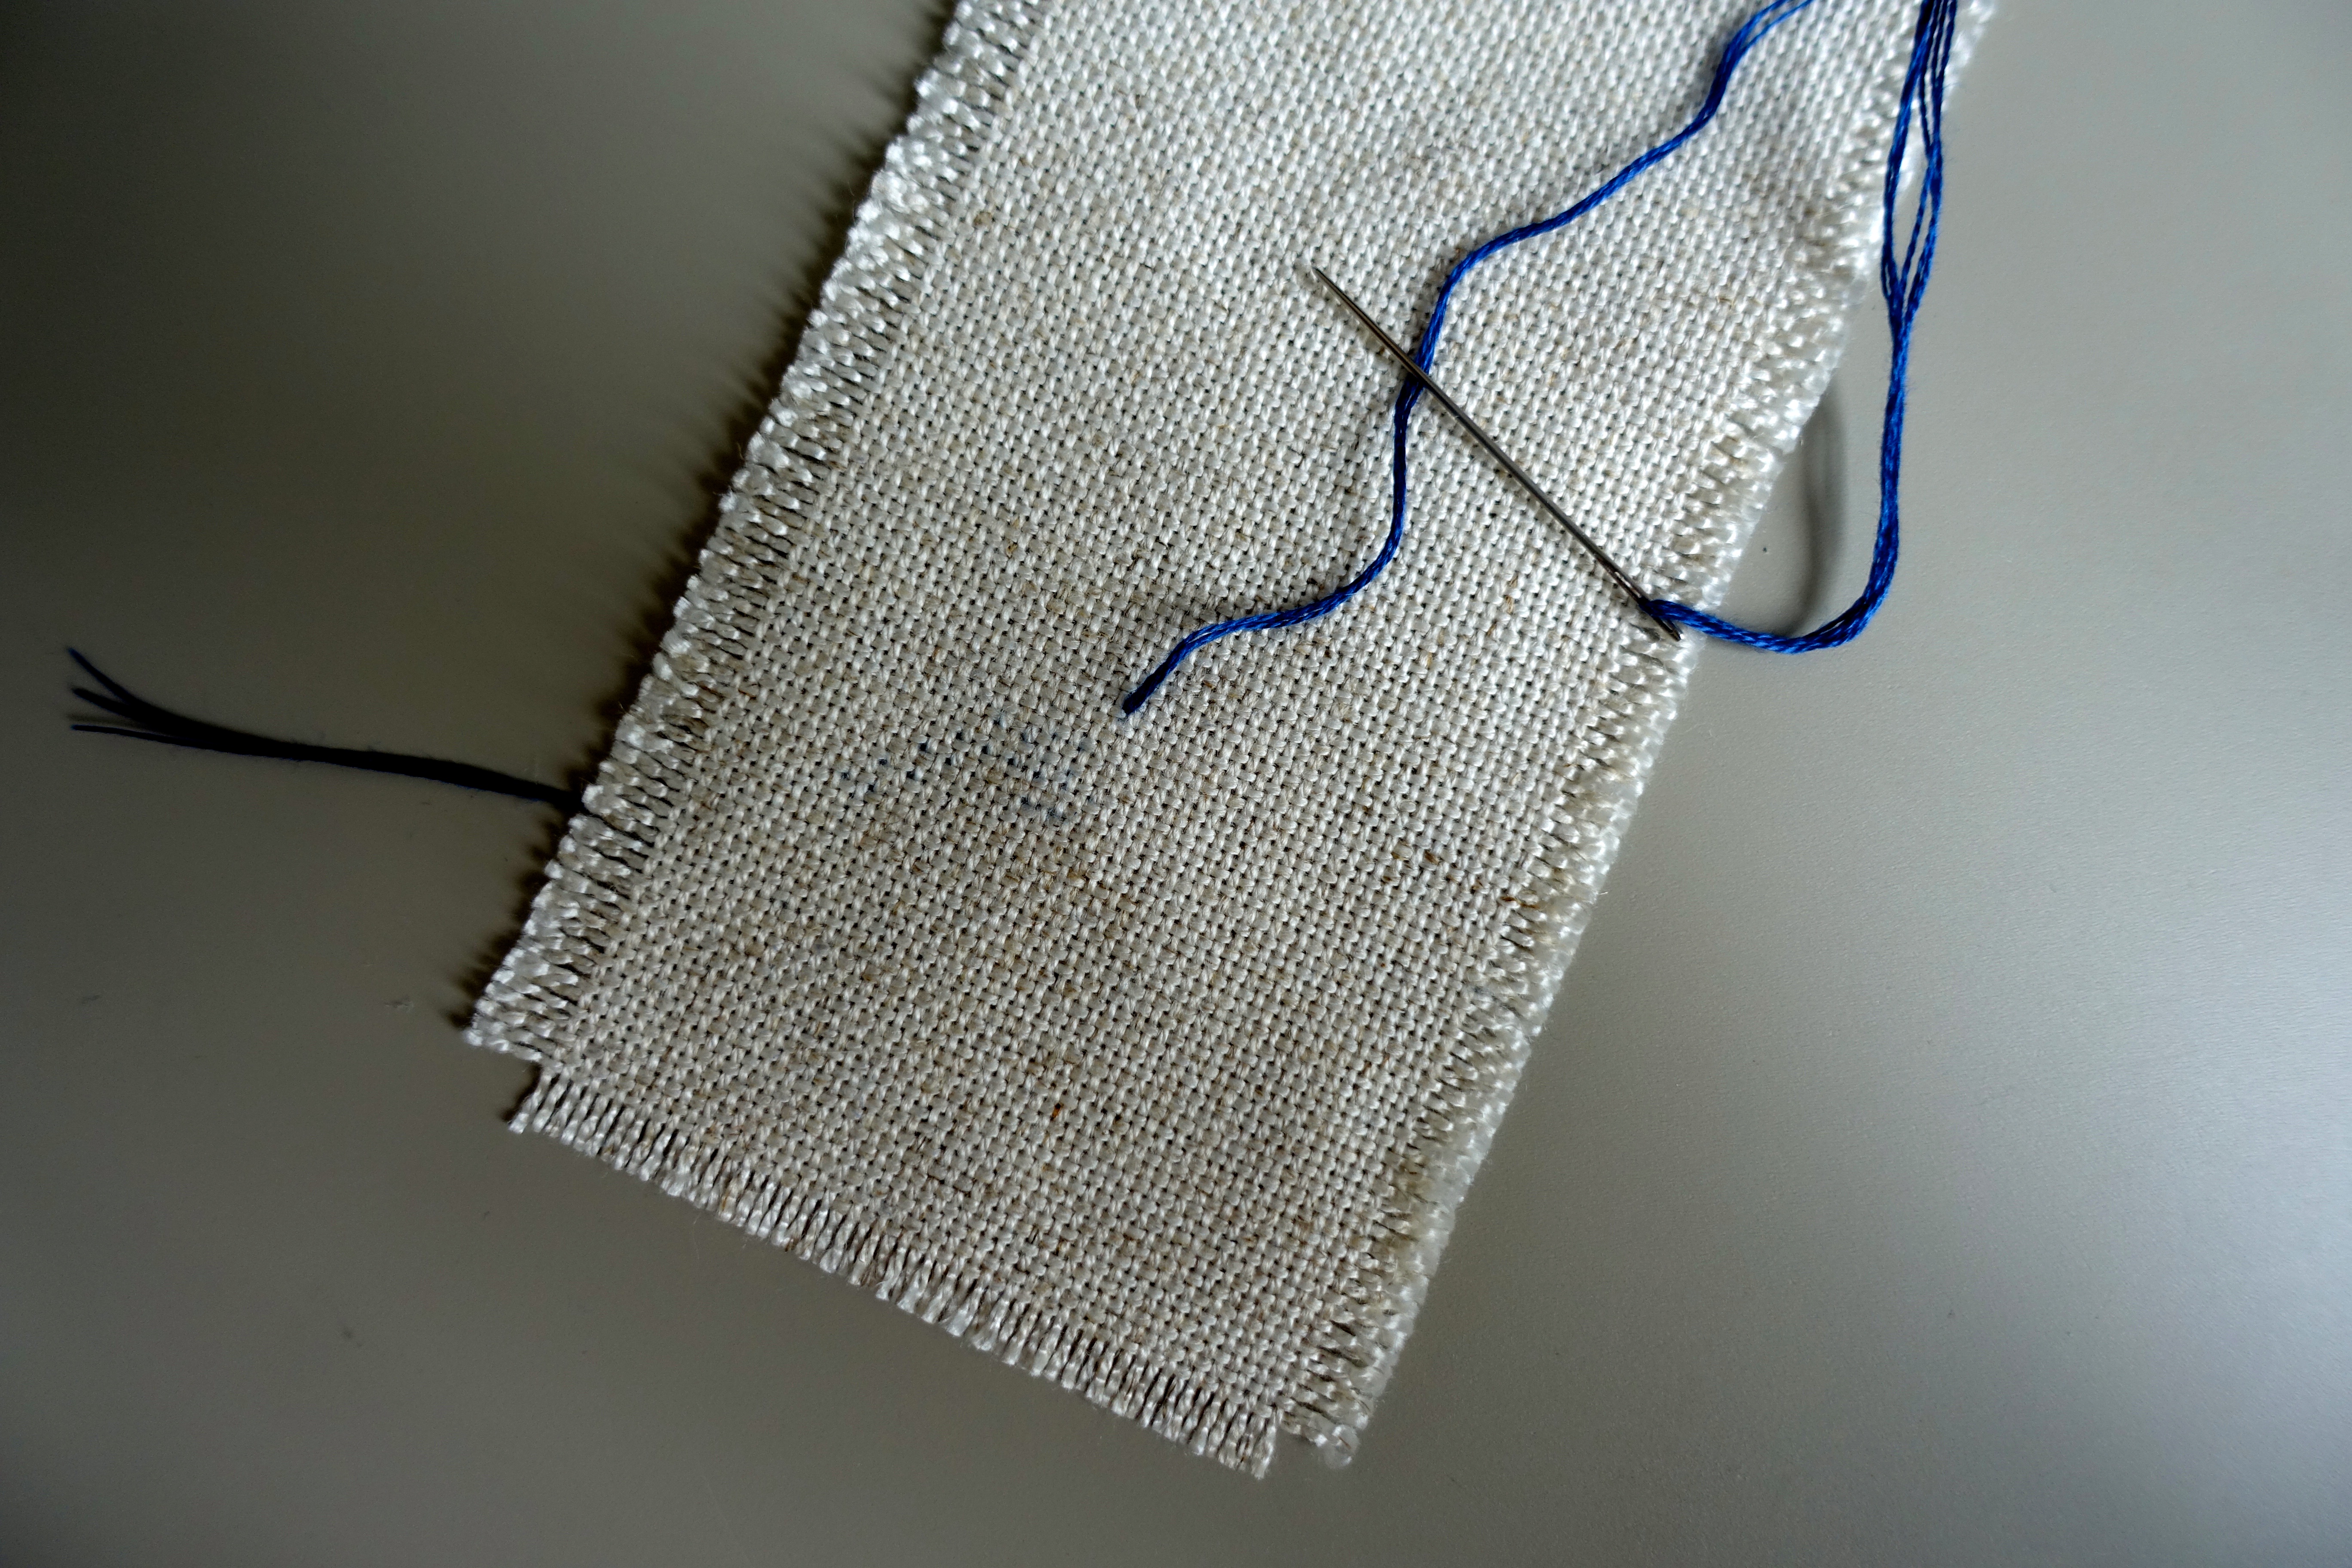
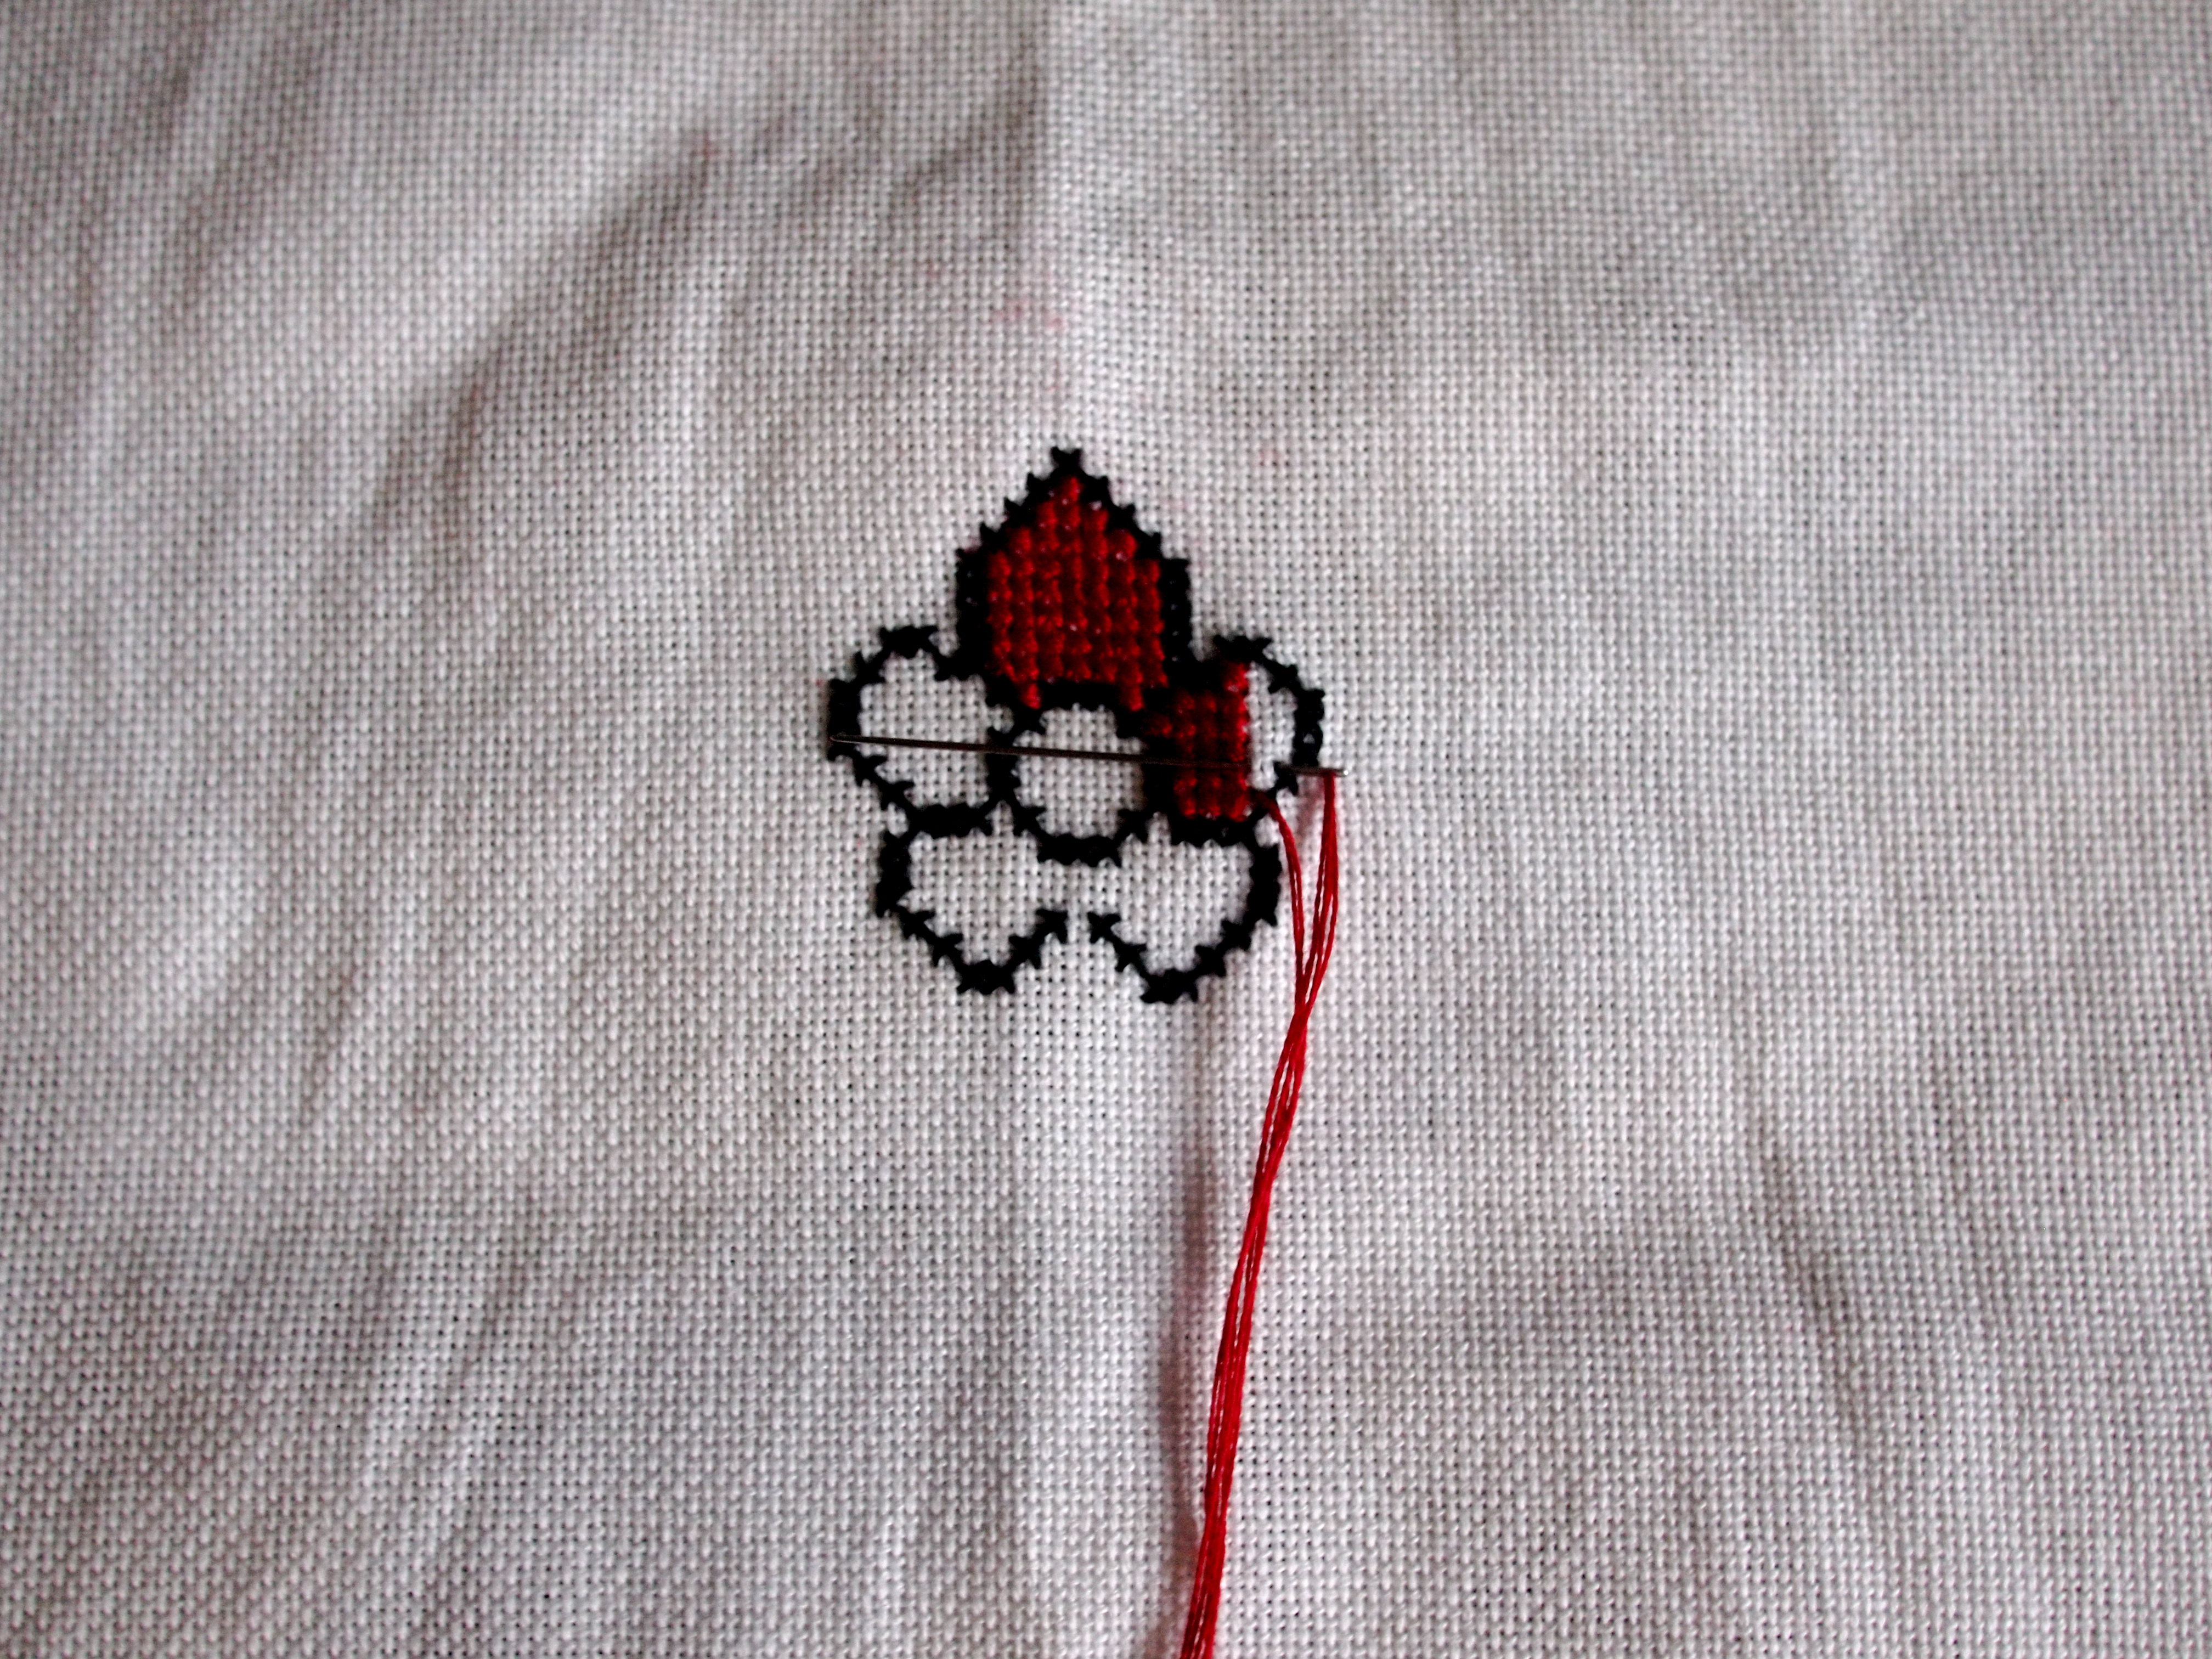
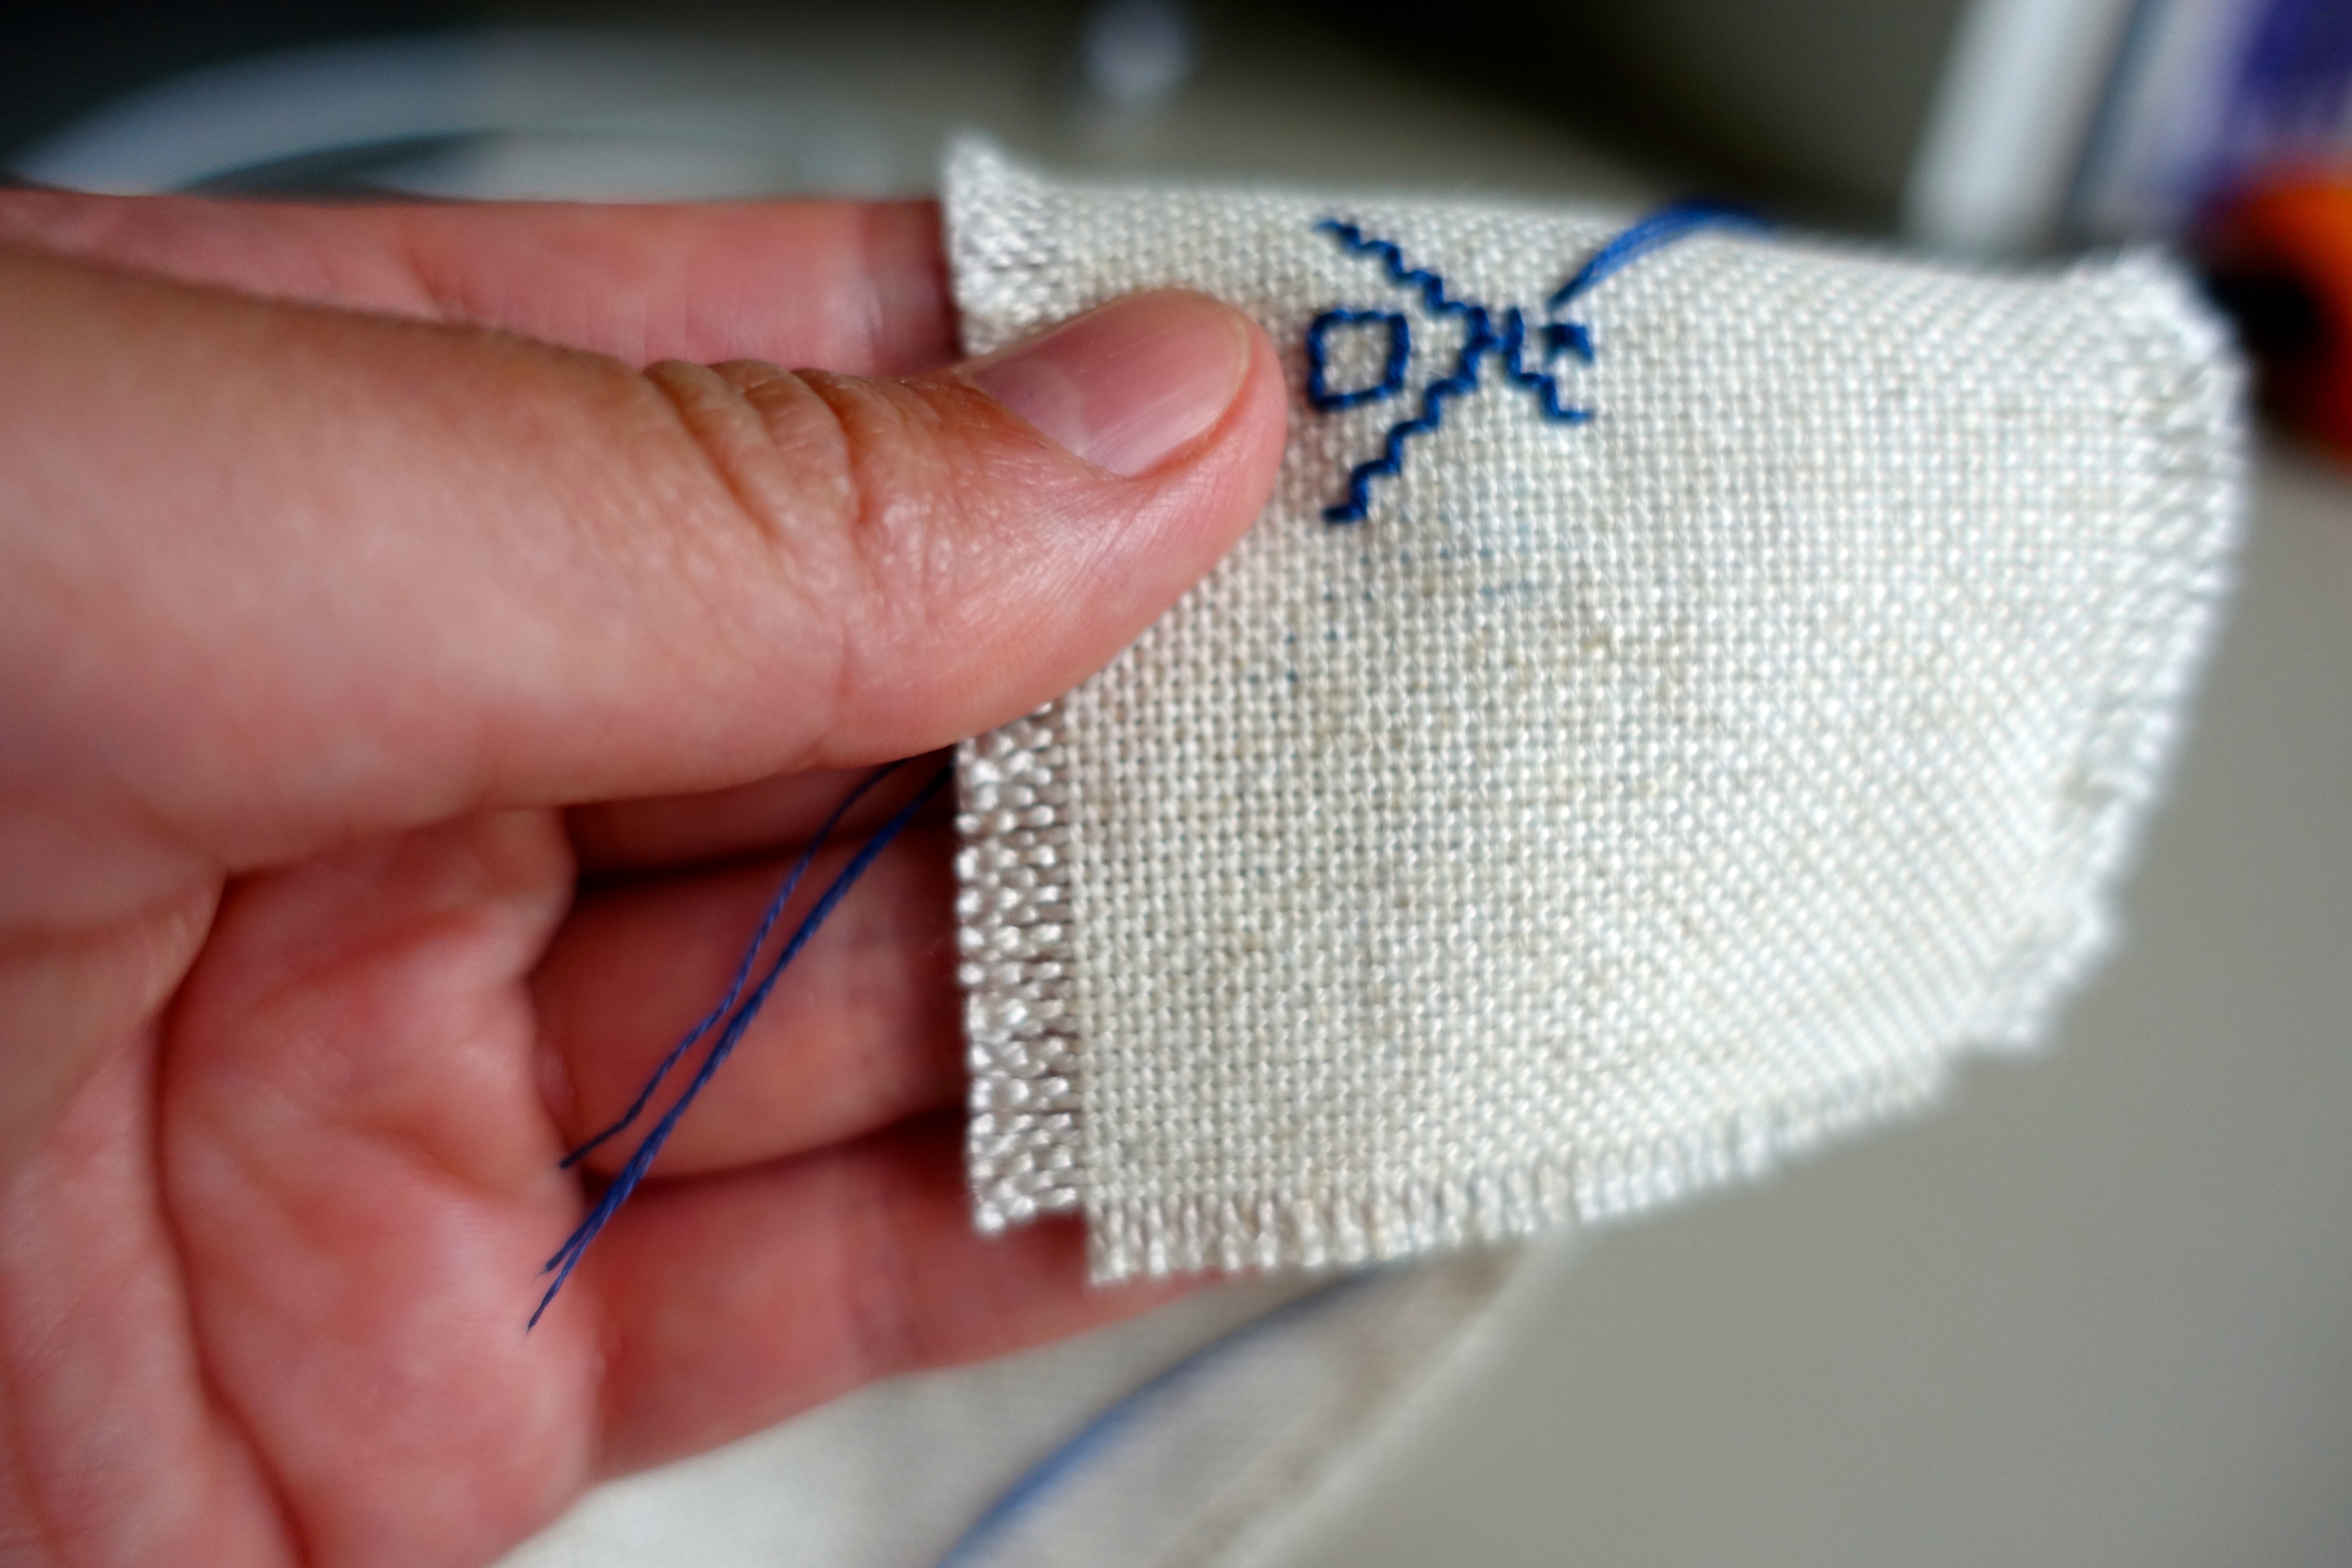
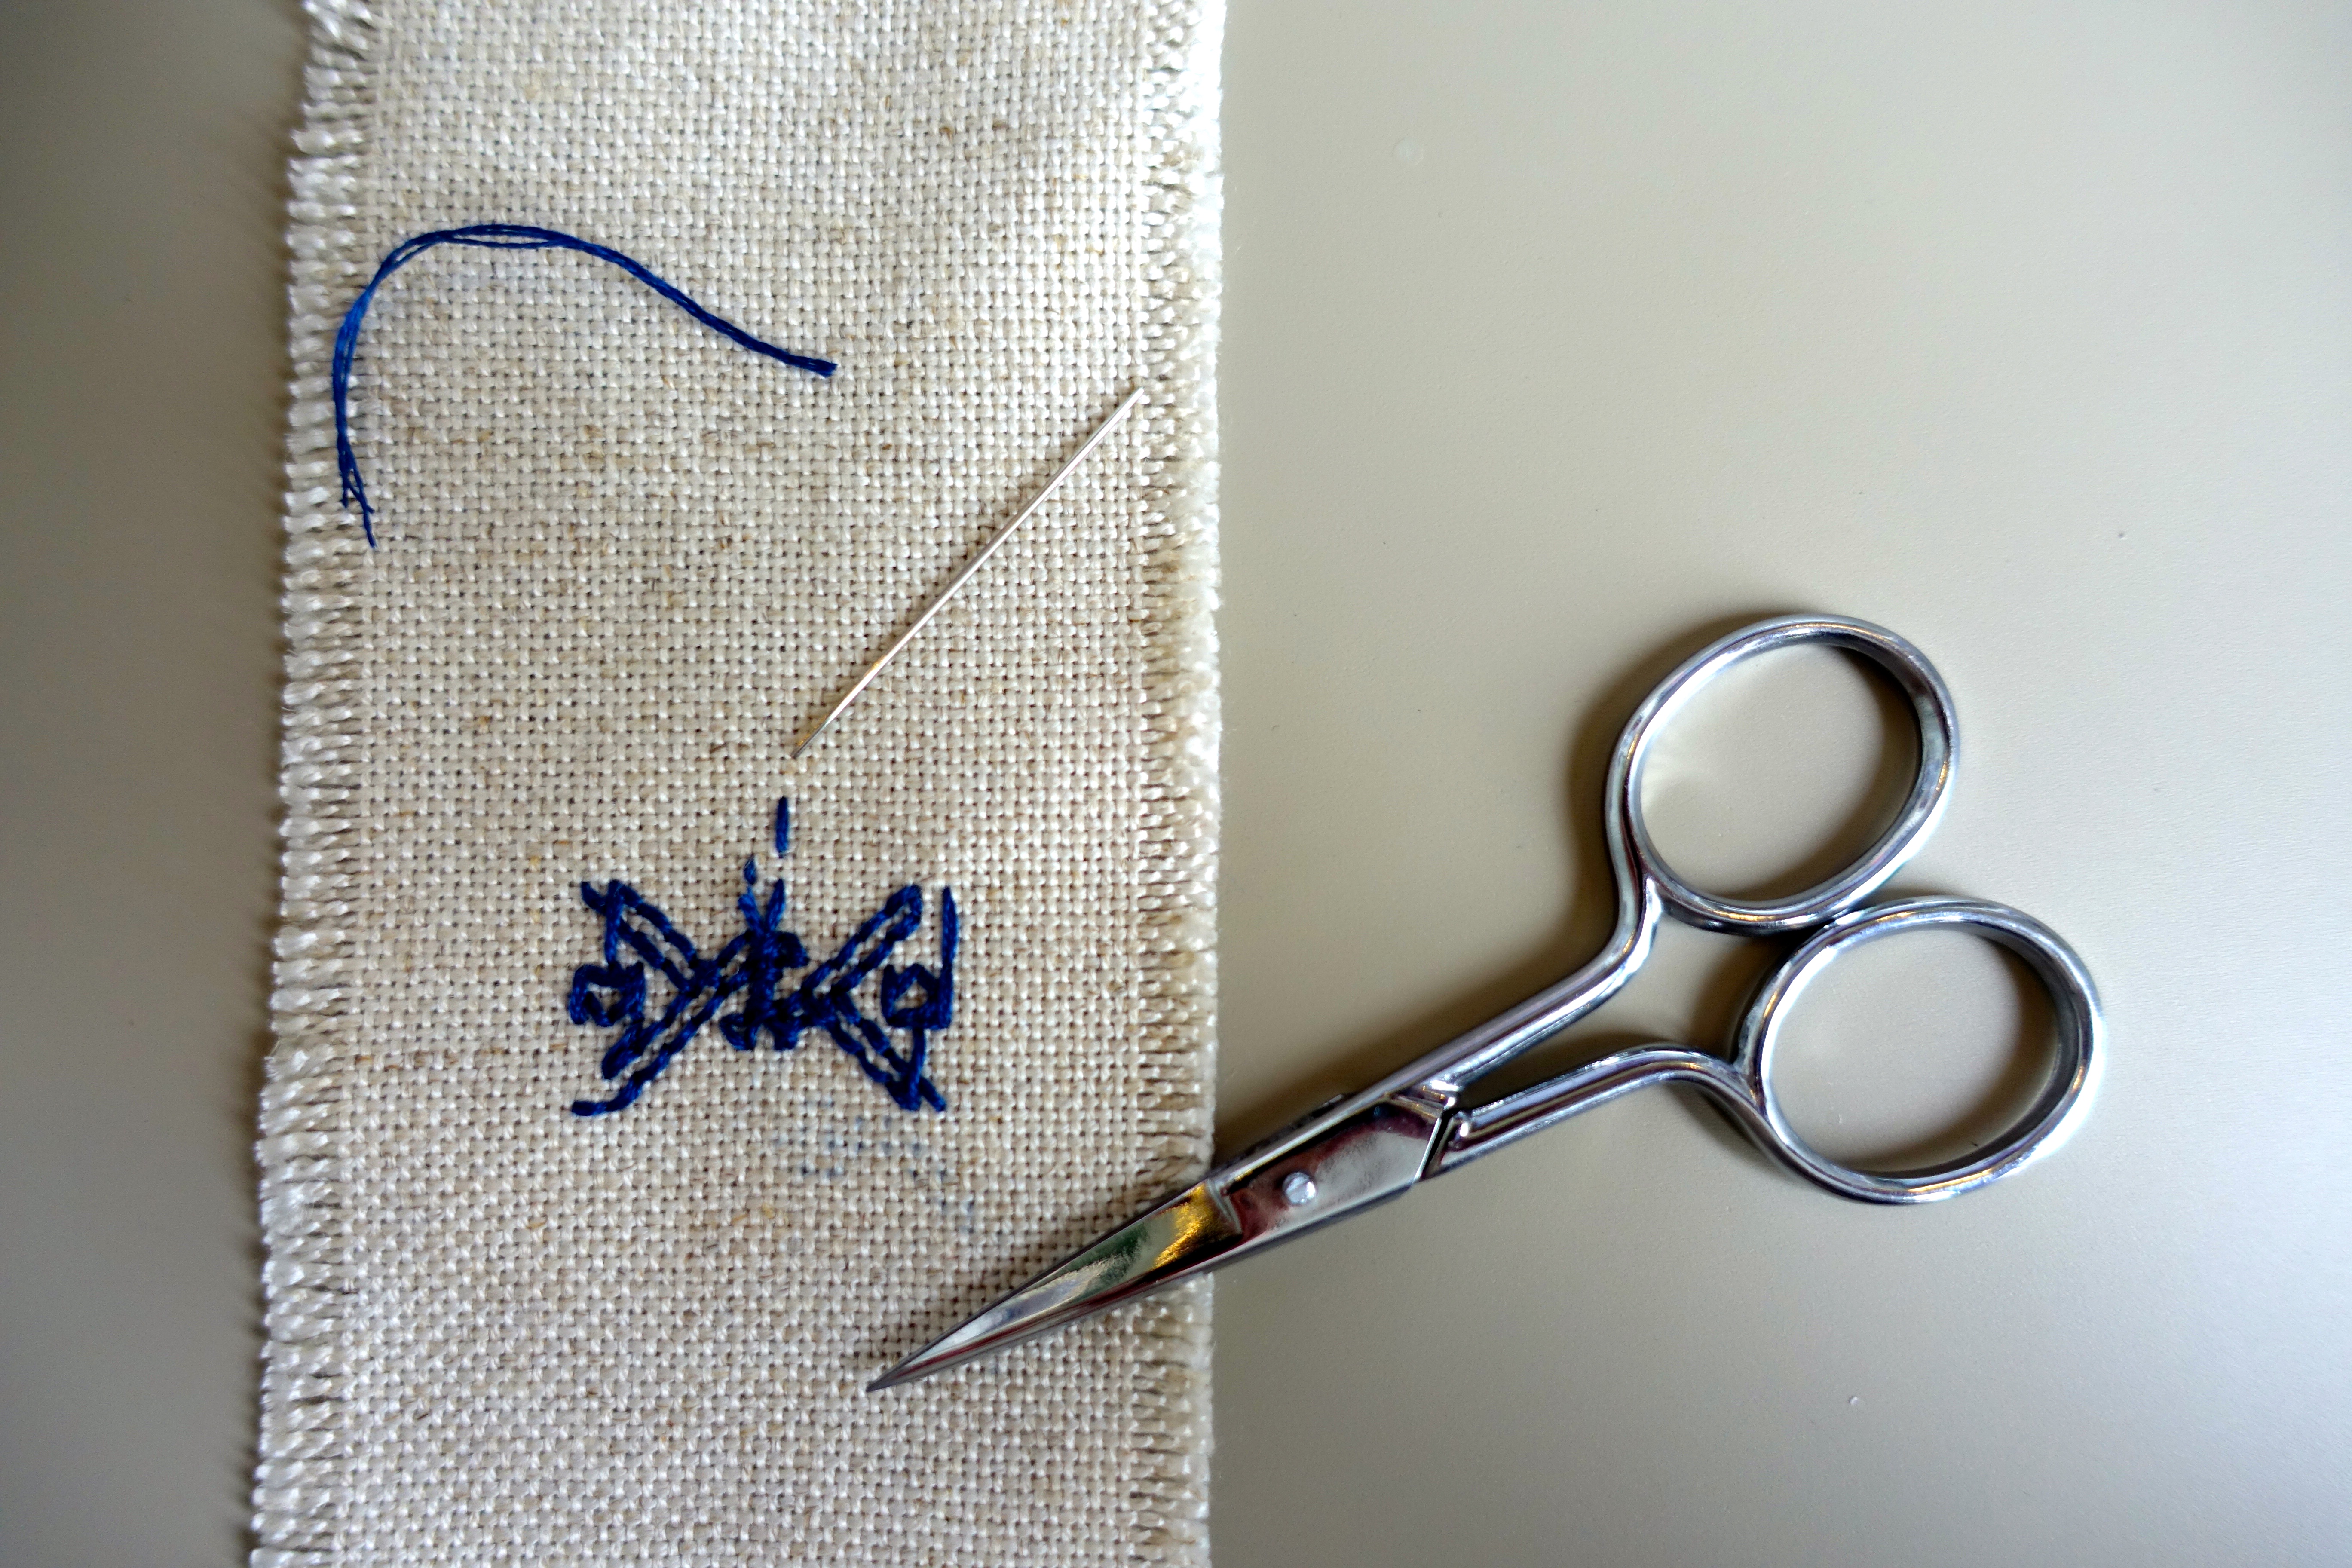
Here I am starting off.  I’ve threaded my thread through where I want it and leave behind a tail of thread on the underside.

dsc01579

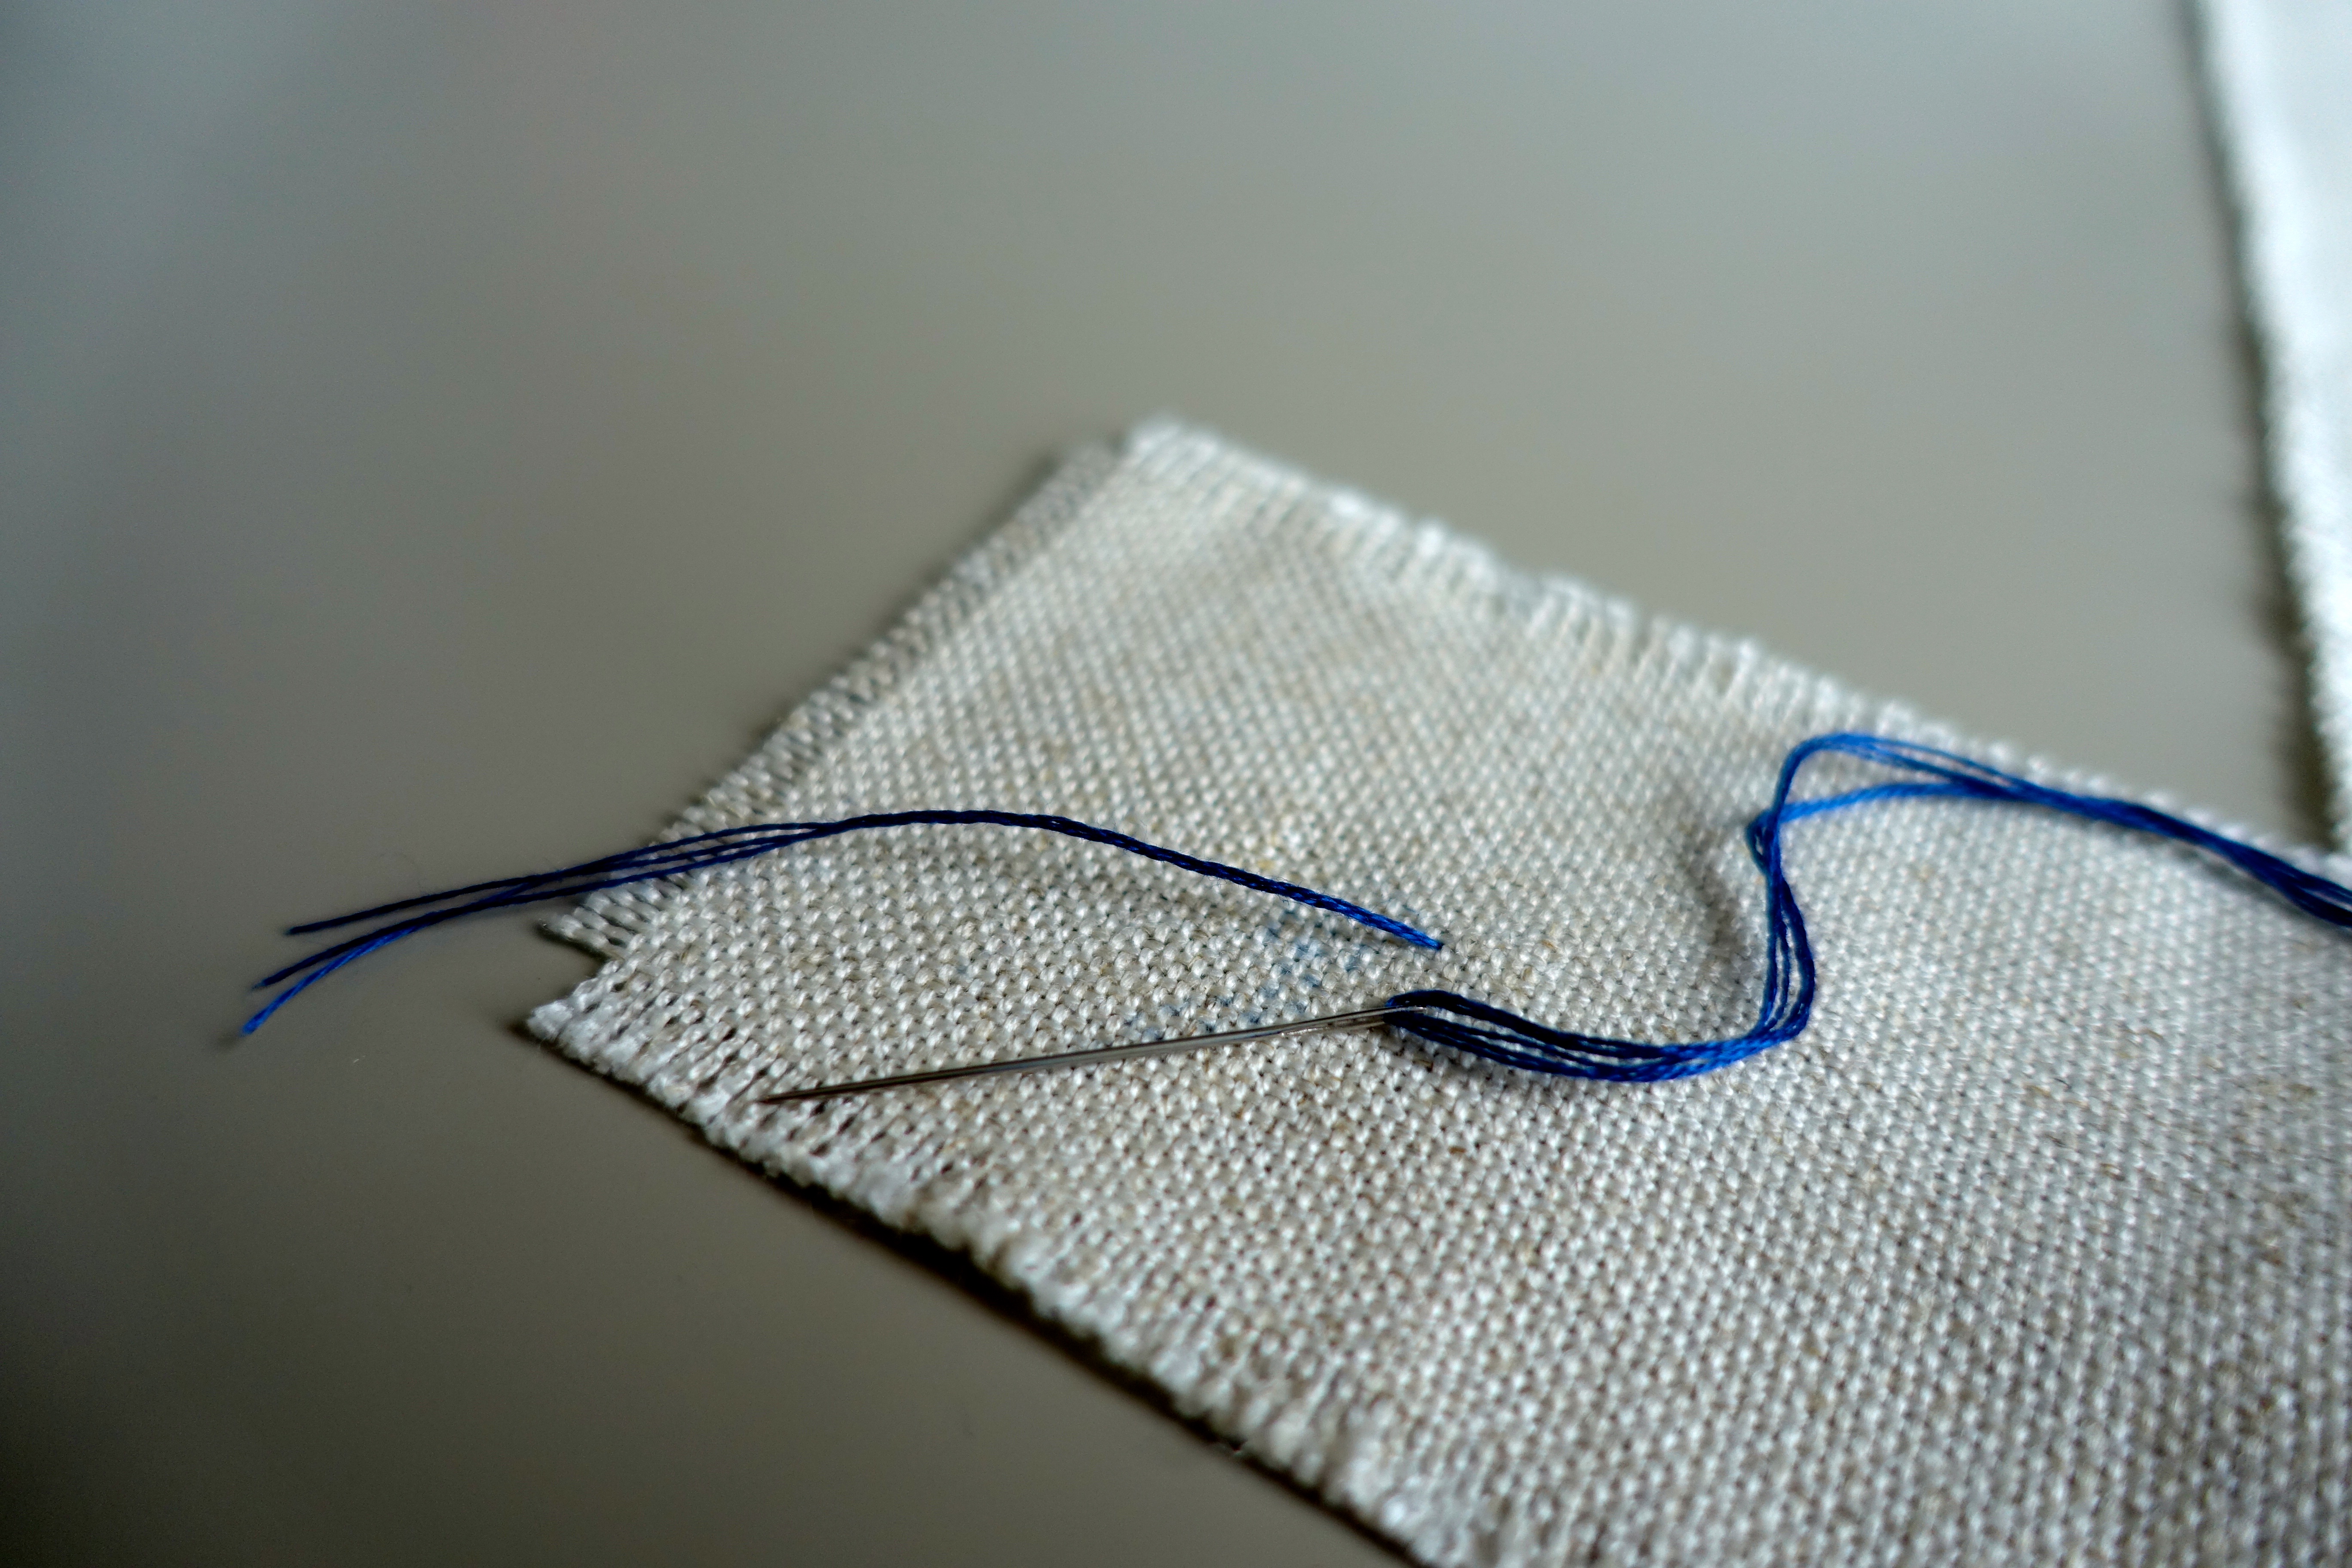
The tail of thread should be longer than the needle, like in this photo.  Begin embroidering.

DSC01580.JPG

Be aware of where your thread-tails are.  If they’re hanging around out the back, you may stitch them unawares to your underside and you will then have no tail to tuck under neatly.  Done this many times, unpicked as a result!  I tend to hold the thread tail in my holding hand as I embroider so that I keep it out of the way of my needle.

dsc01581

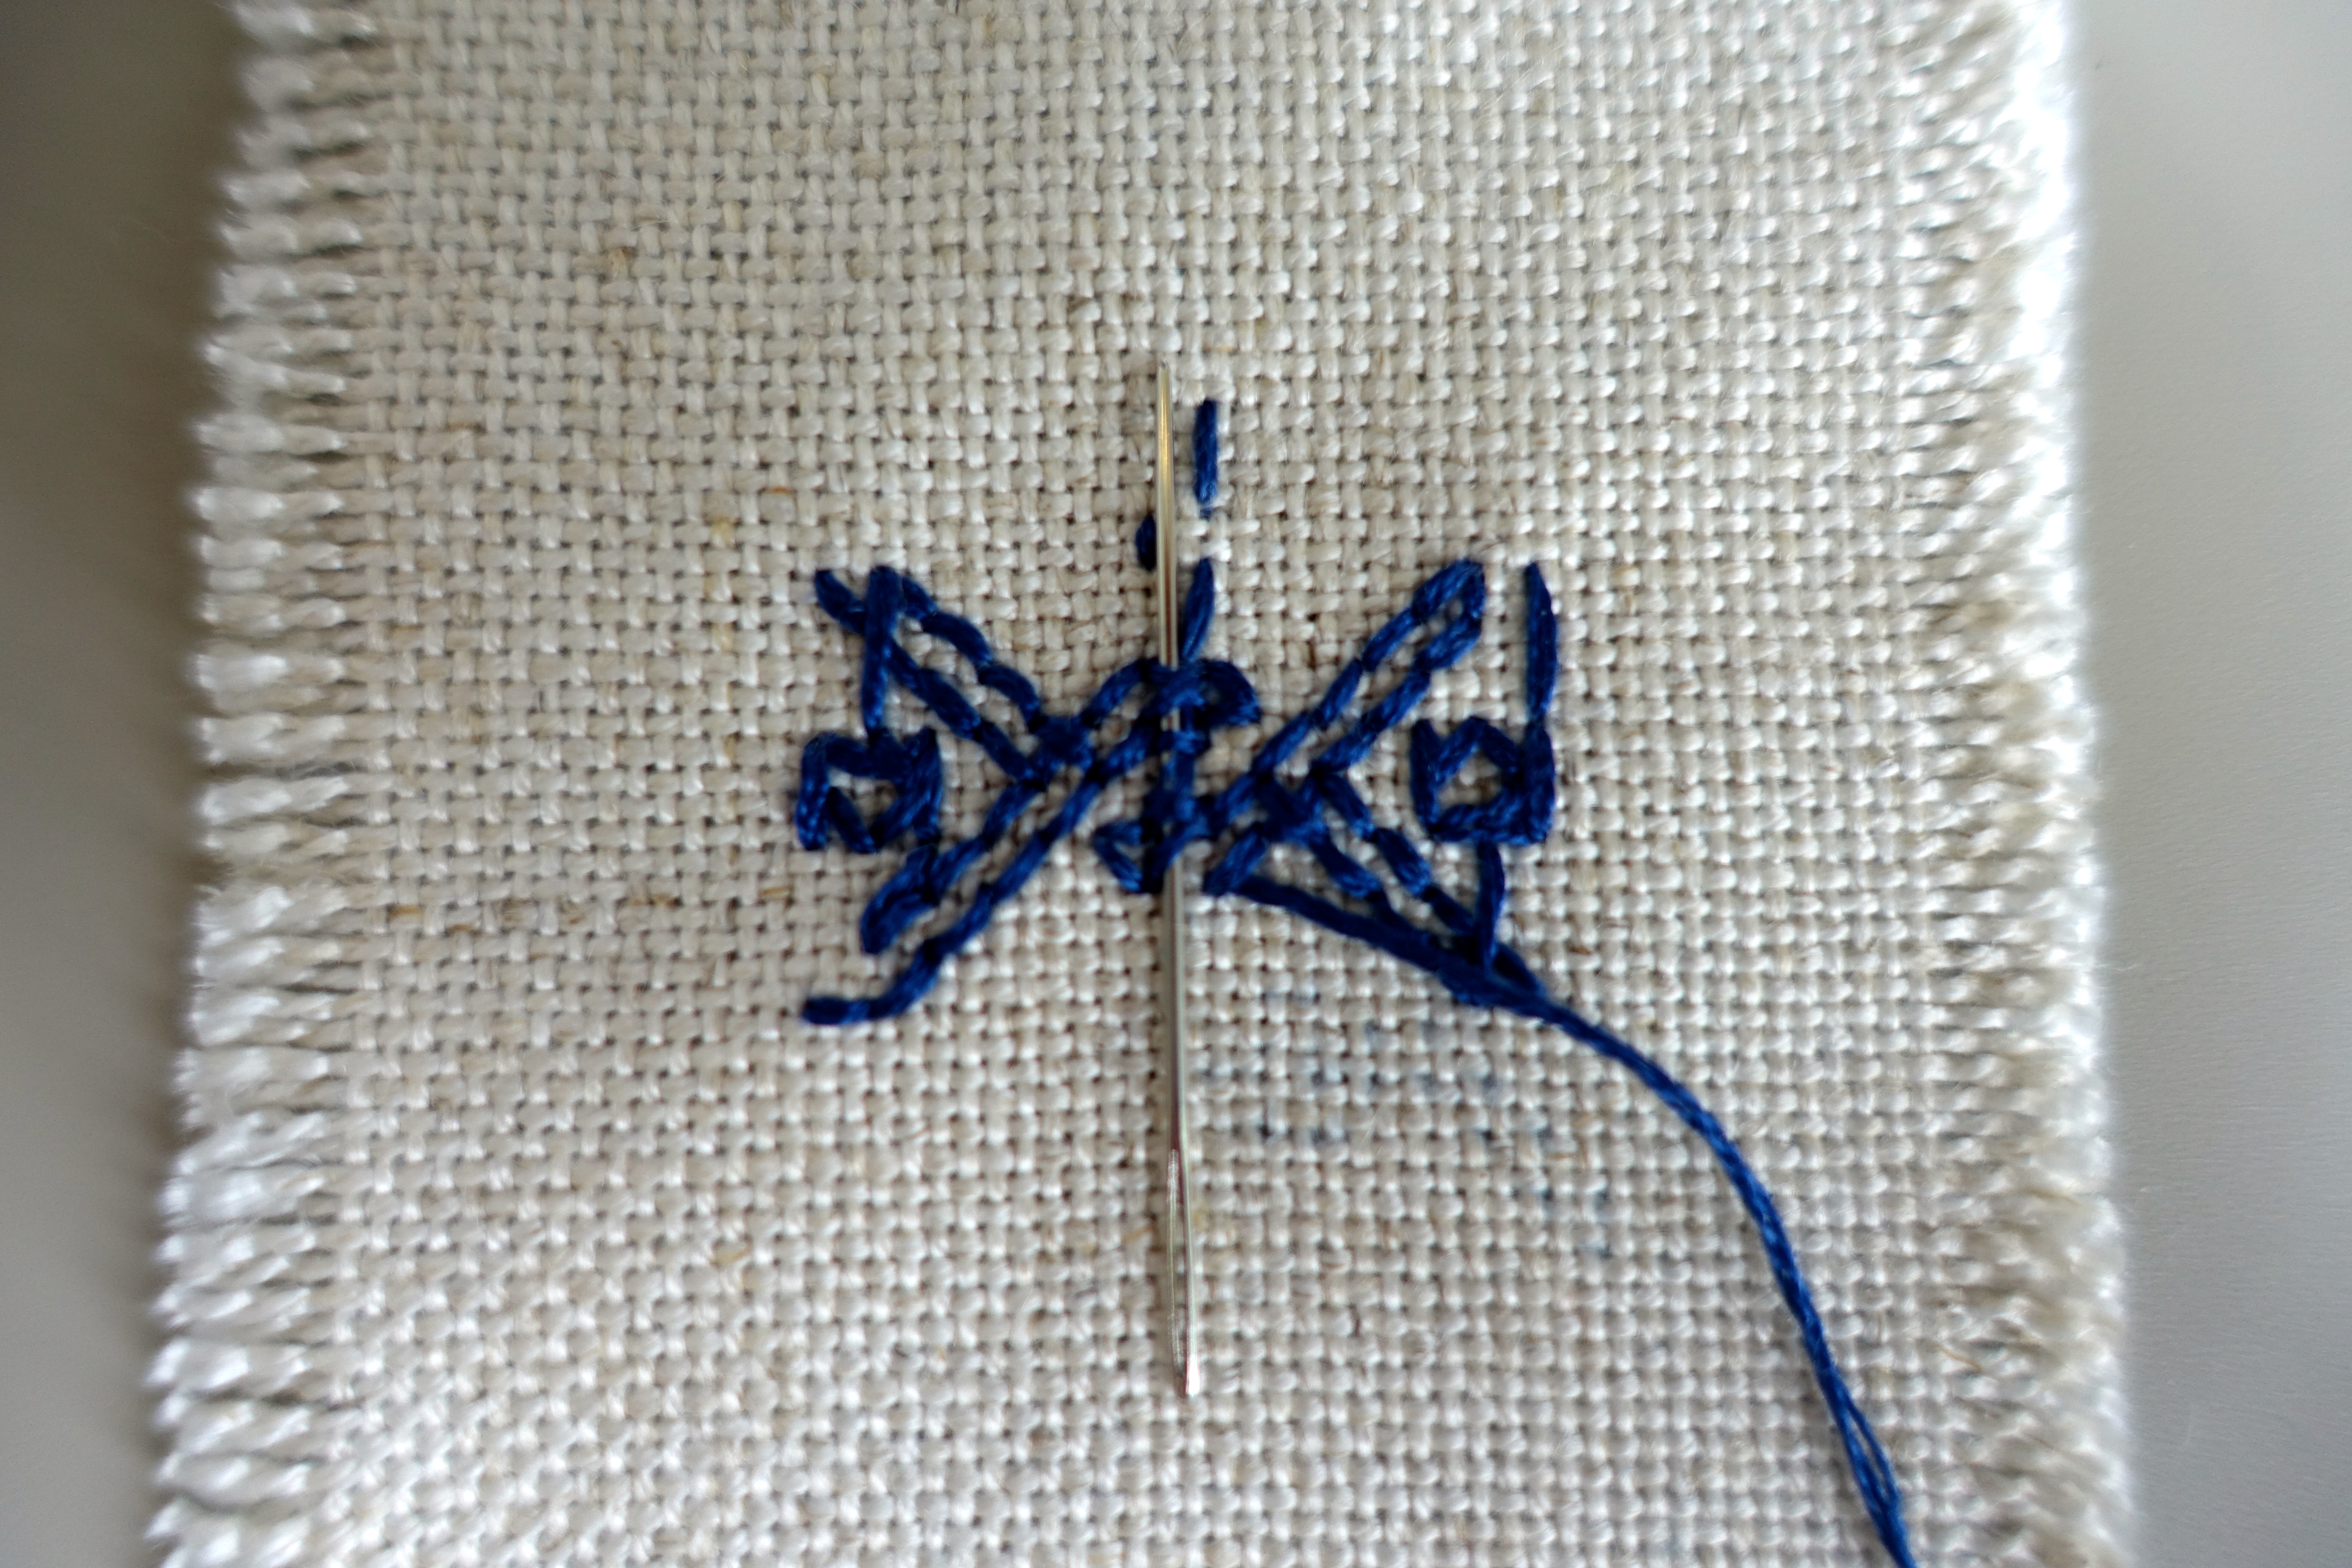
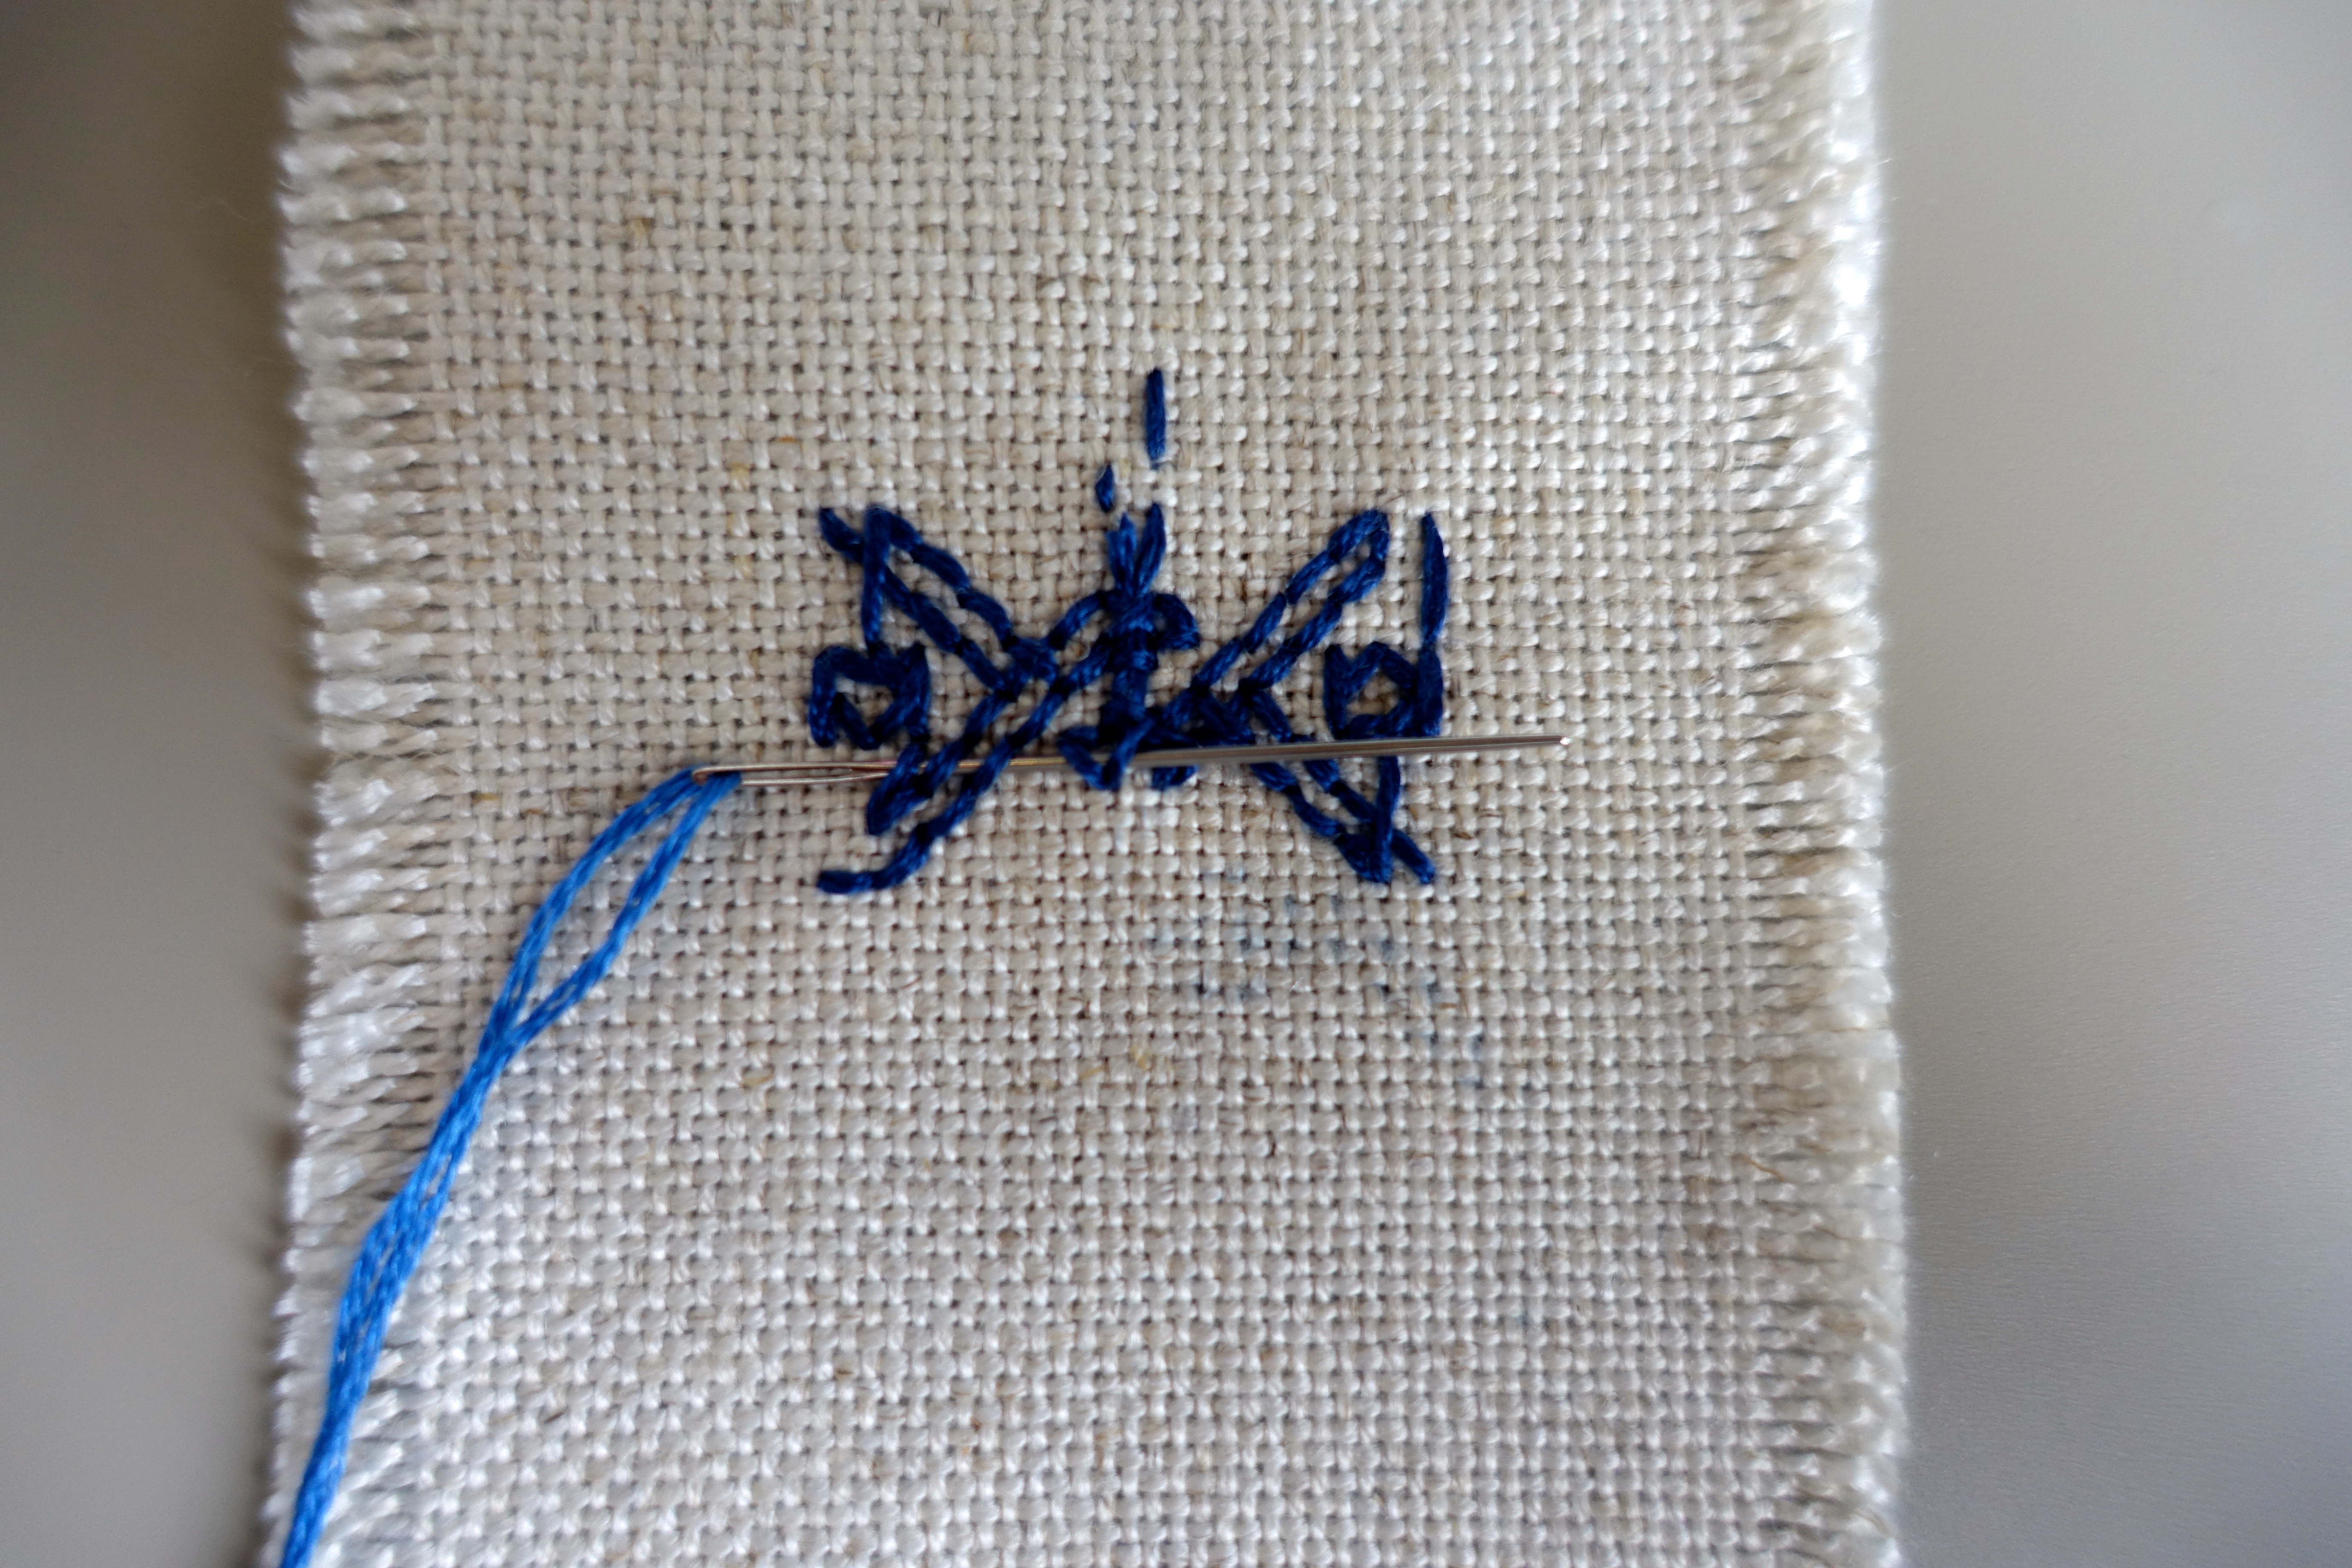
When there comes an opportunity to tuck under, eg the thread is finished and you’re removing it from the needle, or otherwise proactively when there’s enough embroidery there to tuck under, or in this case changing colours, choose 3-4 stitches in row and thread the needle under them.

dsc01582

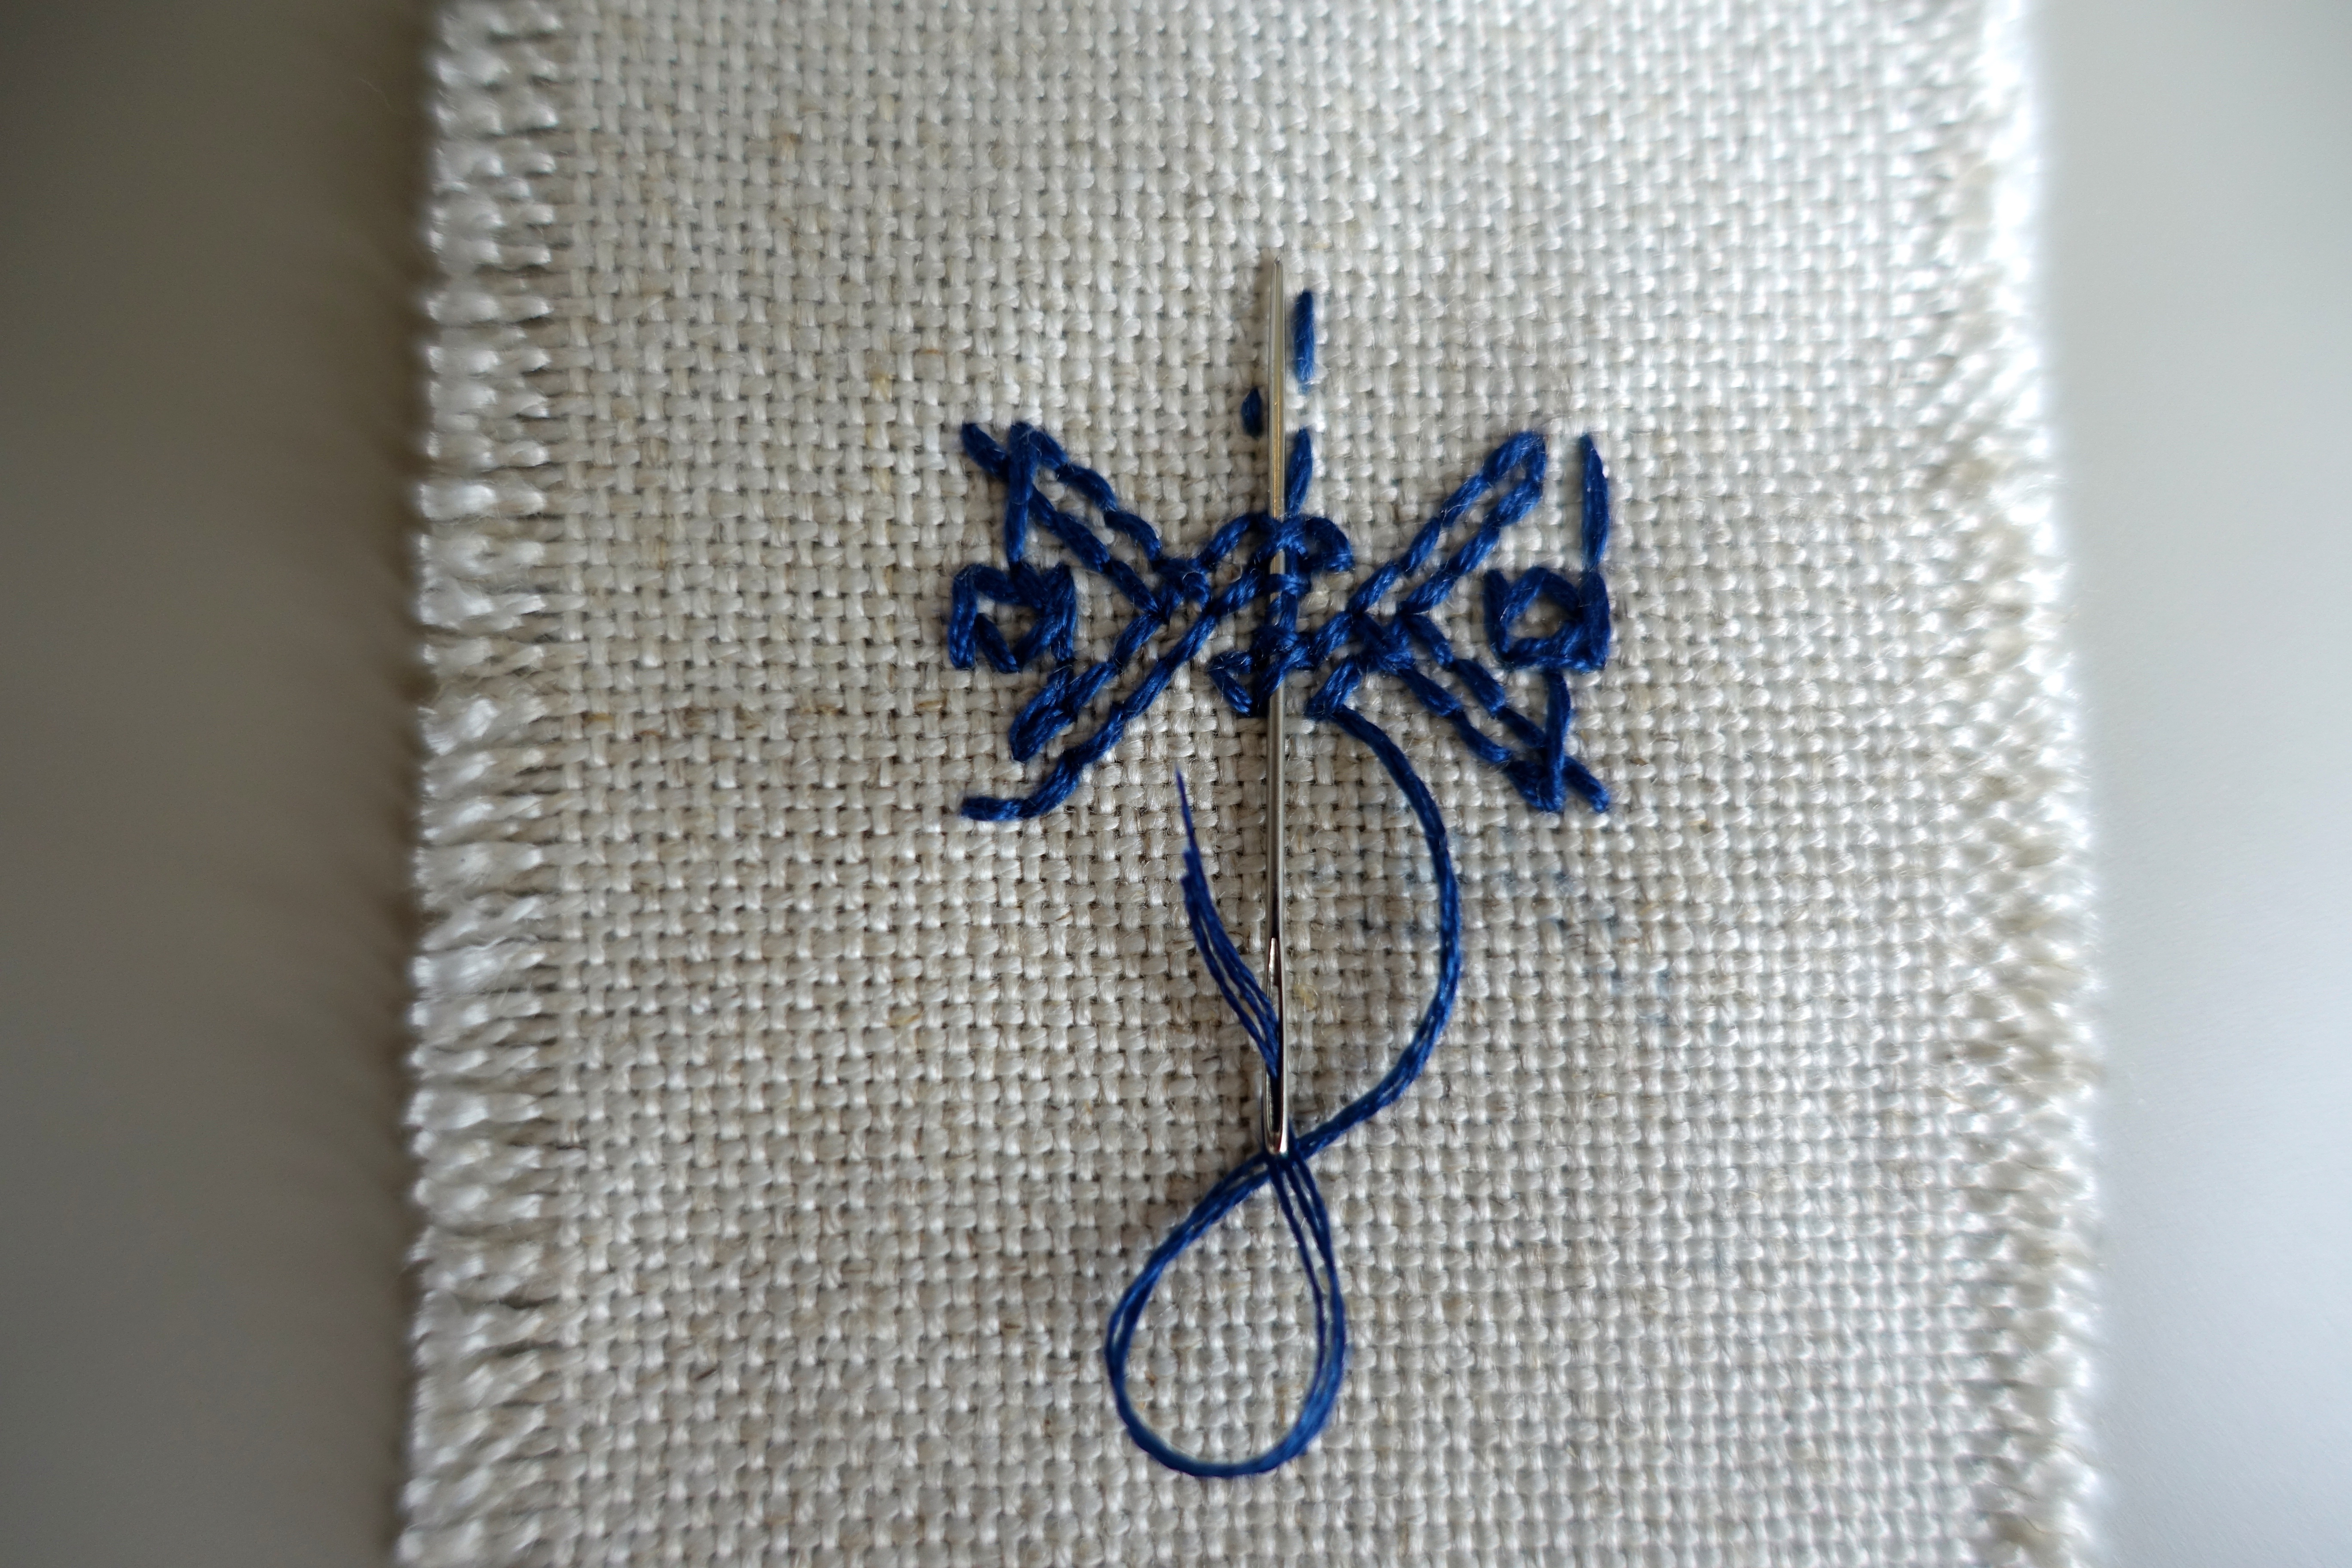
Thread the thread tail into the eye of the needle.

dsc01583

And pull it through.

DSC01584.JPG

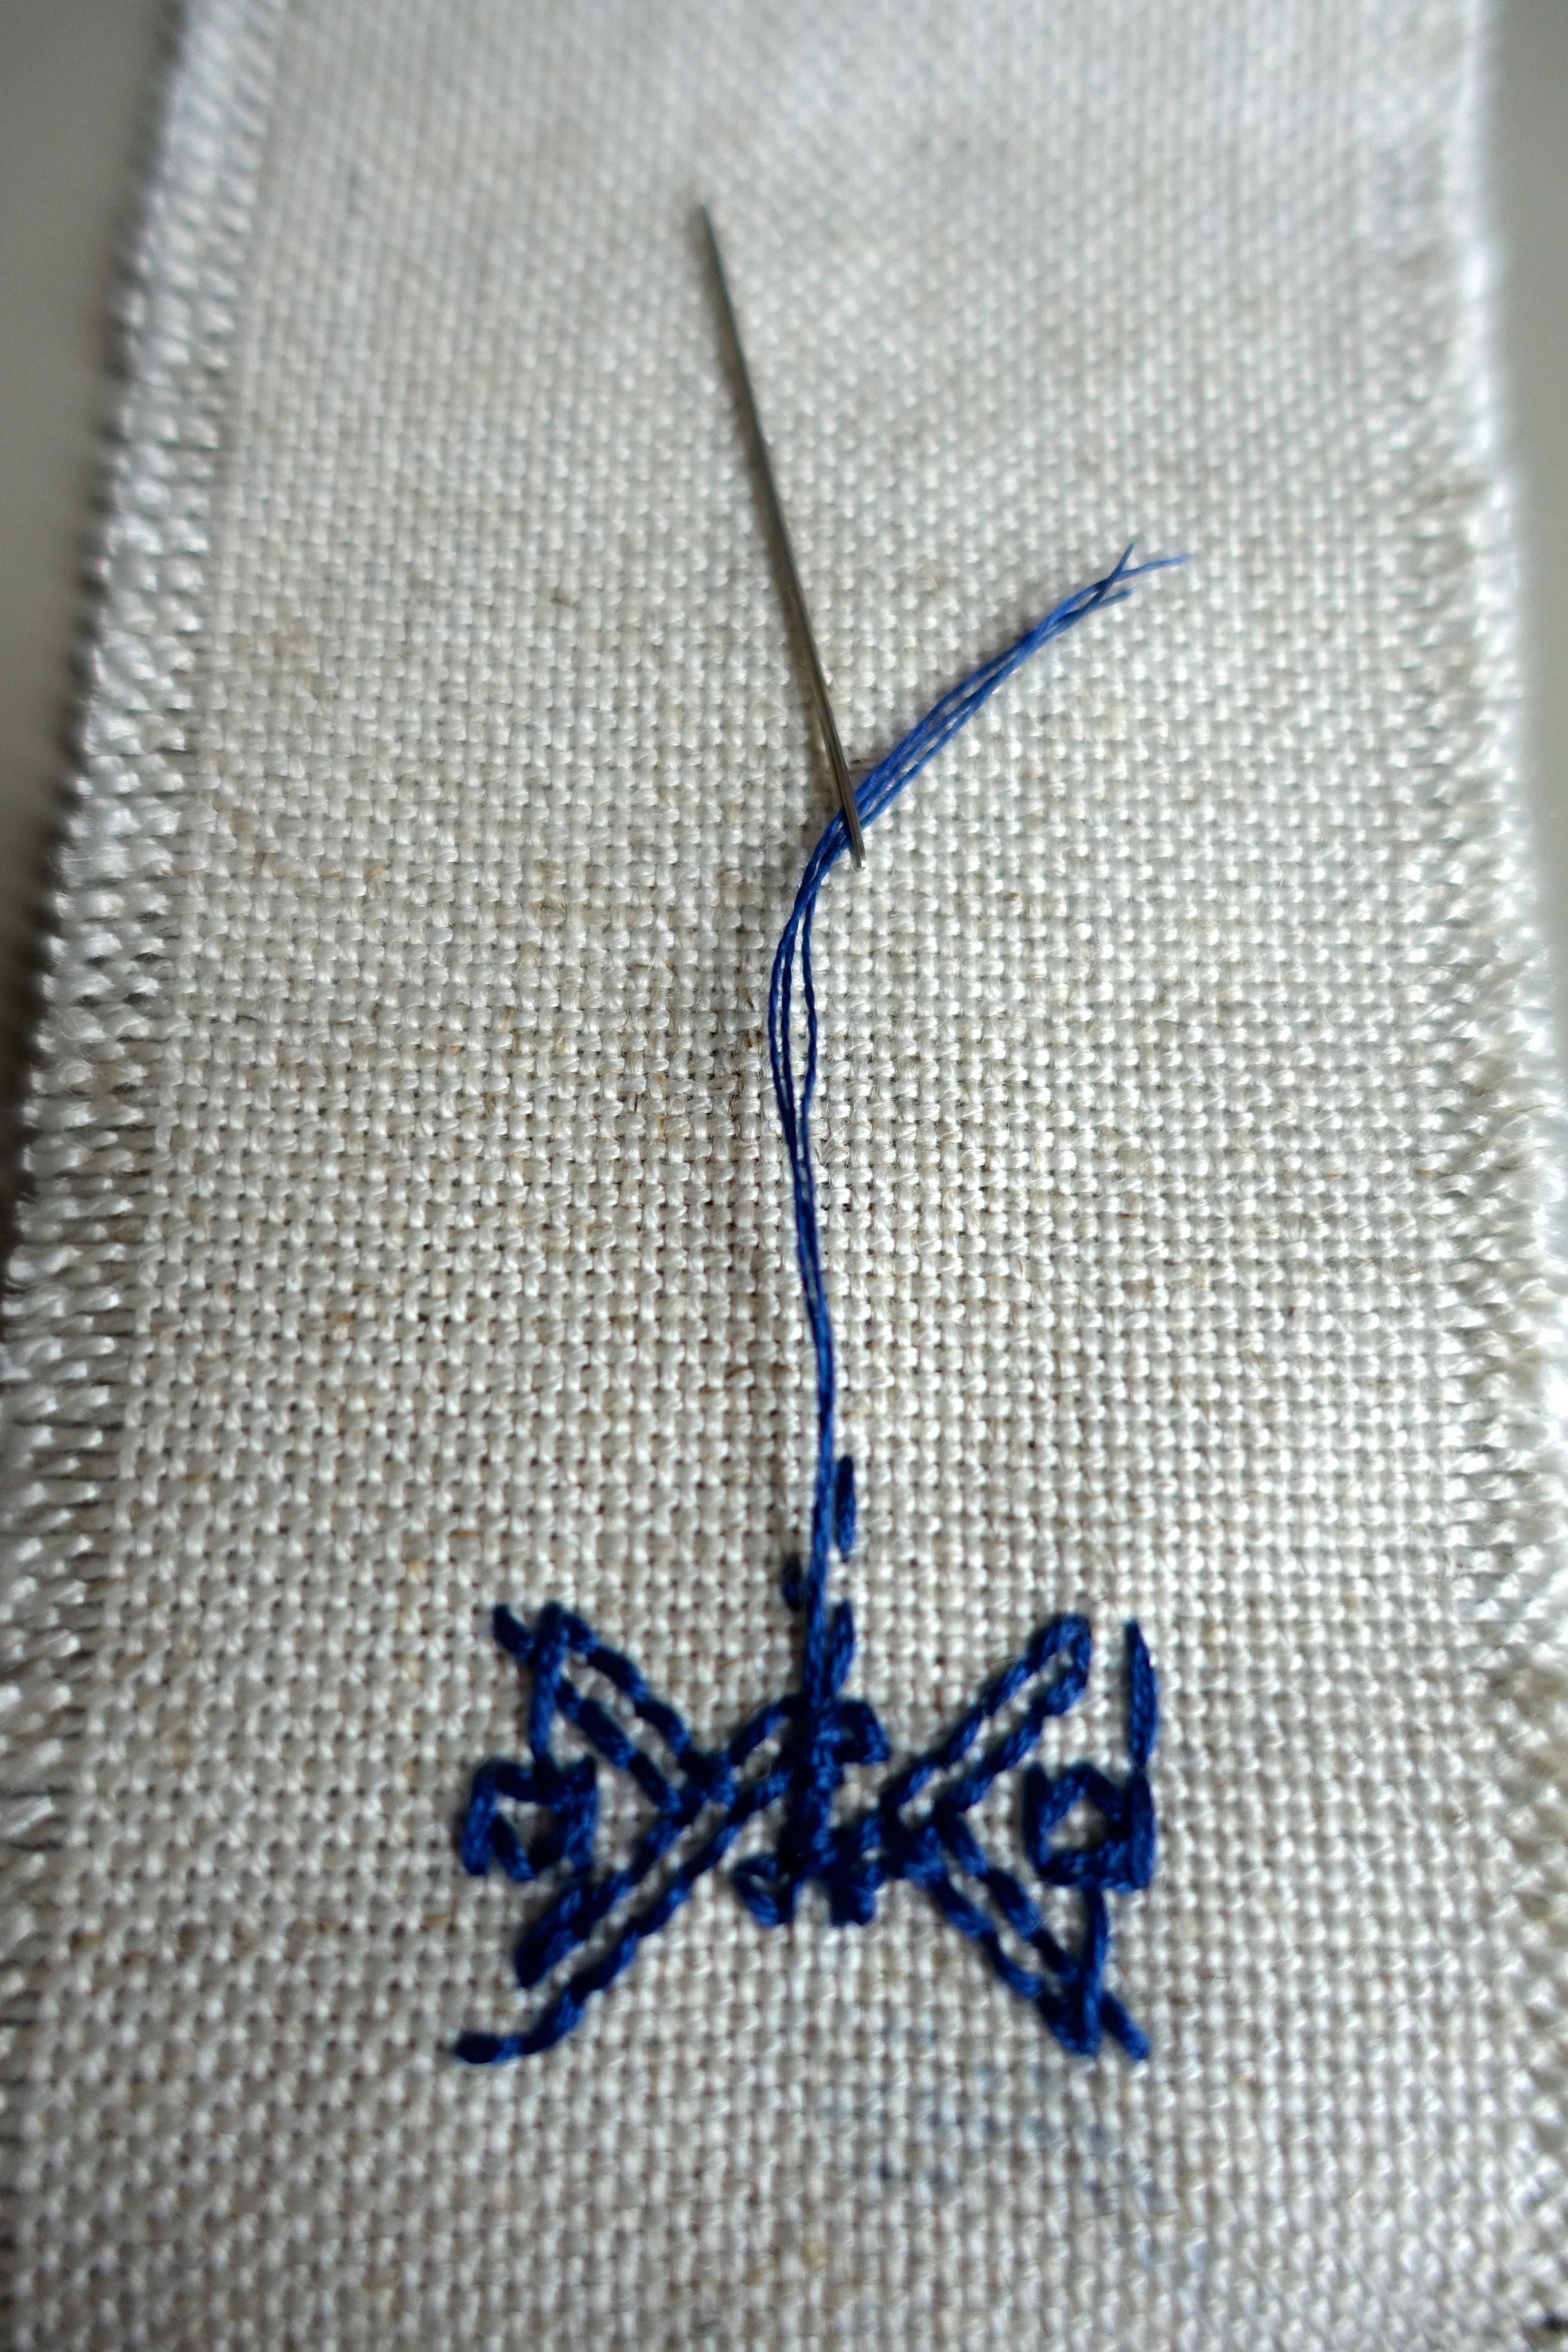
Then cut away the excess thread tail.

dsc01585

When starting a new colour or a new thread, you now have some stitches under which to fasten it.

dsc01586

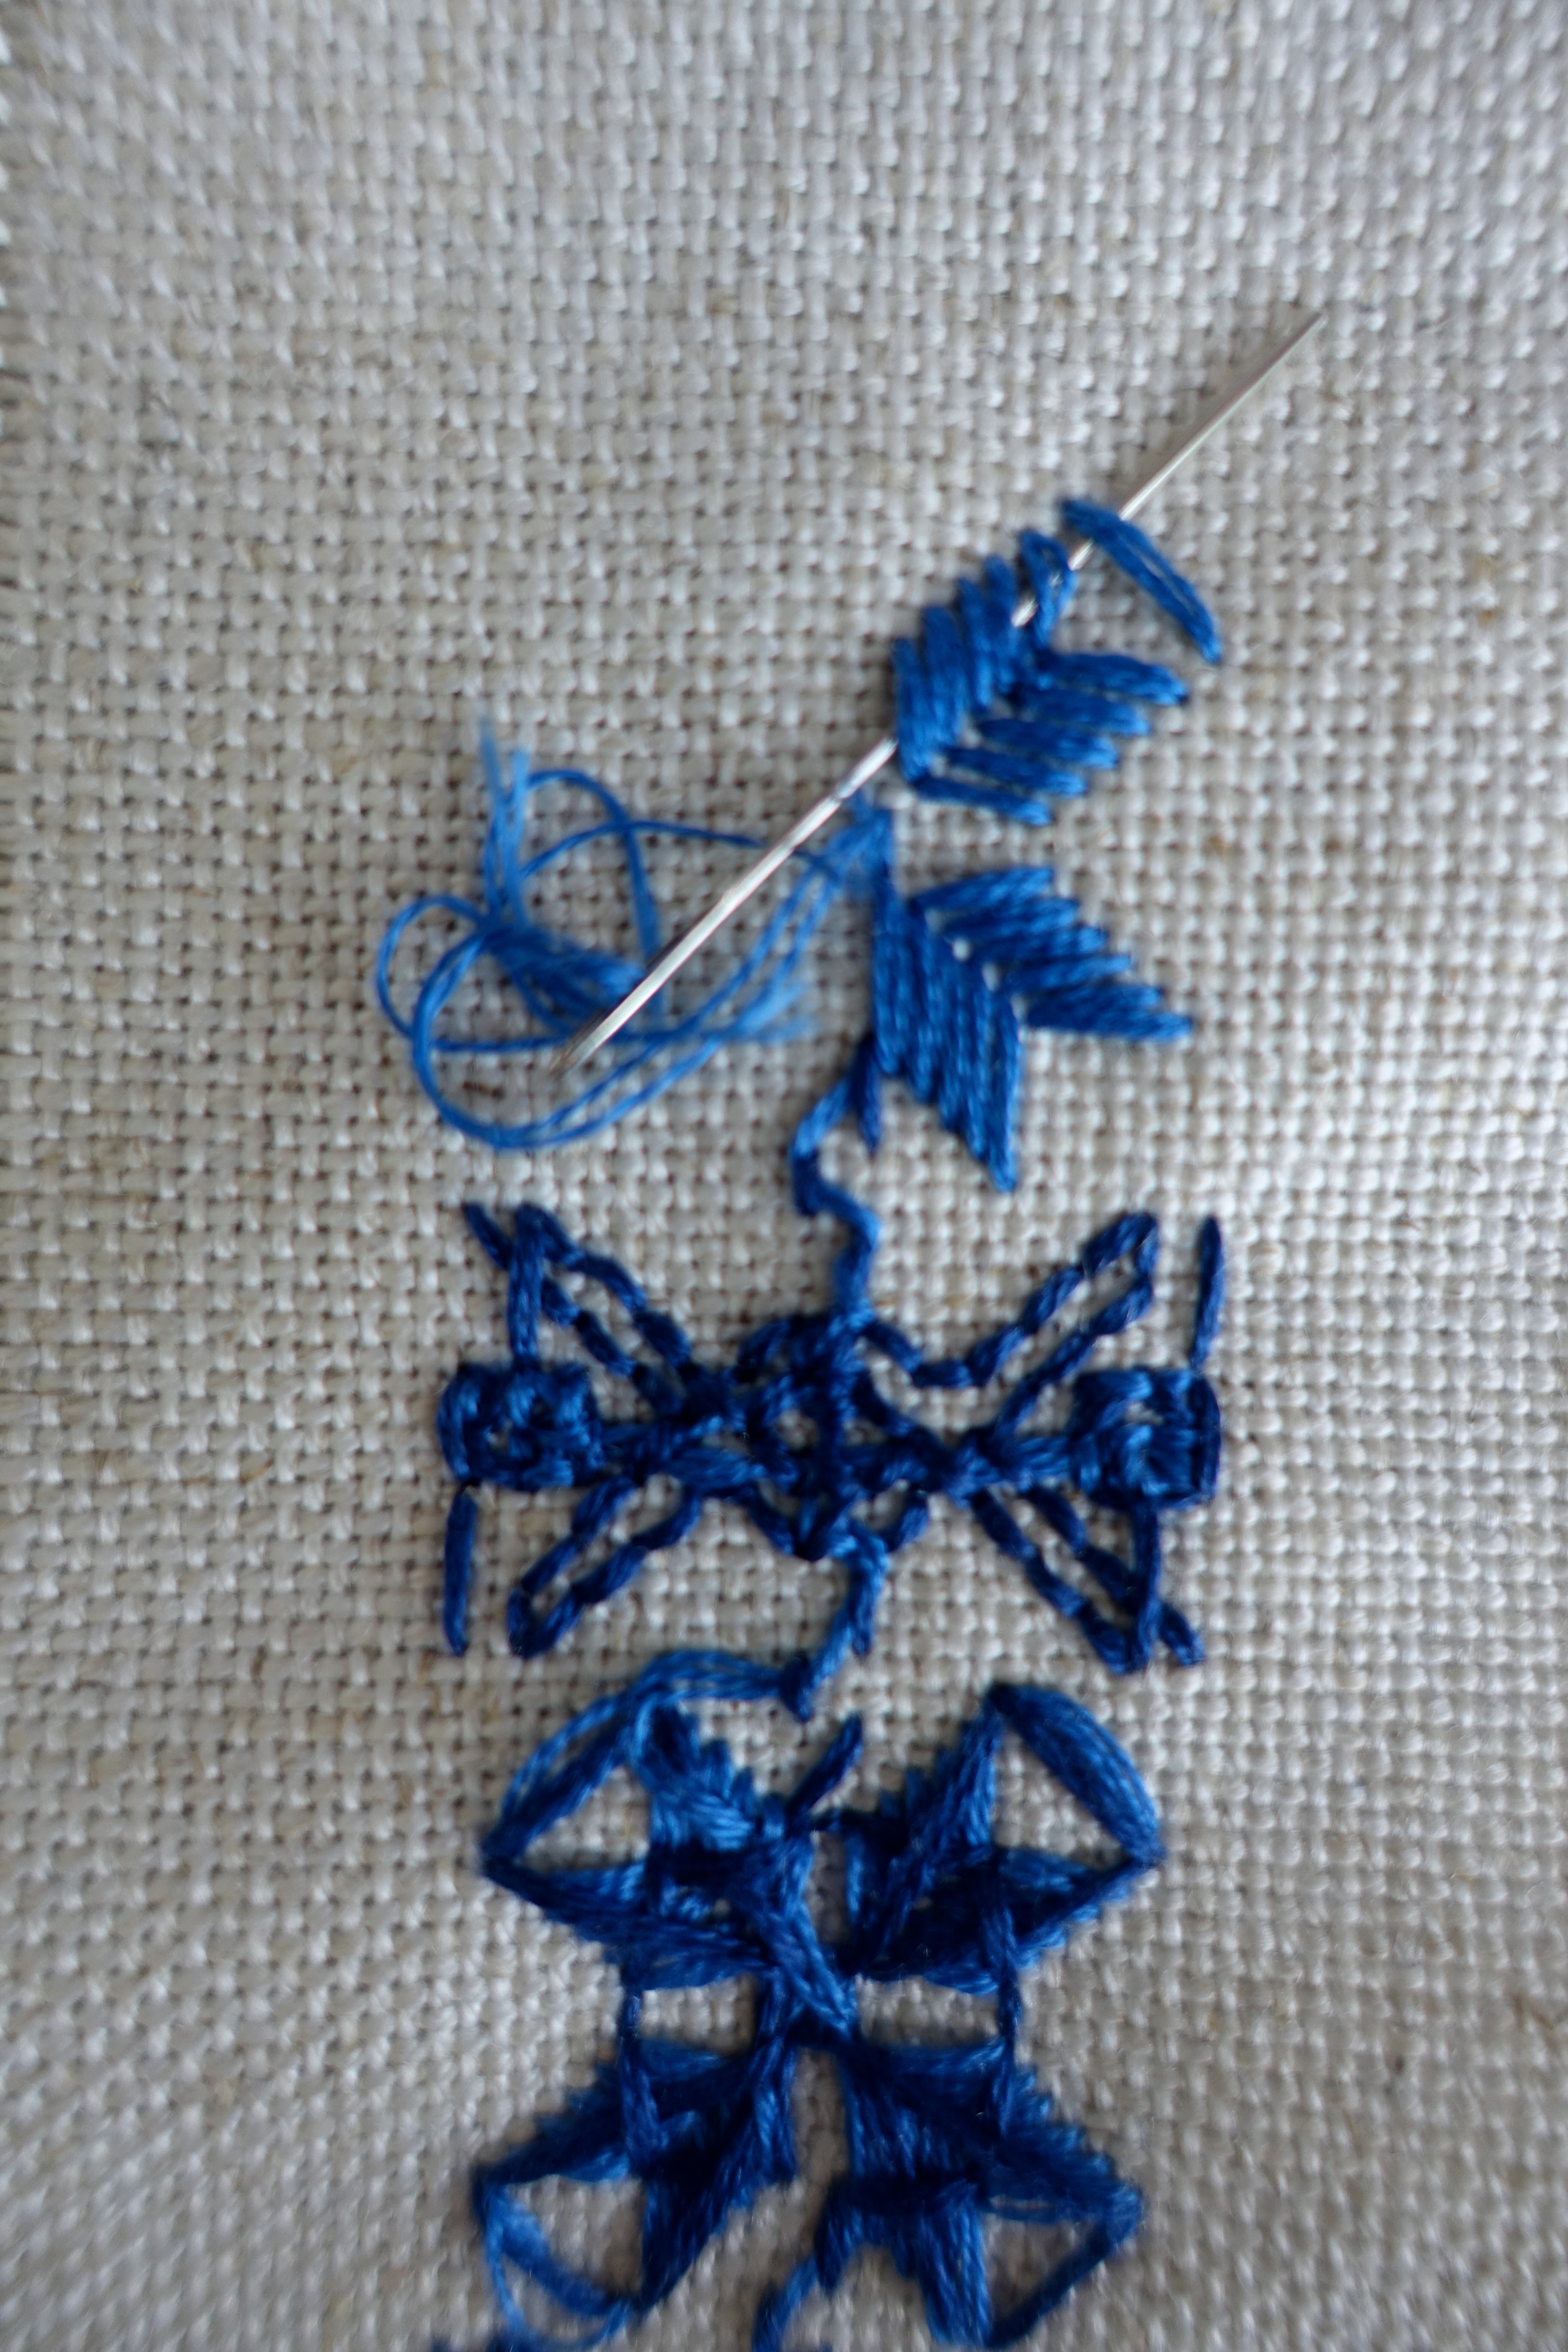
When a thread runs out, you can tuck it under a nearby part of the design.

dsc01588

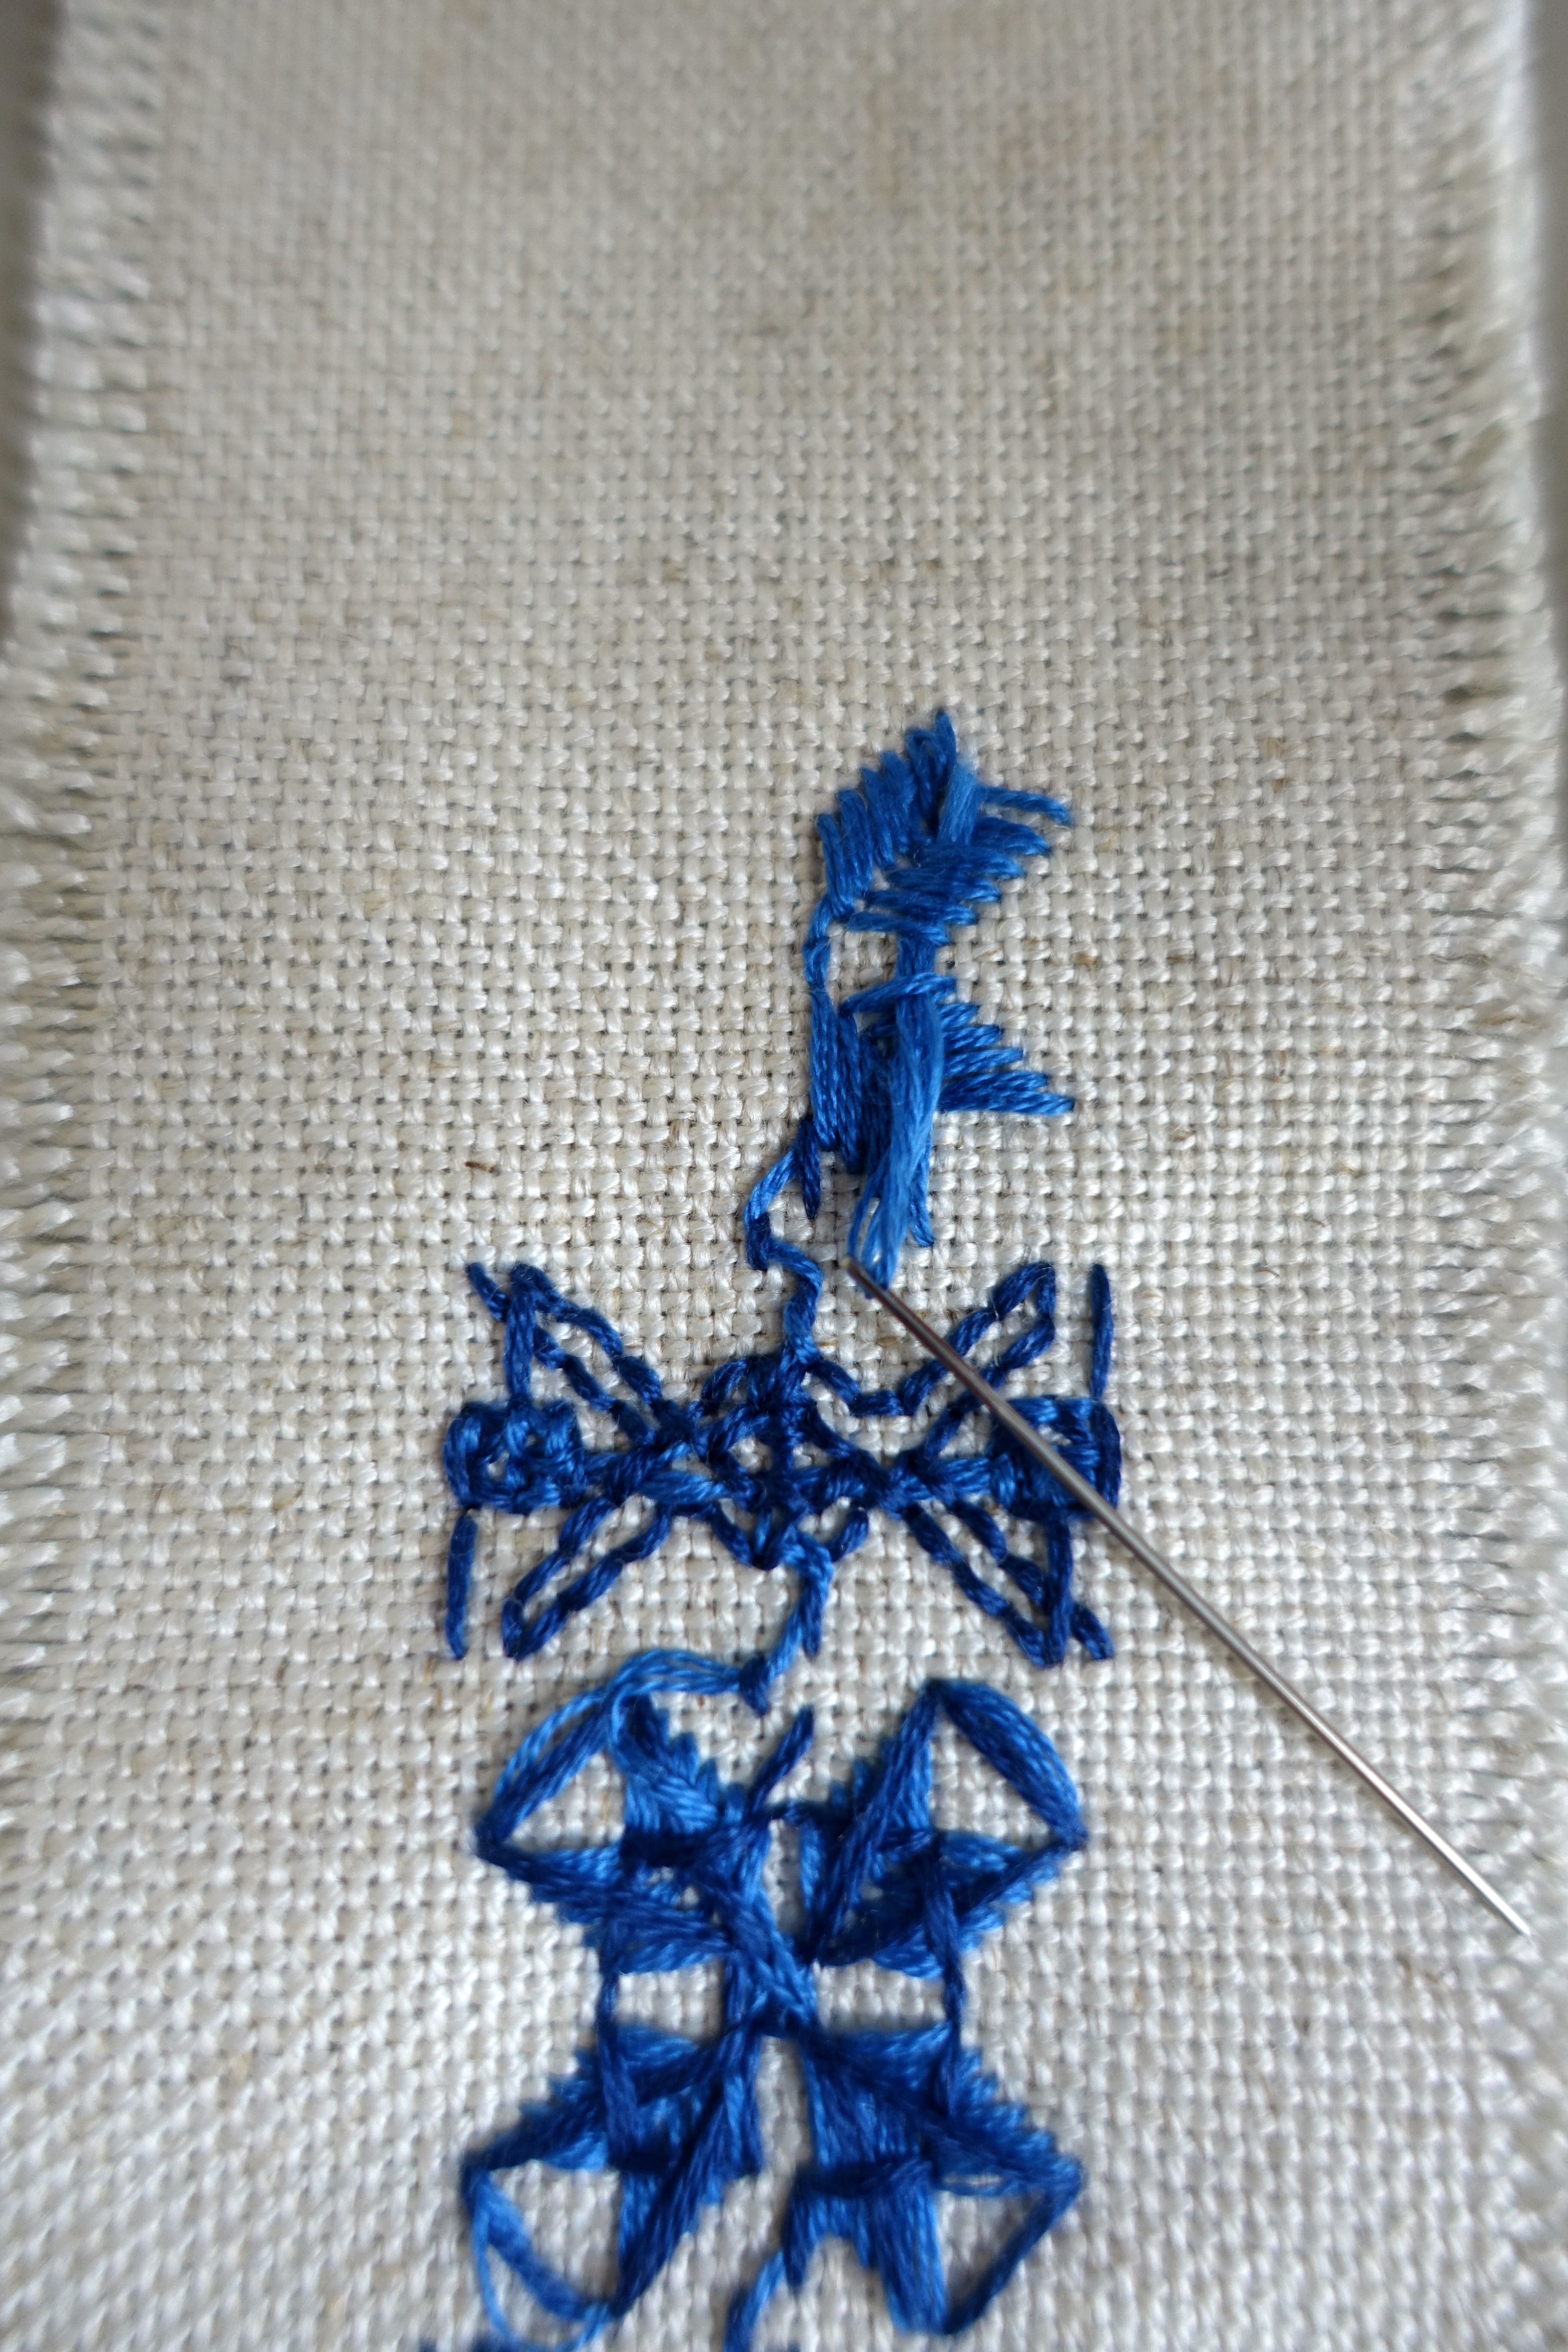
If I’m working on cross stitch or back stitch and the stitches on the reverse side are short, I’m happy to fasten a thread end under 3-4 stitches.  Because in this case I’m using satin stitch and the stitches on the reverse are longer and the tuck will be a little looser, I thread the thread end through two parts to ensure it is fastened.

Cut, re-thread and you’re away.

And there you have a simple no-knots way to fasten thread ends at the beginning of a project or at the end of a thread.

~oOo~

My Paska Recipe

Paska, made with love… this is the recipe my Mama used, I think its actually a babka recipe from the green book.  I put a whole day aside for this – what you see documented started at 8am and was finally finished at 9pm.  There is some time for other things over the day (like doing some pysanky,) but don’t count on getting this recipe done in half a day and don’t expect to pay a lot of attention to anything else!!  This paska is a baby – it wants you all!  I will say that this is a double recipe.  Mama used to do triple! which I’ve never been game to do.

paska 1

On the left are 24 egg yolks and 4 whole eggs.  On the right, we begin with sweat – a vanilla bean grated, and the rind of two lemons.

paska 2

1 cup of lukewarm water with a 1 tablespoon of sugar dissolved.  This recipe uses 6 packets of dry yeast sprinkled over the top until all is spongy.  Use a wide, shallow bowl so all the yeast can easily get wet and eat sugar  Golden rule of paska – be nice to your yeast.  I had to re-do mine today because i noticed it dropping, probably from simply moving the bowl from one spot to the other on the stove top – tears!

paska 3

2 cups of milk are being brought to boil and 2/3 cup of plain flour sifted into a large bowl.  This will later have the yeast stirred in.  I want to move my yeast around as little as possible, so as early as I can in the recipe I get it into the large bowl that will eventually contain all the dough.  So the mix of milk and flour – put it in your largest bowl.

paska 4

Mixing the boiling milk with the flour.  A bit like tempering eggs, this needs to be done SLOWLY.  Making sure this has no lumps means taking the time to add hot milk a tiny bit at a time.

paska 5

No lumps!  Note that you want this to be lukewarm before adding the yeast.  If its hot, the yeast will cook and not rise any more!  I find that by the time I finish doing this nice and slowly it is just fine, but in case you get through it faster let it cool to lukewarm before the next step – adding the yeast to this paste.

paska 6

When the yeast has finished getting spongy in its warm sugary water, it is poured into the milk/flour paste and stirred VERY GENTLY.  While this is rising (you want it to rise to what it looks like in this photo), it is time to take a little break, in today’s case – breakfast.

paska 7

I think a French person was involved in this recipe.  Here is a lot of butter, 500g in fact. It gets melted.

paska 8

Nearly ready to start mixing wet with dry.  On the left are 2 cups of sugar and 2 teaspoons of salt.  The eggs (24 egg yolks and 4 whole eggs) get beaten and then the salt and sugar are added slowly while beating continues.

paska 9

Eggs/sugar/salt are poured into the melted butter (which is cooled) and stirred through.  Then the vanilla bean and lemon rind is added.  May I just say that the smell of vanilla, lemon rind and yeast is the smell of Velykden’ for me.

paska 10

Now another step in which to be very gentle with the yeast.  The butter/egg mixture in the jug needs to be mixed with the yeasty, spongy, milky thing.  I pour the butter/eggs along the side of the bowl so they pour into the bottom.  I then stir VERY GENTLY again.  It wont look a lot different and because the yeasty bubbles will always want to be on top but you can see a bit of yellow in it – that is good enough for me.  I wouldn’t advise rigorous stirring!

paska 11

This is a good spot to have a drink of water and a pee break because the next step takes a bit of time.  12 cups of plain flour are mixed with the wet ingredients.  How are 12 cups of flour going to fit into that bowl?  They flatten the mixture so it all gets in there somehow.  I add 2 cups at a time, sifted, and stir each time.  Above is half-way, with still a v moist dough.

paska 12

12 cups are in.

paska 13

Stir a bit and then knead by hand.  It remains a very moist and sticky dough.  Knead for approx 10 minutes.

paska 14

Still very sticky.  At this stage, resist the temptation to eat heaps of it raw – it already tastes DELICIOUS.

paska 15

Then the dough is divided into bowls and given time to rise (the recipe says to double in size).  I put the oven on low heat and get the temperature up in the kitchen.  As it is, this recipe takes AGES, so a bit of heat to move things along is welcome.

paska 16

Snug like bugs for the 1st rise (creep away, have a shower, eat, do something else for a bit).

paska 17

When I see the dough starting to push up the tea towels, it is time to knead.  Nothing fancy happens next.  The dough is covered up again and allowed time to do its 2nd rise.

paska 18

After the 2nd rise, we are ready for tins.

paska 19

Tins are either from Milo or otherwise International Roast.  Beetroot slice tins also good…

Buttered on the inside and then lined with bread crumbs.  Beware sharp tops and cuts to knuckles whilst buttering.  There was blood.

paska 20

Dough is kneaded in the bowl and then rolled into balls that will fill approx 1/3 of the tin.

paska 21

Cover them with their blankets and let them do their 3rd rise.  They are ready when they’re nearly at the top.

paska 22

Brush with egg/milk mixture for shininess and then into the oven.  Baking instructions: 10 mins at 190 degrees, then cover them with a sheet of foil and bake for another 30 mins at 160 degrees, and then for another 15 mins at 130 degrees with the foil still on top.  Take ’em out and let them cool until the tins are cool enough to handle by hand.  Now it REALLY smells like Velykden’!

paska 23

If there was enough butter/breadcrumbs on the insides of the tins, they can be loosened by pressing the tin a bit from the outside and then tipped out.  If they’re a bit sticky, might need to run a breadknife around the inside of the tin.

paska 24

Wash tins and repeat for any remaining dough – usually end up doing two bakes.  And here they are!

paska 25

Always icing so you can squidge it in with soft butter – best flavour combination EVER.  Just sugar and water on the stove to soften then pour on thick.  Some coloured ones for the little people coming for Velykden’ this year.

~oOo~

The Value of Graphing

So there are many inspiring examples of embroidery floating around.  You see photos online (a reason I keep Facebook), in books, on greeting cards under the quintessential representation of a Uki Easter or Rizdvo eve feast, or worn or used in like proper real life by people.

I remember one such example, standing at the back of the hall at church, awaiting the blessing of Easter baskets, spying and admiring someone’s beautiful servetka.  After the blessing, owner of said servetka whipped it off his basket and passed it over, to borrow, to copy.  And copied it was… onto graph paper.

As the above may demonstrate, there is no question that a graphed design will make the most sense to the grapher.

Even from books where designs are drawn out in schematic diagrams, I prefer to draw them out for myself before getting under way.

IMG_20181218_0008
IMG_20181218_0009
From Gay Eaton’s Ukrainian Whitework. See INSPIRATIONS page for details.

Why?

Apart from the fact that I sometimes find simply graphing a design a relaxing, mindful, satisfying activity, I learnt very early on the value of graphing.

In fact, I remember inventing designs as a little thing!  Not something I do so much any more!

For me, the main value of graphing lies in learning the design before starting to embroider it.  I would find it difficult, in the case of a simple design, and nigh on impossible in the case of a detailed or not zoomed in design, to embroider directly from a photo.

IMG_20181218_0011
A simple design, for example. From Ukrainian Embroideries by Maria Kutsenko. See INSPIRATIONS page for more details.

Even here, the relative size of separate motifs, their spacing, will affect the appearance of the embroidered pattern.  Something to work out on graph before getting under way.

IMG_20181218_0012

Here, the central star didn’t appeal to my eye and when embroidering it, I immediately changed its dimensions to appear more like the original design.

IMG_20181218_0013
Fabric: 25 count Floba. Threads: DMC stranded cotton, used in three strands, shades 3848 and 3849.

Designs presented in books as linear can be little devils when trying to get them to turn a right angle.

IMG_20181218_0016
From Ukrainian Embroideries by Maria Kutsenko. See INSPIRATIONS page for more details.

Who would have thought?

IMG_20181218_0015.jpg

But after this much rubbing out and retrying, I’m not really happy with how it looks and I think the idea of using this for a servetka has well and truly died off.

Or I just came across this again… once enthusiastically copied from a webpage, defeated by designs from Rava Rusha!  If I can’t get it right in drawing, I wont be doing it in needle and thread!

IMG_20181218_0017.jpg

I think the other important factor which graphing helps is composition – how much fabric, what dimensions?  I wont pretend that I very formally compose anything but I often find it helpful to have a design graphed, to count the thread number in a repeated motif and have sense of where I’m going with it before I get started on a more substantial project (than a bookmark anyway)!

Finally, graphing is like an archive of interest.  I have some designs that I’m sure I graphed back when I was a teenager.  And I still look at them and admire them.

DSC01222

In summary?  Graph away!  It is embroidery’s friend!

~oOo~

30th July is World Embroidery Day

Ukraine has an International Embroidery Day (Всесвітний день вишиванки) held on the 4th Thursday of every May since the year 2006.  It would be an amazing day to be in any Ukrainian city or town.  My experience from visiting music festivals was of people happily wearing their embroidered shirts and blouses with jeans, sneakers, braces, dreadlocks…  Imagine the impressions on the day when the festival is dedicated to Ukrainian embroidery!

Although for Australia I am a day late, it is still the 30th of July somewhere in the world and World Embroidery Day is still taking place there.  World Embroidery Day is an initiative of the Swedish Embroiderers Guild.  I love their manifesto!

Screen Shot 2018-07-31 at 10.25.16 am

I LOVE THIS!  Stitches CAN be healing and embroidery CAN be an act of freedom and of creation of identity.

Most recently, a life-long friend brought to my place some embroidery that had been started but not completed by her grandma now departed.  With it came her own desire to expand her knowledge and skills of Ukrainian embroidery and I was only too happy to be asked to help.  I do believe that quite aside from the sheer enjoyment experienced from creating an embroidered piece, we have the capacity to also create our identities as women and men, daughters and granddaughters or sons and grandsons, friends, creative individuals and descendants of embroidering nations.

The Swedish Embroiderers Guild manifesto speaks of connection, creativity, beauty, giving and sharing.  How absolutely inspiring is that?

~oOo~

On the Making of Mistakes and Unfinished Projects

IMG_0698

There are the inevitable projects conceived and commenced but never completed.  It may be because part way through, something looked wrong.  (It wasn’t quite accurate to say in my first post that everything ALWAYS looks better in fabric and thread).  Or that a good way in, I have made a pretty epic mistake that requires a lot of unpicking and I have become disheartened by its magnitude.

I have started things on too small a piece of fabric for their intentioned use.  At other times, I have misjudged dimensions in composition and by the time I’ve realised, the work is too far advanced for unpicking.  Sometimes the piece simply isn’t taking shape in the grand or delicate way I want it to and so I stop.

IMG_0704

Starting something large – a large project or a series of pieces intended to complement one another – is a risk because ones taste for a technique, colour scheme, working fabric or style may change before the large thing is completed.  And it lies about unfinished.

IMG_0701

Some techniques are plain hard and very fiddly and which means progress is slow and A LOT of patience is required.  The reward is too far away or the brave attempt gives way to doubt about the quality of the needlework and it lies about unfinished.

IMG_0700

One of the risks of experimenting with colour schemes is that the colours simply don’t complement all that well.

img_0703-e1532302106741.jpg

Sometimes a design involves a lot of different colours crowded into a small space which means a lot of tucking under of threads.  The design becomes thick on the reverse side and the needle is hard to pass through…  abandoned.

Otherwise, there is a discordance between the fabric count and the thickness/thinness of the embroidery thread/wool and the coverage I achieve doesn’t appeal to the eye.

IMG_0705

The MAIN reason I have a lot of unfinished projects lying about is that I LOVE STARTING THINGS!  Inspiration and the workings of imagination move too fast for my hands and the day-to-day time available.  I see a design in a new light, my mind goes to work on a possible colour scheme and I’m done – a new piece is born.

Currently, I have three servetky on the go.  Meaning I’m working on all three of them simultaneously.  Starting the kxembroidery page has meant a quiet commitment to completing projects.  All three of these servetky are very different and very beautiful.  One falls in the rather large category.  Another is smaller but involves a bit of labour.  The third is quick and fun and is flying.  I’m looking forward to sharing.  But bear with me whilst I get through at least one – the site will be a little quiet ’till then!

In the meantime, I don’t mind sharing my mistakes or failed experiments.  Each one teaches a good lesson and contributes to the chalked up experience of composing and working embroidery projects.

~oOo~

Red

321 cherry

Red is one of THE most used colours in Ukrainian embroidery.  It features on it’s own and  in patterns of dual colours or multiple colours in the regional embroideries of many parts of UA.

Growing up, I was exposed primarily to my Baba’s embroidery and therefore her style of composition and colour choices.  Some shades of red were extremely familiar to me from embroideries of my childhood, and may well be familiar to friends and other Ukis around the world who have seen many of the black and red patterns so popular and quintessential in Ukrainian costume and decoration.

DMC colours 814 and 815 were the traditional deep reds, 321 the gorgeous cherry red and 666 the light and bright and slightly crazy.

A few years ago, I wondered about subtle variations in colour and the inspiration they could bring with colour combinations and the overall appearance of a design.  I stood at the long wall of my go-to needlework supply store and picked out as many reds as I could and found there are definitely more that 4 or 5 shades of red available in my favourite embroidery cotton.

Sometimes in embroidery, patterns tell you what to do.  For example, there is no question in my mind that this design HAS TO BE done in 321 cherry.  I can’t imagine it any other way.

така краса, аж очі плачуть ~ so beautiful eyes could weep

But another shade I love is the subtle, tomatoey, vintage 347.  Slightly faded and a little bit pink, it has brought to mind an entirely different style of colour combination.

After all, in colour combinations, what the eye sees of a colour depends very much on its surroundings.  A shade of colour is suggested to the eye based on relative shades around it.

DMC colour chart

Understanding this has prompted me to try alternatives to the traditional darks and mediums.

Apart from being fun, playing with colour brings new dimensions, mood and an element of the unpredictable to embroidery projects.

so many reds

~oOo~

What is Embroidery?

This is a question probably a little bit like asking “what is borsch?” Some fundamentals will be the same, but there will be as many variations as there are people familiar with it, and all of them will be true. Embroidery will be something different to every person who does it or has seen it, or worn it for that matter.

I was taught cross stitch by my grandmother, Baba, who patiently let me stand by her knee and pull the needle and thread with each stitch after she’d passed it through her linen. She then taught me how to cross stitch in straight lines and then in little rows of zig zags, or zubchyky, “little teeth” as we called them. She was Ukrainian – as were all of my grandparents – and so my exposure to and passion for embroidery has always been with Ukrainian embroidery. I remember friends and neighbours coming to her house to talk stitch. I remember going out with her to buy materials and threads.

Baba made all of our sorochky, embroidered shirts – no mean feat as I have two brothers and four cousins on that side of the family and we grew at the going rate for children and adolescents. She also embroidered multitudes of rushnyky (a long, narrow piece with symmetrical design at each end), servetky (embroidered square or rectangular cloths), podushky (cushion covers), nastilnyky (table cloths) in a dizzying range of techniques and colour combinations. She was, in fact, prolific.

She had a huge garden in the suburbs of Sydney and loved planting flowers. I remember her telling me that her inspiration for colours came from nature – she would look into her garden to see what nature had combined and bring these colours to her embroidery.

Our Mama made exquisite embroideries – the christening gown we all wore, most recently used for my little nieces, and the collections of podushky and servekty that were kept in a deep dresser draw, opened and sorted through for choices for each Easter basket, special occasion or simply as ornaments at home. I loved them all.

I’m deeply grateful for this gift I have been given. Ever since I started visiting Ukraine, finding and buying as many books on Ukrainian embroidery as I could was essential. I remember one particular year when I visited a handful of music festivals with friends and saw EVERYONE in vyshyvanky worn with shorts, jeans, dreadlocks and sneakers. It was so funky and inspiring, I took A LOT of photos.

To me, embroidery is many things. It is something I do to relax or think things over – hands busy, mind working. It’s an opportunity for play with colour and composition. I get inspired by the books I’ve inherited and collected over time, and so much needlework that is posted on blogs and social media from Ukraine. I just can’t stitch fast enough! Sometimes sitting with a photo of a beautiful design and successfully mapping it out on graph paper brings me satisfaction. There are certain friends’ homes that I visit and come away with an array of new ideas. Sometimes a variation on a colour scheme is suggested by the linen at hand. At other times, I want to use a certain shade and find a design to match. Embroideries make what I think are extremely special gifts. No matter what the basis for a design, whether it comes from a book or a photo, each new piece is 100% unique and the time taken to complete a project means it is made and given with love. Sometimes I want to create something that presents what is my impression of the deeply traditional; at other times, I want to bend rules and get away with it. Starting a project is always incredibly rewarding. I don’t know why it surprises me each time that what I had in my imagination ALWAYS looks far more spectacular in linen and thread. At all times, I want my work to retain its Ukrainianess, if I may invent such a word. I want it to be Ukrainian.

Spending time with my embroideries makes me feel close to the women who have been in my life and made this very much part of the every day for me. To have that in such easy reach is something for which I am very grateful.

P7040784.JPG

~oOo~